The web interface
98-145510-E Chapter 6: Setup and operation 6-3
6.1.2 Configuration web interface
Use the built-in web interface of the ACU to make a full configuration of the VSAT system
with the correct VSAT modem, the satellite positions you intend to use and other
parameters. You can use a standard Internet browser.
To access the configuration web interface
To access the web interface of the ACU do as follows:
1. Power up the VSAT system, i.e. switch on the ACU. Wait until the LEDs on the front plate
of the ACU show that the system is ready to be accessed.
•Power LED: Green
• Fail/Pass LED: Steady green.
2. Connect a PC to LAN interface 1 (Service port, standard Ethernet) of the ACU or to the
front LAN connector of the ACU. You can also connect to the WLAN interface if
configured.
3. Open your Internet browser and enter the IP address of the ACU. The default IP address
is http://192.168.0.1.
4. By default, the web interface shows the DASHBOARD page. However, you can set up a
password protection, so that you have to log in before you can get access to the web
interface. See User permissions (guest login) on page 6-24.
When the Dashboard (or the Guest login page) is displayed, you know that the connection
to the VSAT system can be established. The web interface is ready for use. You can
continue to configure the system.
If you cannot establish a connection there might be problems with the Proxy server
settings of your PC (“Use proxy server” must be disabled in your PC).
If you want to use another LAN port you must configure it according to your network
requirements. For information how to configure the LAN connectors To configure the LAN
network on page 6-14.
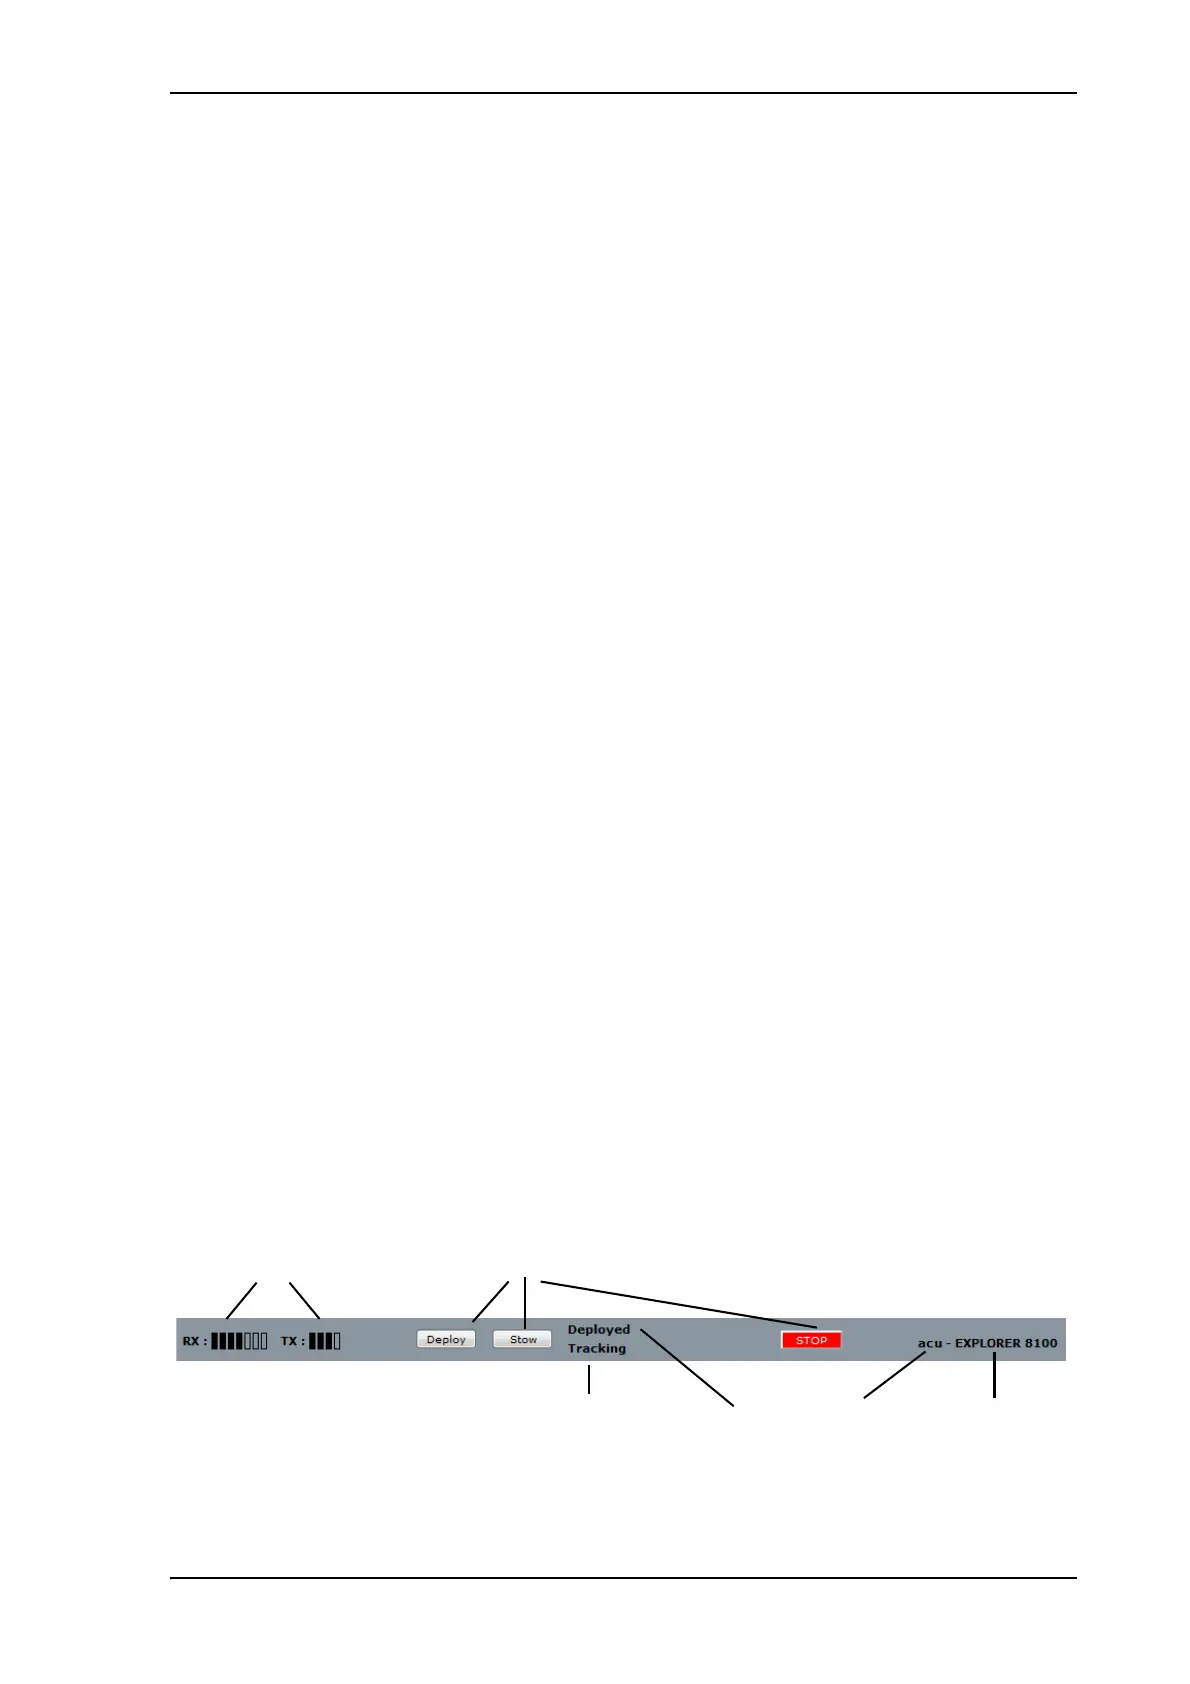
Information and controls in the top bar of the web interface
The top bar, which is independent of the selected page, shows the signal strength, the
deployed status, the system status, and, if an event is active, a warning icon.
The buttons Deploy, Stow and Stop are also available from the top bar. For details on
these functions, see Start up and basic functions on page 5-3.
Figure 2: Top bar in Dashboard
Signal strength Buttons for antenna actions
System status Deployed status Host name Product name