Horizon Imager User’s Manual 6-15
3ULQWLQJYLD3RVW6FULSW
`Ü~åÖáåÖ=eçêá òçå=mçëípÅêáéí=m~ê~ãÉíÉêëÔtáåÇçïë OMMM=
~åÇ=um
127(
7KLVSURFHGXUHDVVXPHVWKDWWKH3RVW6FULSWGULYHUIRUWKH+RUL]RQLPDJHUKDV
DOUHDG\EHHQLQVWDOOHGRQWKHZRUNVWDWLRQ)RUPRUHLQIRUPDWLRQUHIHUWRWKH³:LQGRZV
'ULYHU,QVWDOODWLRQ²+RUL]RQ´RU³:LQGRZV ;3'ULYHU,QVWDOODWLRQ²+RUL]RQ´7HFKQLFDO%ULHI
1. Initiate the print job from the Windows application.
The Print dialog box displays.
2. Make sure that the Horizon imager is the selected printer.
3. Click the
3URSHUWLHV
button.
The Document Properties dialog box displays.
4. Click the
$GYDQFHG
button.
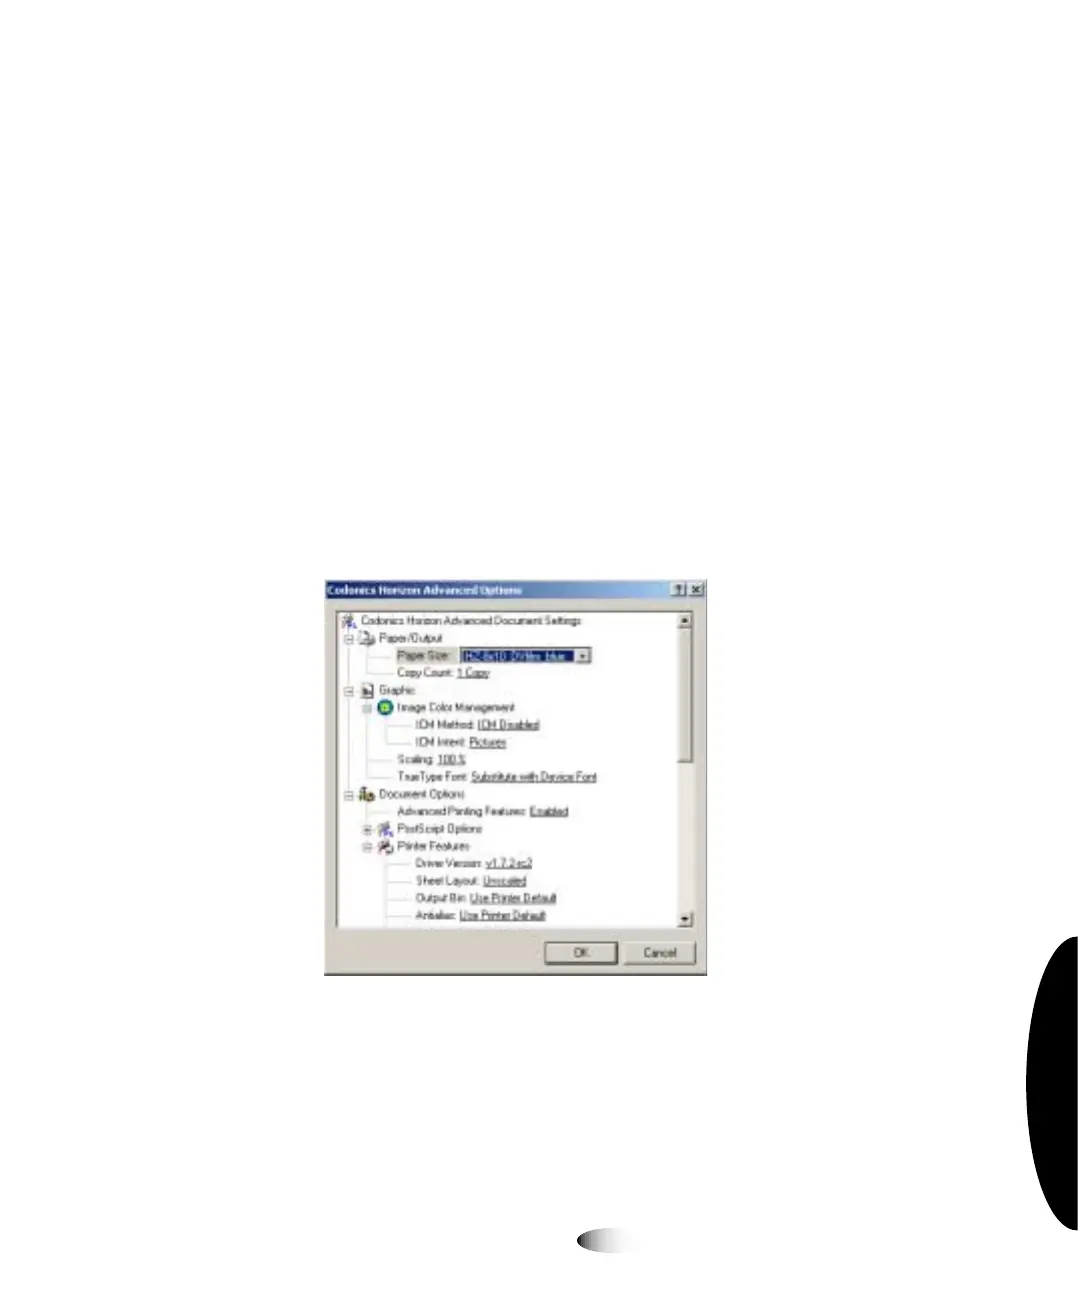
The Advanced Options dialog box displays.
5. Specify a Horizon media size and type combination from the
3DSHU6L]H
drop-down list. The Horizon media choices begin
with “HZ.”
6. To specify any of the other Horizon PostScript parameter
settings, scroll to the
3ULQWHU)HDWXUHV
list of parameters.
3
8
7RFKDQJHWKH
3RVW6FULS
SDUDPHWHUVLQ
:LQGRZV
DQG;3


 To Next Page