2-18 Setting Up the Imager
After the Horizon imager is set up and powered on, you should
print the Imager Status test print to verify imager operation and save
a record of the imager’s information. There are several other test
patterns to choose from to allow you to check the quality of printed
images.
127(
)RULQVWUXFWLRQVRQKRZWRXVHWKHLPDJHU¶VFRQWUROSDQHODQGPHQXVUHIHUWR
&KDSWHU
1. At the control panel, press the key.
The Main Menu displays.
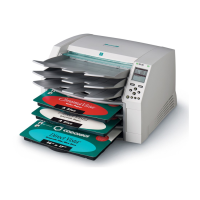
2. Insert a supply cassette for the media type on which you want
to print the Imager Status test print into one of the supply slots.
127(
)RUGHWDLOHGSURFHGXUHVRQKRZWRORDGPHGLDUHIHUWR³,QVHUWLQJRU&KDQJLQJ
&DVVHWWHV´RQSDJH
3. From the Main Menu, select the following options.
7HVW3ULQWV
PHGLDW\SHWKDWLVWKHW\SHLQVHUWHGLQVWHS
PHGLDVL]HWKDWLVWKHPHGLDVL]HLQVHUWHGLQVWHS
,PDJHU6WDWXV
&RSLHV
The number of copies to print displays.
4. Change the number of copies or leave as is, then press the
key.
The imager prints the Imager Status sheet.
127(
,IDFDVVHWWHZLWKWKHVHOHFWHGPHGLDVL]HDQGW\SHLVQRWFXUUHQWO\ORDGHGLQWKH
LPDJHURU\RXDUHSULQWLQJWR
&KURPD9LVWD
FRORUPHGLDDQGDULEERQLVQRWORDGHGWKHWHVW
SULQWZLOOQRWSULQW7KHLPDJHUZLOOSURPSW\RXWRLQVHUWWKHSURSHUVXSSO\FDVVHWWHDQGRU
FRORUULEERQ
mêáåíáåÖ=íÜÉ=fã~ÖÉê=pí~íì ë=qÉëí=mêáåí
3
8
7RSULQWWKH
,PDJHU6WDWXV
WHVWSULQ
0(18
3
(17(5
3