2-28 Setting Up the Imager
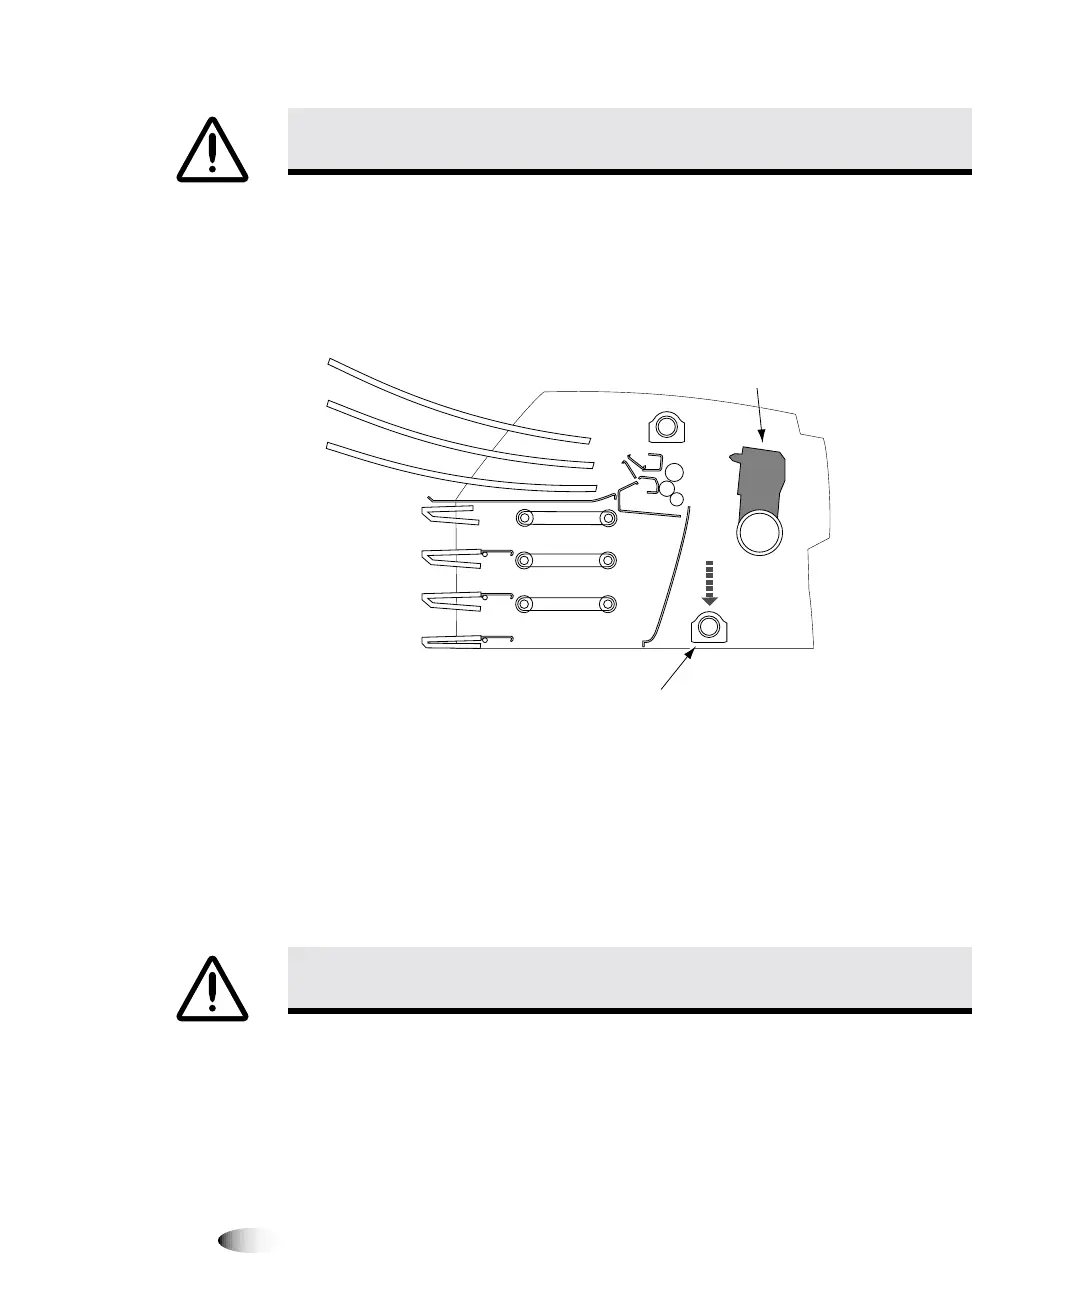
7. Look down into the imager just in front of the thermal print
head and make sure that the ribbon carriage is fully down to the
bottom of the imager. (The ribbon carriage should have lowered
during power off.)
&URVV6HFWLRQ9LHZRI,PDJHU
127(
,IWKHULEERQFDUULDJHLVQRWIXOO\GRZQ\RXFDQXVHWKHIRDPVWDELOL]HUWRSXVKLW
GRZQ7KHVWDELOL]HULVVKRZQLQWKHILUVWSDQHORIWKHUHSDFNLQJLOOXVWUDWLRQRQWKHER[LQVHUW
7KHULEERQFDUULDJHGRHVQRWPRYHHDVLO\EXWLWLVVDIHWRDSSO\PRGHUDWHSUHVVXUHWRIRUFH
LWDOOWKHZD\GRZQ
8. Replace the packing materials into the imager, close the top
cover, and repack the imager into its original box. Refer to the
box insert for illustrated instructions.
&$87,21
,IWKHWKHUPDOSULQWKHDGLVQRWSDUNHGSRZHURQWKHLPDJHUWKHQUHSHDW
VWHSVDQGWRSURSHUO\SRZHURIIWKHLPDJHUVRWKDWLWGRHVSDUN
&$87,21
3XVKWKHULEERQFDUULDJHGRZQVORZO\)RUFLQJLWGRZQWRRTXLFNO\PD\
GDPDJHWKHFDUULDJH
Ribbon carriage
at bottom of imager
Thermal
print head
3