Before carrying out any adjustments, proceed as follows:
1. Take the machine to the maintenance area.
N.B.: the place given over to this operation must comply with current environmental protection regulations.
2. Make sure the machine is in a safe condition (see chapter “MACHINE SAFETY MEASURES”).
CAUTION: It is recommended that you wear the PPE (Personal Protective Equipment) suited to the work to be carried out.
N.B.: The rubber blade can be rotated symmetrically to be used more than once.
• Repeat the operations in reverse order to reassemble all the parts.
N.B.: Before using the machine, remember to adjust the squeegee body: see the section titled “ADJUSTING THE SQUEEGEE BODY'S
RUBBER BLADES”.
N.B.: It is recommended to replace both squeegee body blades in order to ensure good results when drying the oor.
REPLACING THE BRUSH (SCRUBBING VERSION)
The good condition of the brush guarantees better cleaning of the oor, as well as a longer brush head gearmotor lifespan. To replace the brush,
proceed as follows:
1. Go to the front left-hand side of the machine.
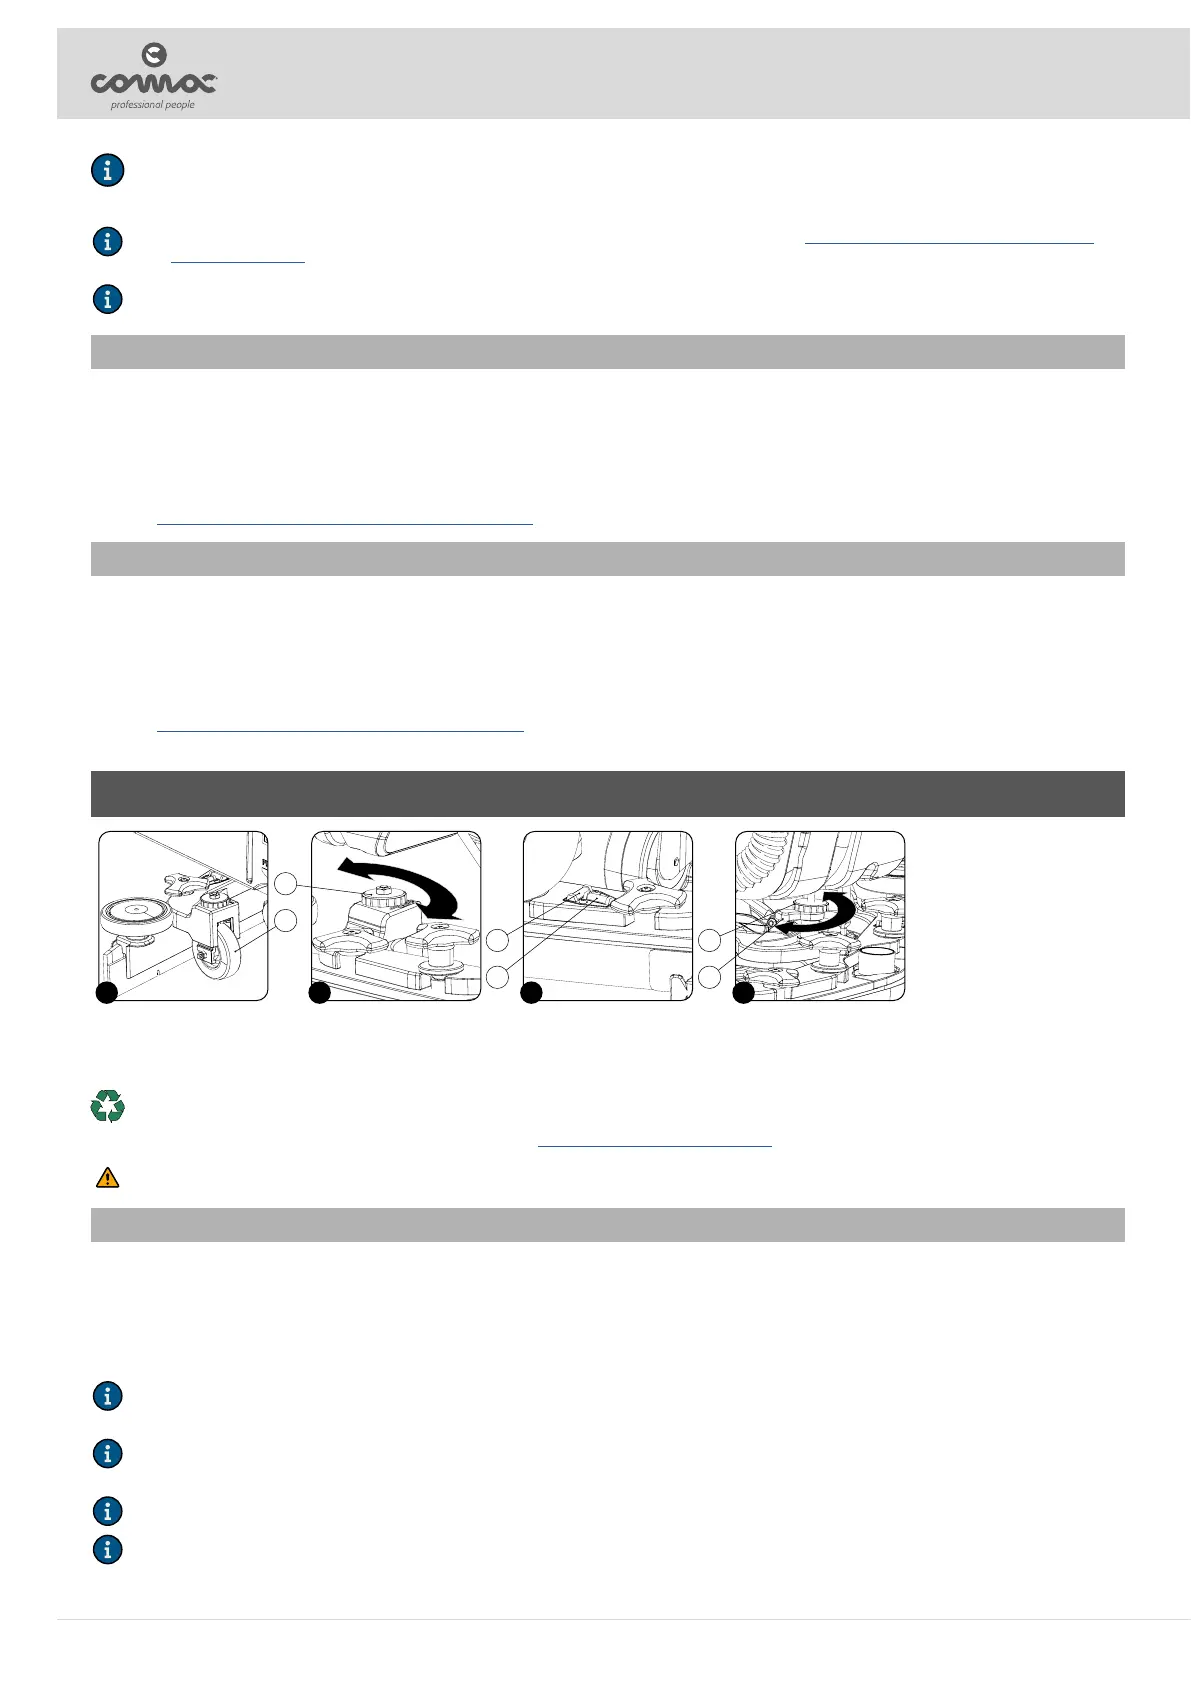
2. With the brush head in the raised position, remove the brush head splash guards (9) (Fig.7).
3. Press the brush-holder plate retainer (10) and simultaneously rotate the brush in the direction shown in the image (Fig.8).
4. Repeat the same operation for the right-hand brush.
5. See “INSTALLING THE BRUSH (SCRUBBING VERSION)” for instructions on tting the new brushes in the brush head body.
REPLACING THE BRUSH (SWEEPING VERSION)
The good condition of the brush guarantees better cleaning of the oor, as well as a longer brush head gearmotor lifespan. To replace the brush,
proceed as follows:
1. Go to the front left-hand side of the machine.
2. With the brush head raised from the oor, turn the knobs (11) that hold the left lateral carter (12) in place anti-clockwise (Fig.9).
3. Remove the left-hand side carter and extract the brush from the tunnel.
4. Repeat the same operation for the right-hand brush.
5. See “INSTALLING THE BRUSH (SWEEPING VERSION)” for instructions on tting the new brushes in the brush head body.
ADJUSTMENT INTERVENTIONS
ADJUSTING THE SQUEEGEE BODY'S RUBBER BLADES
The careful adjustment of the squeegee body rubber blades guarantees better cleaning of the oor.
To adjust the height of the squeegee body:
1. The distance of the squeegee rubber blades from the oor can be adjusted by changing the distance between the wheels (1) located on the
squeegee support and the oor itself (Fig.1).
2. To adjust the height of the wheels, simply use the adjustment knobs (2) located on the squeegee support (Fig.2).
N.B.: To decrease the distance between the wheels and the oor, simply turn the adjustment levers (2) in the direction indicated by the
arrows with the sign "-", while to increase the distance just follow the arrows with the "+" sign.
N.B.: By decreasing the distance between the squeegee support and the oor, the rubber blades present in the squeegee's body move
closer to the oor.
N.B.: For eective drying, the wheels must be at the same distance from the oor.
N.B.: Check for proper adjustment by looking at the instrument (3) positioned on the squeegee body (Fig.3).
32
1 2 3 4
2
6 4
1
3 5