66
HS-RC-C5E-AM-APC_01.fm
00/0211
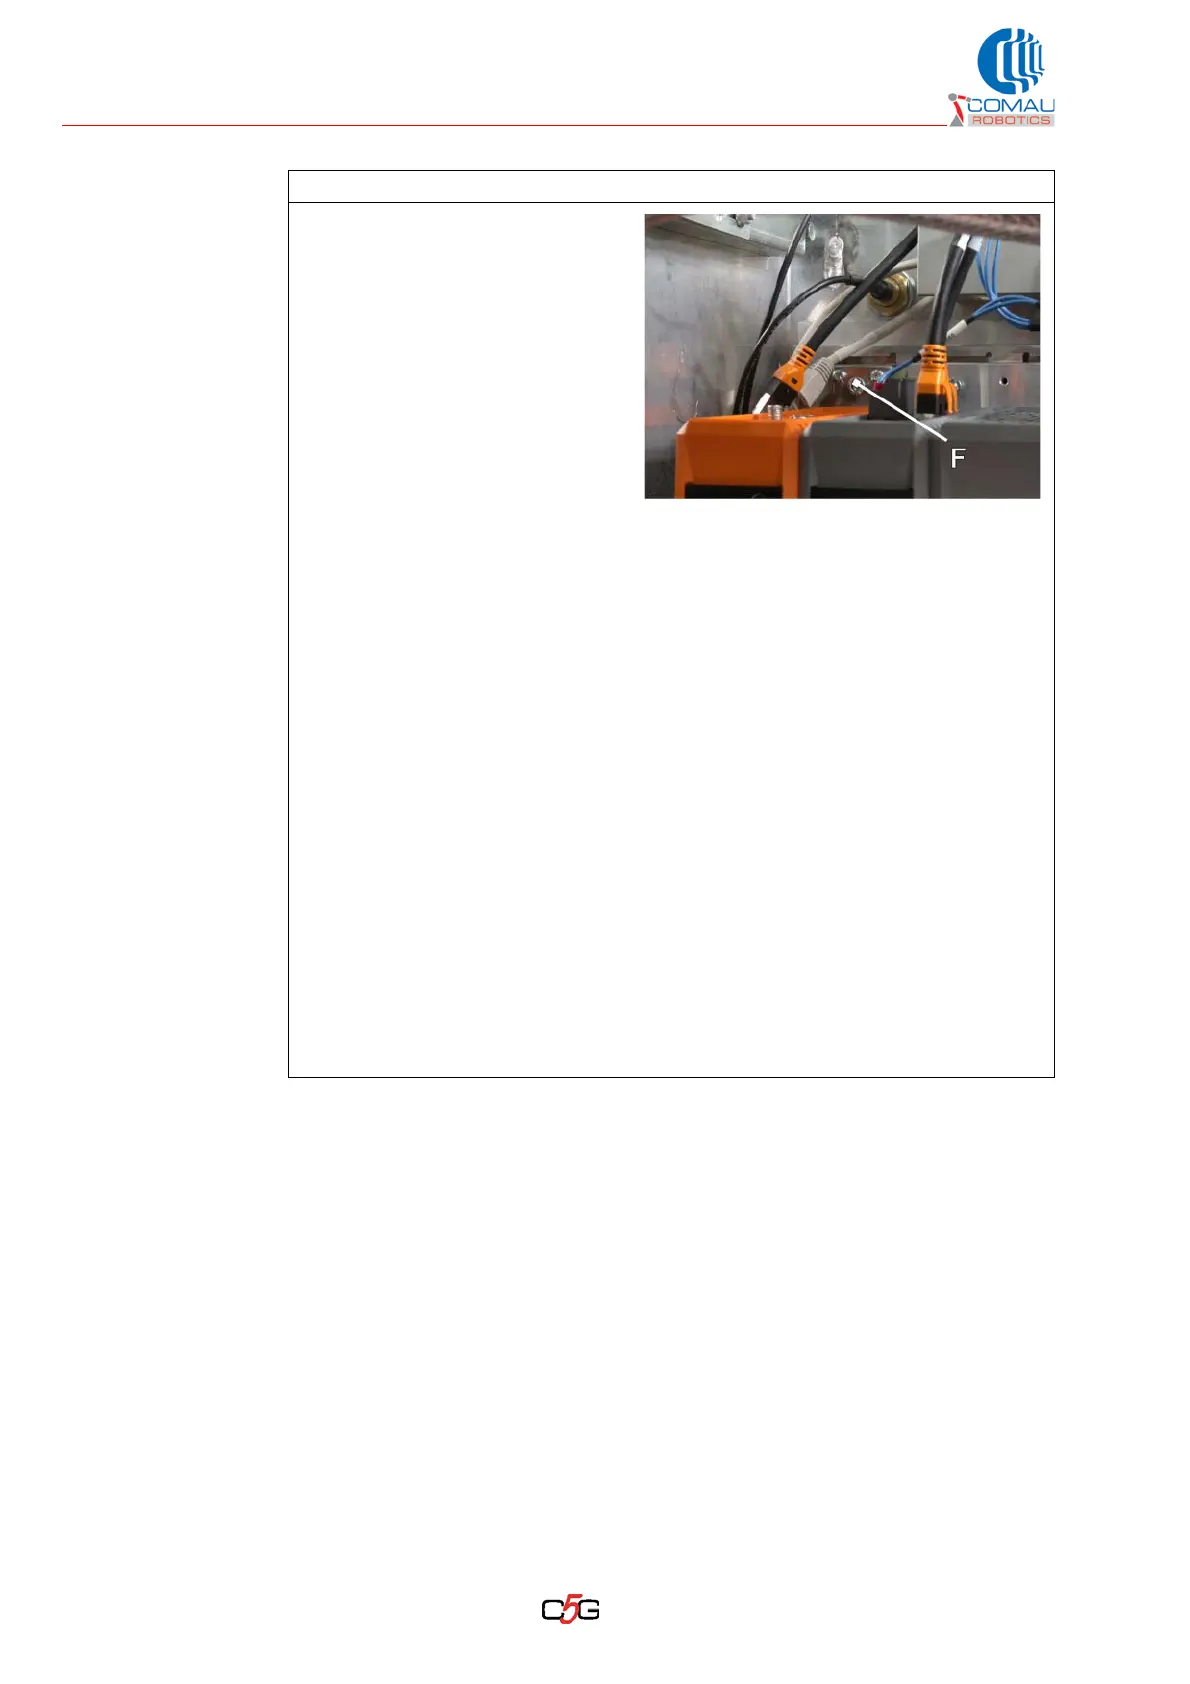
n. Tighten the Allen screw (F) by
5 Nm.
o. Place back all connectors (A), making sure the fitting is followed by a sharp “click”
indicating the fitting has been completely accomplished.
p. Place back possible other connectors and Flash Disk USB that may have been
removed previously.
q. If necessary, refer to the connectors and modules table included in the diagram
posted inside the Control Unit door.
r. Lower the lexan lower cover on the module.
s. After replacing the AMS-APC820, the Control Unit starts up in minimum
configuration and many controls will not be available until the configuration
updating procedure has come to its end (the parameters are resident on the
Compact Flash only).
t. Switch on the Control Unit and make sure the Programming terminal is operating
and working. If you are using a wireless Programming terminal, it may be
necessary to carry out the Pairing procedure, possibly advanced by the
emergency Unpairing one (the Pairing and Unpairing procedure are described in
the Control Unit Usage Modalities manual).
u. On the Control Unit modal selector switch, select the PROG mode.
Operating procedure (Continued)