Operation Instructions
5-5
[V6] as the rhythm lead.
9) [Rhythm lead 3]: select any one of the [І], [II], [III], [aVR], [aVL], [aVF], [V1], [V2], [V3], [V4], [V5],
[V6] as the rhythm lead.
10) [Lead Status Map]: Three settings such as [on], [off ] and [automatic].
When the lead status map is set as [on], the lead status map on the left of the screen can be used as
a reference schematic diagram of leads connection, and the lead connection and falling off state
information can be observed. Red color shows the falling off state of the lead and green color
shows that the leads have been connected well.
When the leads status map is set as [off], the leads status map will not be displayed on the left of
the screen.
When the leads status map is set as [auto], the leads status map will be displayed only when leads
are falling off, and it will not be displayed as soon as the leads are all connected well.
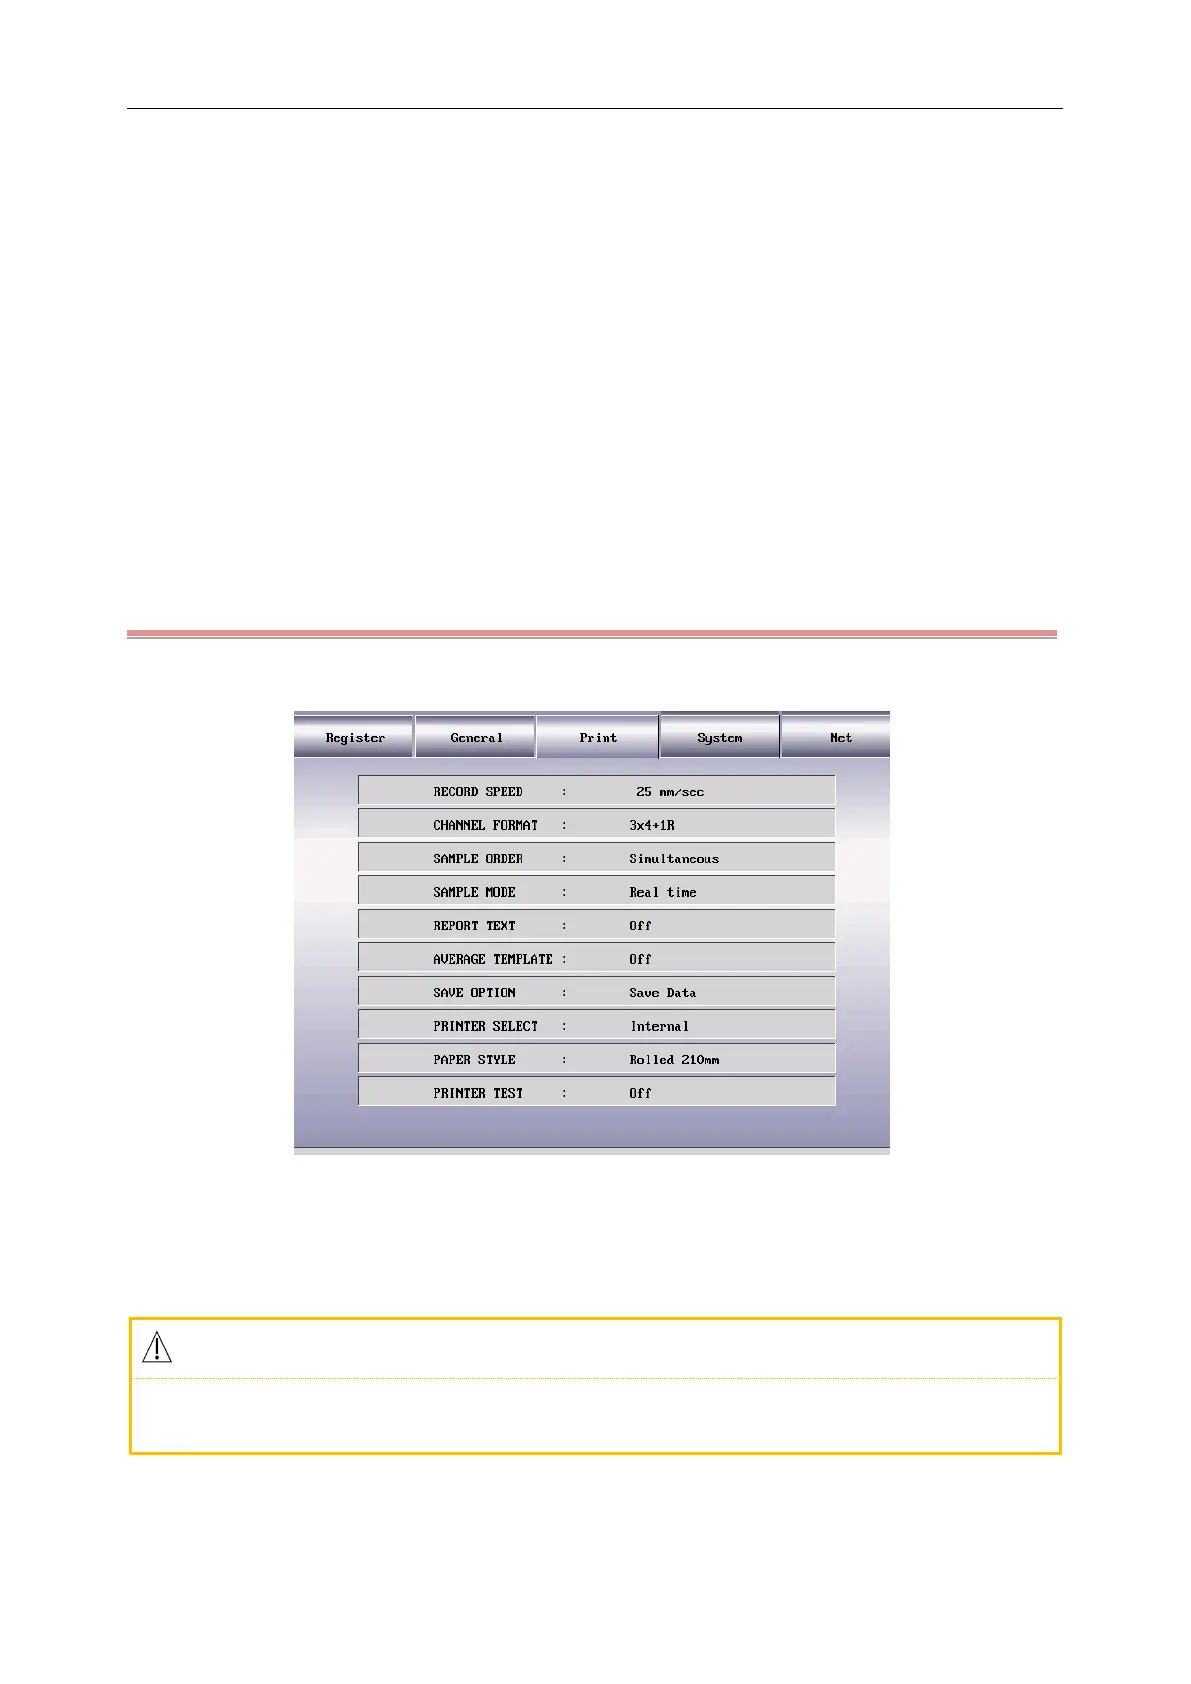
5.2.3 Print Options
Press the MENU key to enter the setting menu, select the “Print” as shown in the following figure:
Figure 5-4Print Options Interface
1) [Record Speed]: the paper driving speed of the recorder, there are five options for the user to set such as
[5mm/sec], [10mm/sec], [12.5mm/sec], [25mm/sec] and [50mm/sec].
Only the record speed of [25mm/s] and [50mm/s] are supported under rhythm and automatic
mode.
2) [Channel Format]: [3×4], [3×4+1R], [3×4+3R], [6×2], [6×2+1R], [12×1] and [12×1+T].
When it is set as [3×4], 12 leads are recorded in 3 channels and 4 sequences, record 2.5 seconds for