7596004CM - Manuale EASYBLUE COMENDA ENG ok - 24 -
6.2.2 Protection fuse replacement on electronic board
Remove the front of the machine, accessing the board compartment.
Unscrew the fixing screws of the electronic board bracket.
Replace the burned fuse with a similar. (Annex V)
Assemble the electronic board with reverse procedure.
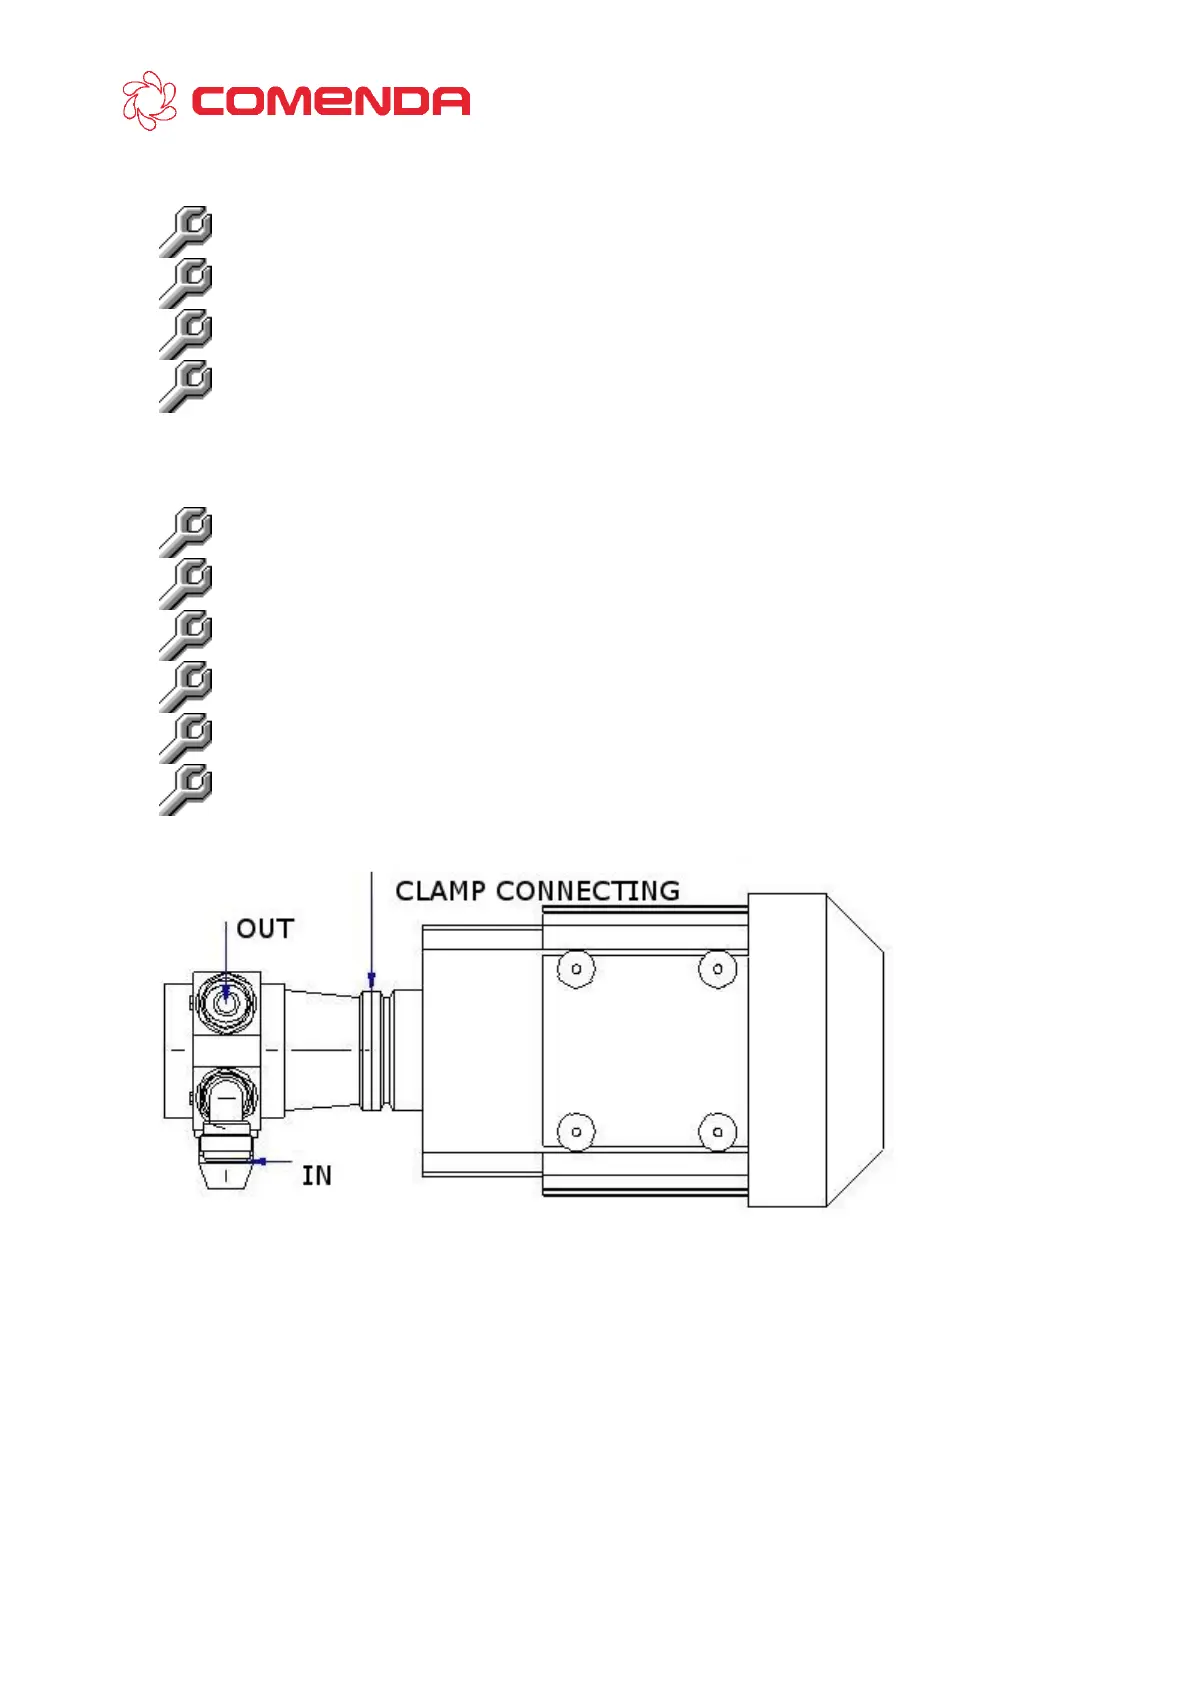
6.3 VANE PUMP REPLACEMENT
Remove the front of the machine.
Disconnect the pipes from the pump.
Unscrew the clamp of the motor - vane pump connection.
Remove the vane pump from its housing and pay attention to the connection coupling.
Install on the new pump the connections previously removed.
Install the new vane pump on the motor in reverse procedure and reconnect the pipes.