Refer to Health and Safety section before carrying
out any service work.
Separator
•
Disconnect cable connector from solenoid valve.
•
Remove nameplate (20).
•
Unscrewand removeeight screws (16) and spring washers (17).
The separator assembly may now be lifted from the oil chamber.
If necessary, tap the end cap (18) with a soft hammer to
overcome gasket adhesion.
•
Remove and discard gasket (28).
•
Unscrew separator element (26) and discard its ‘O’ ring (27).
•
Check element (26) for contamination. Renew the element, if
necessary.Ensurethe elementisfitted with a new‘O’ring(27).
•
Thoroughly clean the jointing surfaces of the separator cap (18)
andoilchamber beforefittinganew gasket(28).Toaid assembly,
the gasket may be retained on the oil chamber jointing surface
using a small amount of APPROVED OIL.
•
When refitting the separator cap (18) to the oil chamber, avoid
distortion by tightening the eight screws (16) evenly to the
specified torque.
Page 42
CompAir Hydrovane
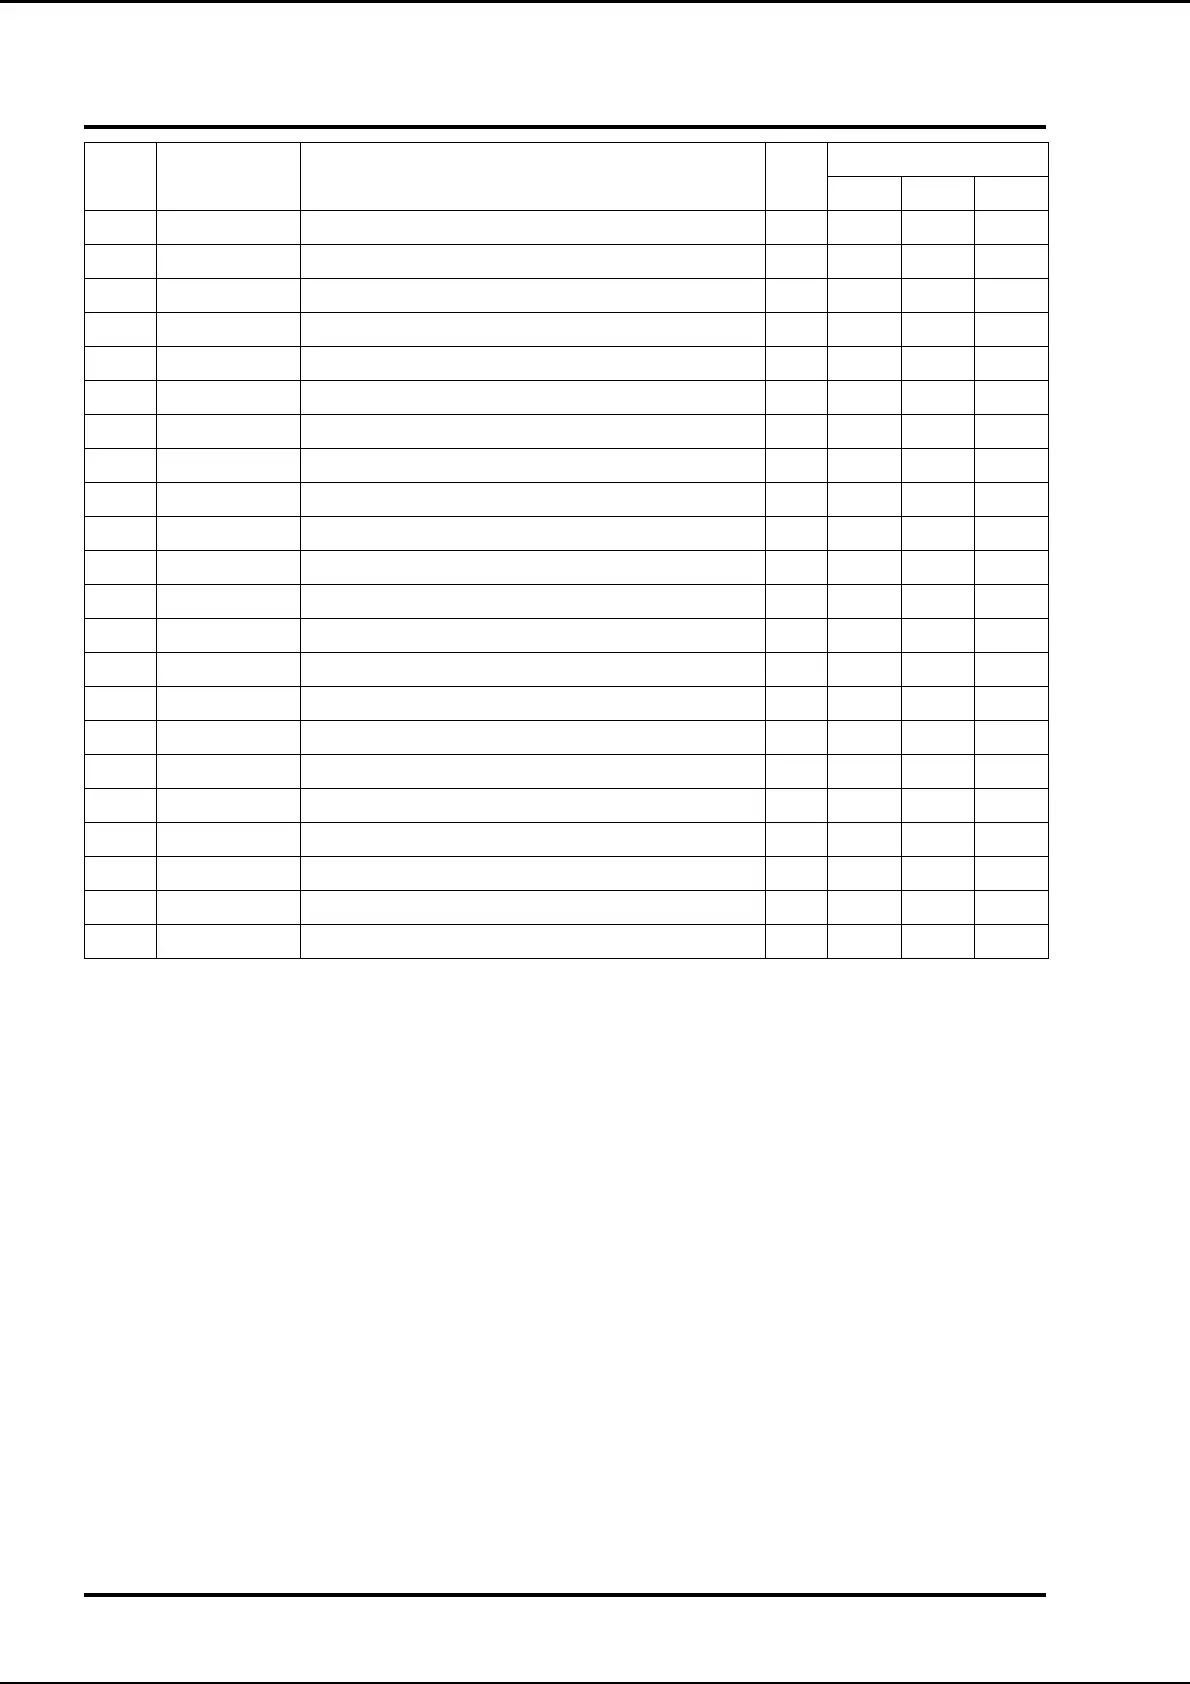
2G Minimum Pressure Valve and Oil Separator
Item Part Number Description Kit
Quantity
All 705 707
16 MS706-20 Socket head screw 8
17 MWG6 Spring washer 8
18 32506 Separator cap assembly 1
19 59425-03 Taper plug brass 3/8 BSP 1
20a 71162 Nameplate 1
20b 71163 Nameplate 1
20c 72427 Nameplate
21 56391 Pressure gauge 1
22 MS2105-10 Pan head screw M5 x 10 2
23 see Ventdown assemblies
24 MS703-10 Cap head screw M3 x 10 2
25 58341 Separator stud M8 1
26 59177 Separator element KS71 1
27 9799 O ring 1
28 57803 Gasket KS71 1
 Loading...