Operation l 4-15
To Start Drying
1 Make sure there is material in the hopper.
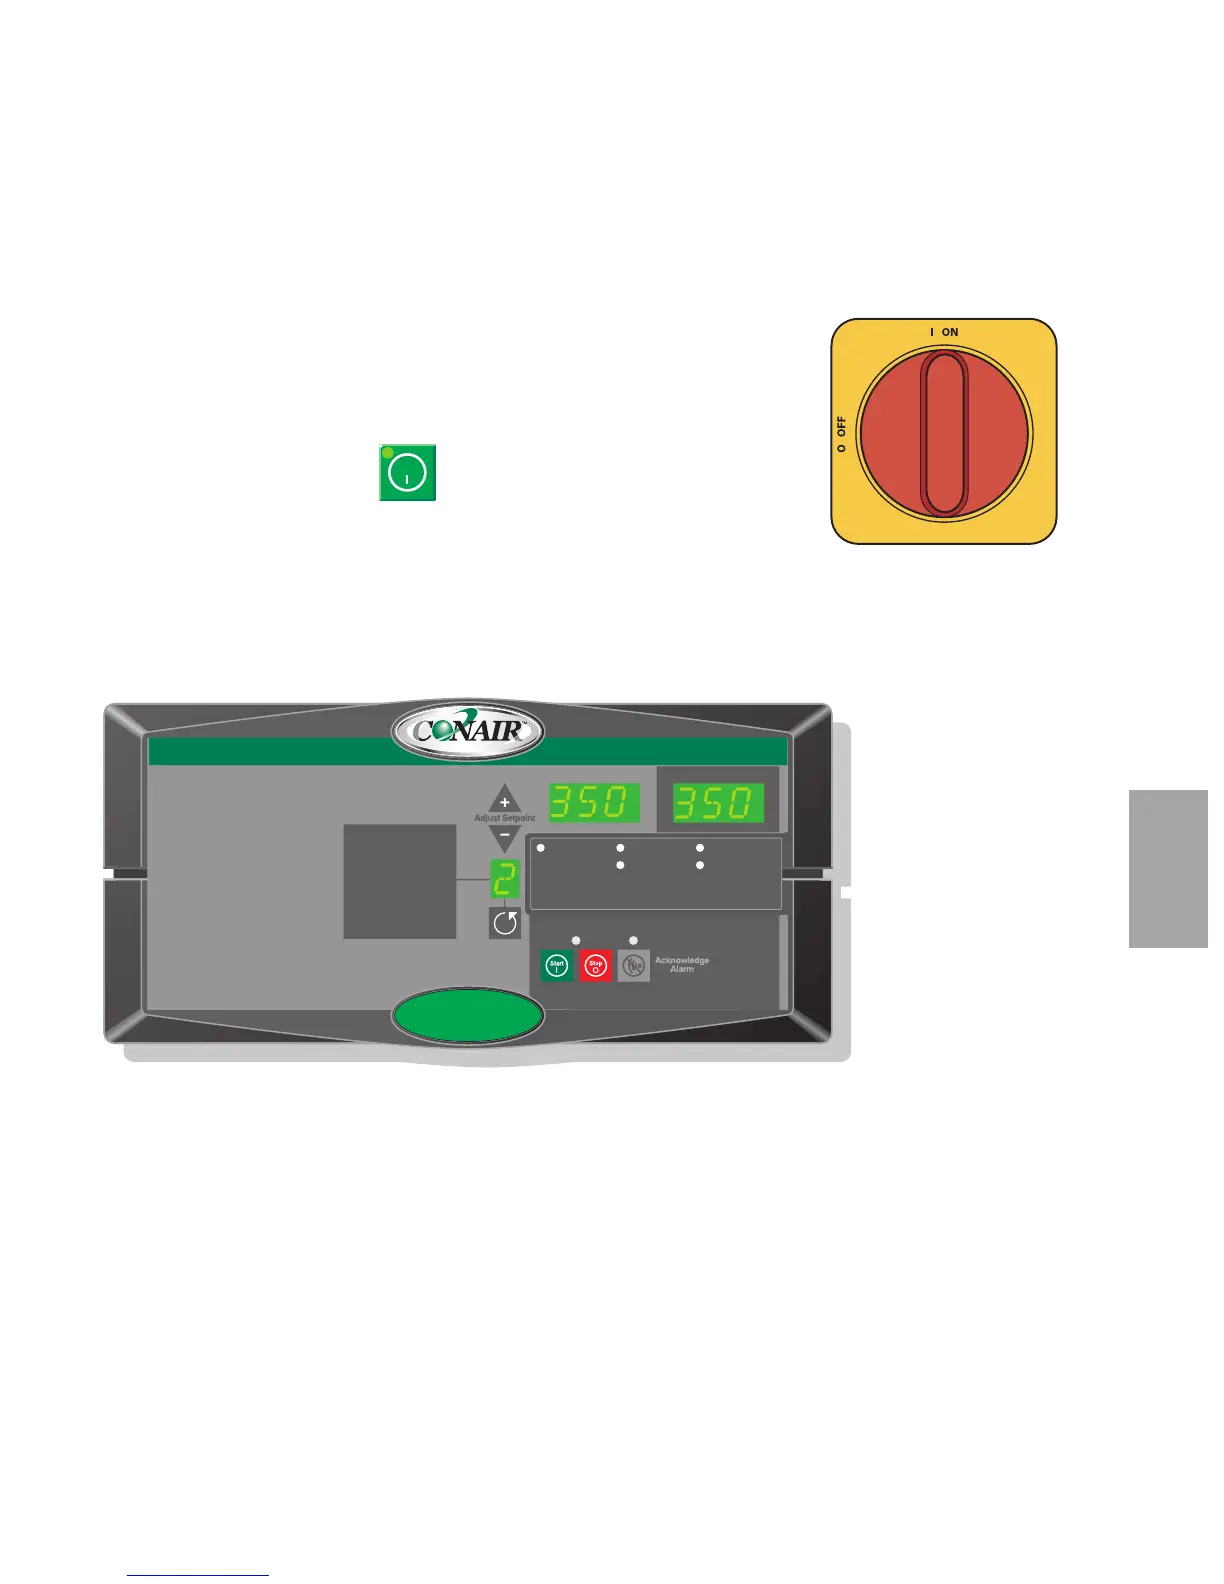
2 Turn on the main power to the dryer. Make sure the dryer’s disconnect dial
is in the ON position. This powers up the control and the display lights will
illuminate.
3 Press the START button.
If everything is installed correctly:
• The green light on the start button will illuminate.
• The process and regeneration blowers turn on and the LEDs will
illuminate.
• The regeneration heater turns on and the LED will illuminate.
• The desiccant wheel starts turning.
Auto Start
Dryer Status
Process Blower Regen. Blower
Regen. Heater
Set Point Actual
1 Process Temp.
2 Regen. Temp.
3 Return Air Temp.
4 Auto Start
5 Load Time (MDC)
6 Activate Setback Temp.
7 Setback Temp.(Process)
8 Dewpoint
Shutdown Alarms
A1 Process High Temp
A2 Process Loop Break
A3 Process Heater High Temp
A4 Regen Heater High Temp
A7 Return Air High Temp
A49 Process Protection High Temp
A53 Process Blower Overload
A55 Wheel Rotation Failure
Passive Alarms
P1 Process Temp Deviation
P3 Regen Temp Deviation
P5 Return Air Mid High Temp
P17 MDC Conveying Demand
1000
NOTE: Once the dryer has been started, go to the ResinWorks or HTC and set the set-
point, then turn on the unit.
✐
Start
4
Operation