Maintenance 27
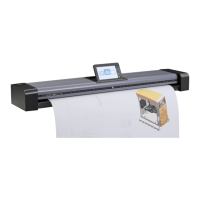
Maintenance
About scanner maintenance
Scanner maintenance will ensure optimal performance of your scanner.
There are three basic maintenance tasks:
1. Cleaning
Keep your scanner clean – the next section describes how to
thoroughly clean the internal scan area. How often you need to clean
the scanner will depend on how often and the types of media you
scan. If your work primarily involves scanning newspapers and old
blueprints you may need to clean more often than users who only scan
brochures and new drawings.
Be sure to clean the scanner when results are not optimal. Particles of
dust in the scan area can often be the cause of streaks in the end
result.
See more under the section Cleaning the scan area
2. Calibration and camera alignment
Scanner Calibration is easy to perform and most of it is completely
automatic. Scanner calibration includes camera alignment and
calibration of B&W and color parameters. To run, you insert a
Calibration Sheet, and start the Scanner Maintenance program. Be
sure to calibrate if your output is not optimal. Make sure the scanner is
clean before calibrating.
See more under the section Camera alignment and Calibration.
3. Replacing worn parts
This should be carried out when you get a warning on your screen or
when a worn part affects your results. Replaceable parts are:
a. the glass plate
b. the lamp
c. the white background platen
d. the dust filters
See more under the section Replacing scanner parts.
NOTE: Parts are not replaceable on HD2530 models.
Cleaning the scan area
Follow the steps below for thoroughly cleaning the scanner and scan area.
Be sure to clean the scan area when results are not optimal. These could
be streaks in your scan image due to dust particles in the scan area.
You must clean the following scanner parts/areas:
1. The scanner bed
2. Glass plate
3. White background
4. Transport rollers
Caution: do not use abrasives, acetone, benzene or fluids that
contain these chemicals. Do not spray liquids directly onto the scanner
glass-plate or anywhere else in the scanner.
Caution: Before cleaning the scan area, be sure to turn the scanner
power off and disconnect the power plug.
Instructions on cleaning the scan area follow on the next page.