5 INSTALLATION 21
5
5
INSTALLATION
5
5
.
.
1
1
I
I
n
n
s
s
t
t
a
a
l
l
l
l
i
i
n
n
g
g
t
t
h
h
e
e
U
U
n
n
i
i
t
t
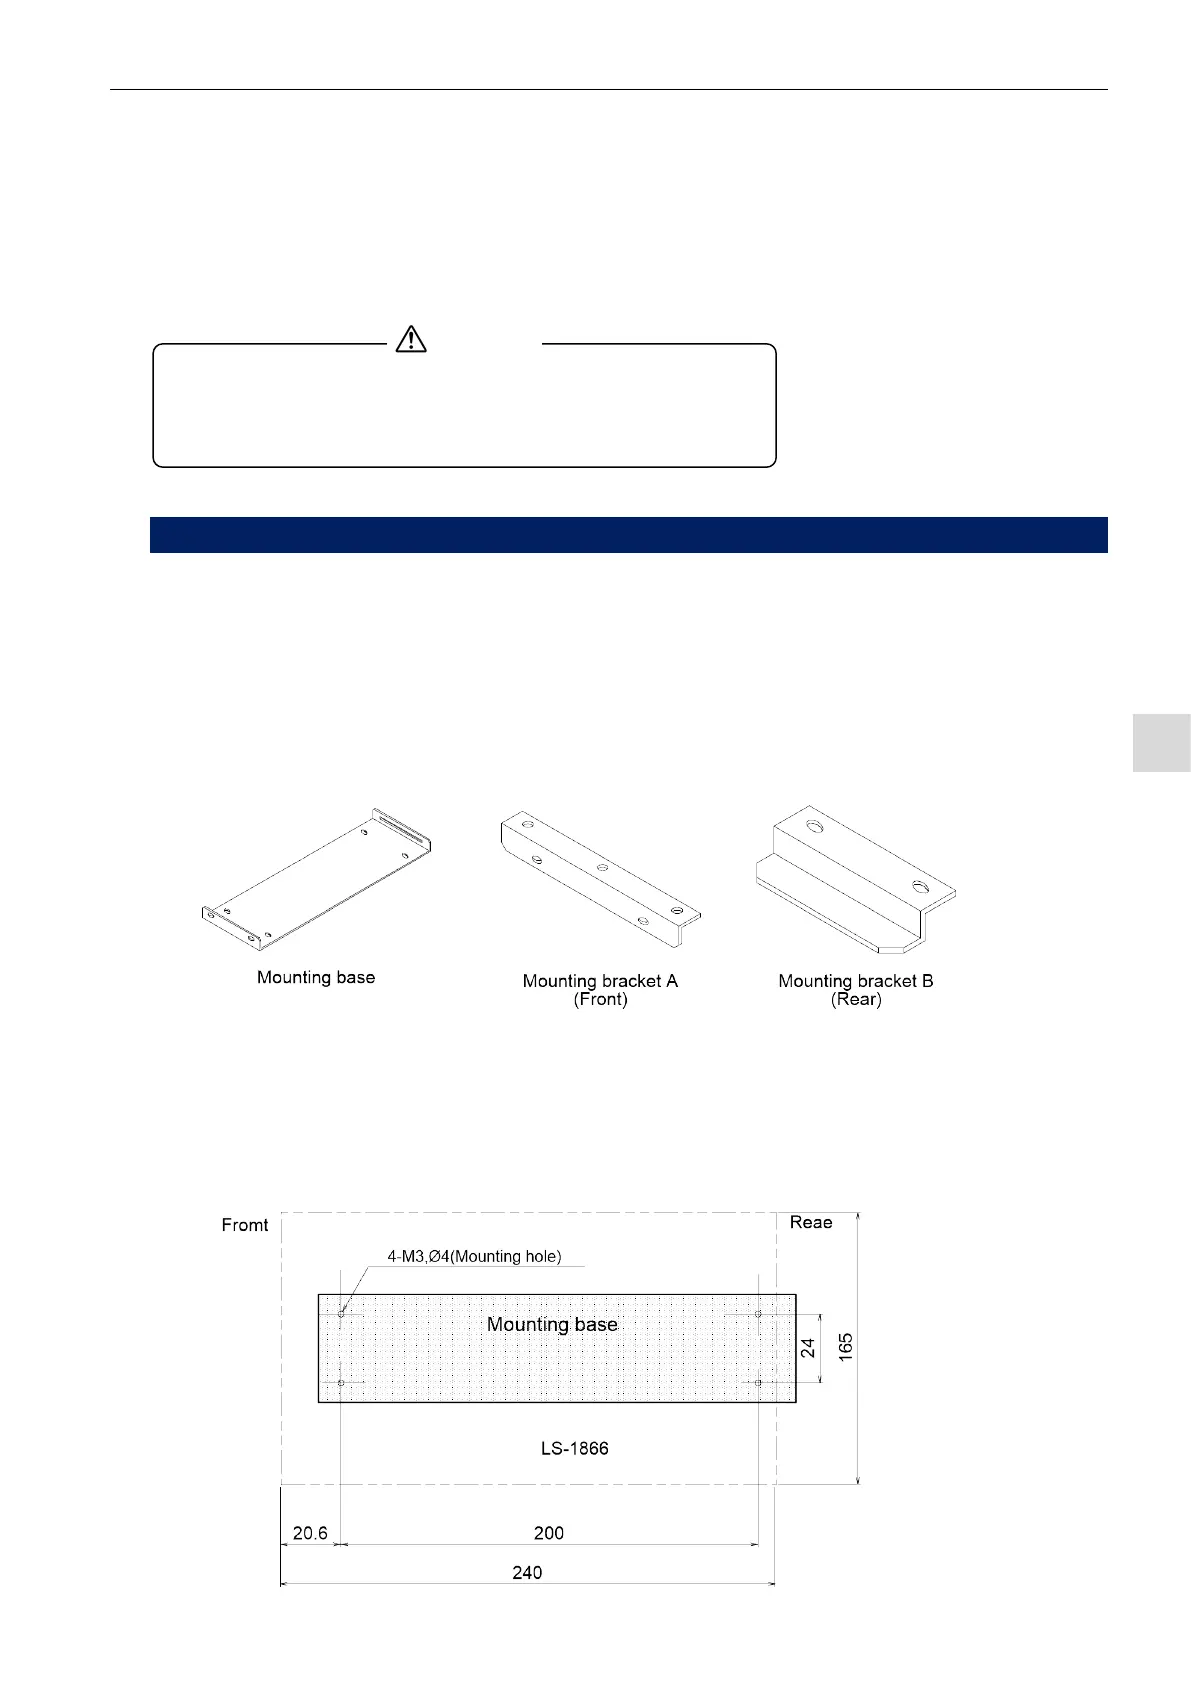
5.1.1 Using Quick Mounting Brackets (standard)
The LS-1866 comes with mounting brackets that can be attached or detached with two front-panel screws.
Use of these mounting brackets allows for better space utilization for installing testers side by side by
removing the need to insert a screwdriver along the side of each tester.
1) Components
The components comprise a mounting base, a mounting bracket A, and a mounting bracket B. Attach
the mounting base where the tester is to be mounted. The mounting brackets A and B are assembled in
the bottom of the tester body.
2) Mounting base
Attach the mounting base where the tester is to be mounted, using four M3 screws. The mounting base
cannot be attached to a rugged surface. An outline drawing of the leak tester body is shown below.
Clamp the mounting base at the screw pitches indicated. The leak tester does not come with mounting
M3 screws. Make available screws and bolts to suit the intended site of installation.
When relocating the leak tester, hold its bottom with your hand to
keep it from dropping. Do not lift the leak tester by gripping its
components, such as a rear panel-
mounted stop valve or regulator.
Damage to the hardware or physical injury can result.