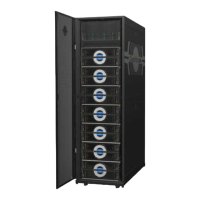
Figure 12. Secure the Drive Carrier
5. Seat the drive carrier by pressing fingers on the handle latch, pivoting it to a closed position, as shown.
The latch clicks as it engages and holds the handle closed.
6. Continue populating all the drives for the configuration.
IMPORTANT: Any drive bay not occupied by a populated drive carrier must have a dummy drive
carrier installed, to ensure proper air circulation.
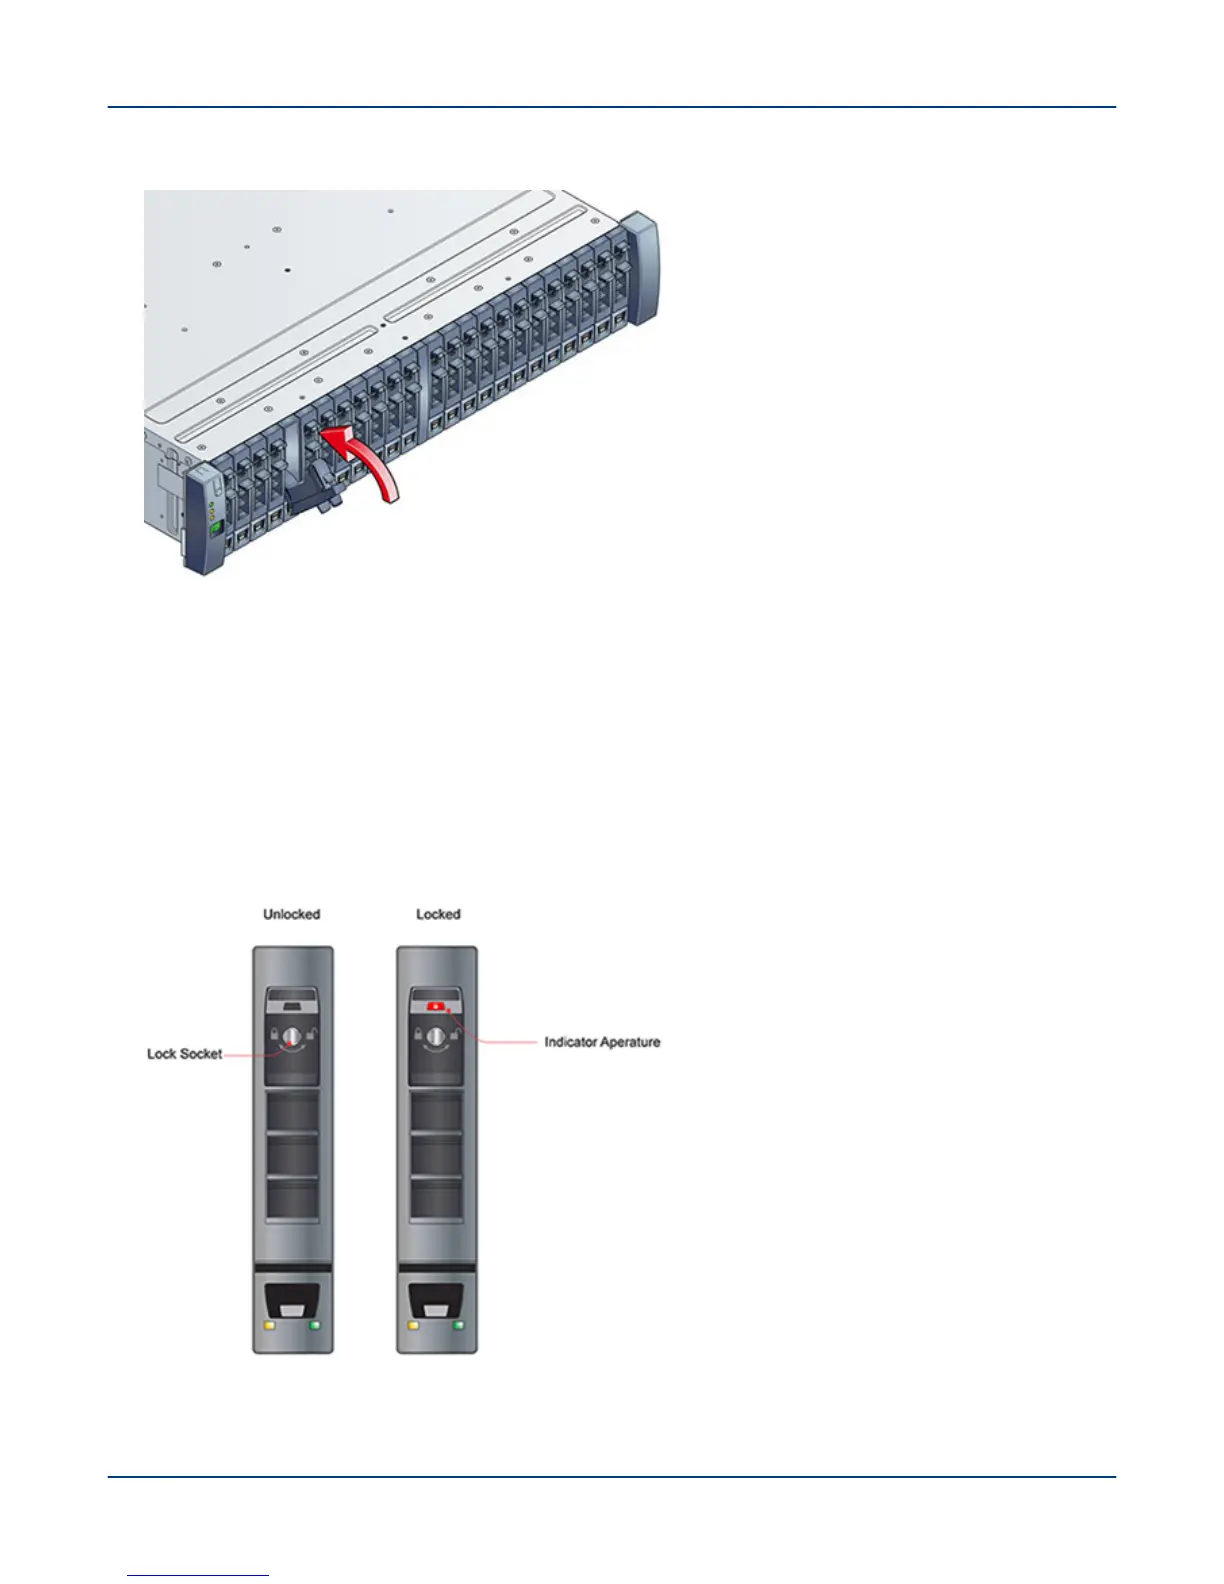
7. Engage the drive carrier locks, using a T10 Torx screwdriver, and rotating clockwise until the red indicator
appears in the aperture above the key, as shown.
Figure 13. Drive Carrier Unlocked and Locked
Install Disk Drives in a 2U24 Enclosure
26