Chapter 6 - Hydraulic Brakes
179
Brake Pads: The brake caliper must be removed to
replace the brake pads.
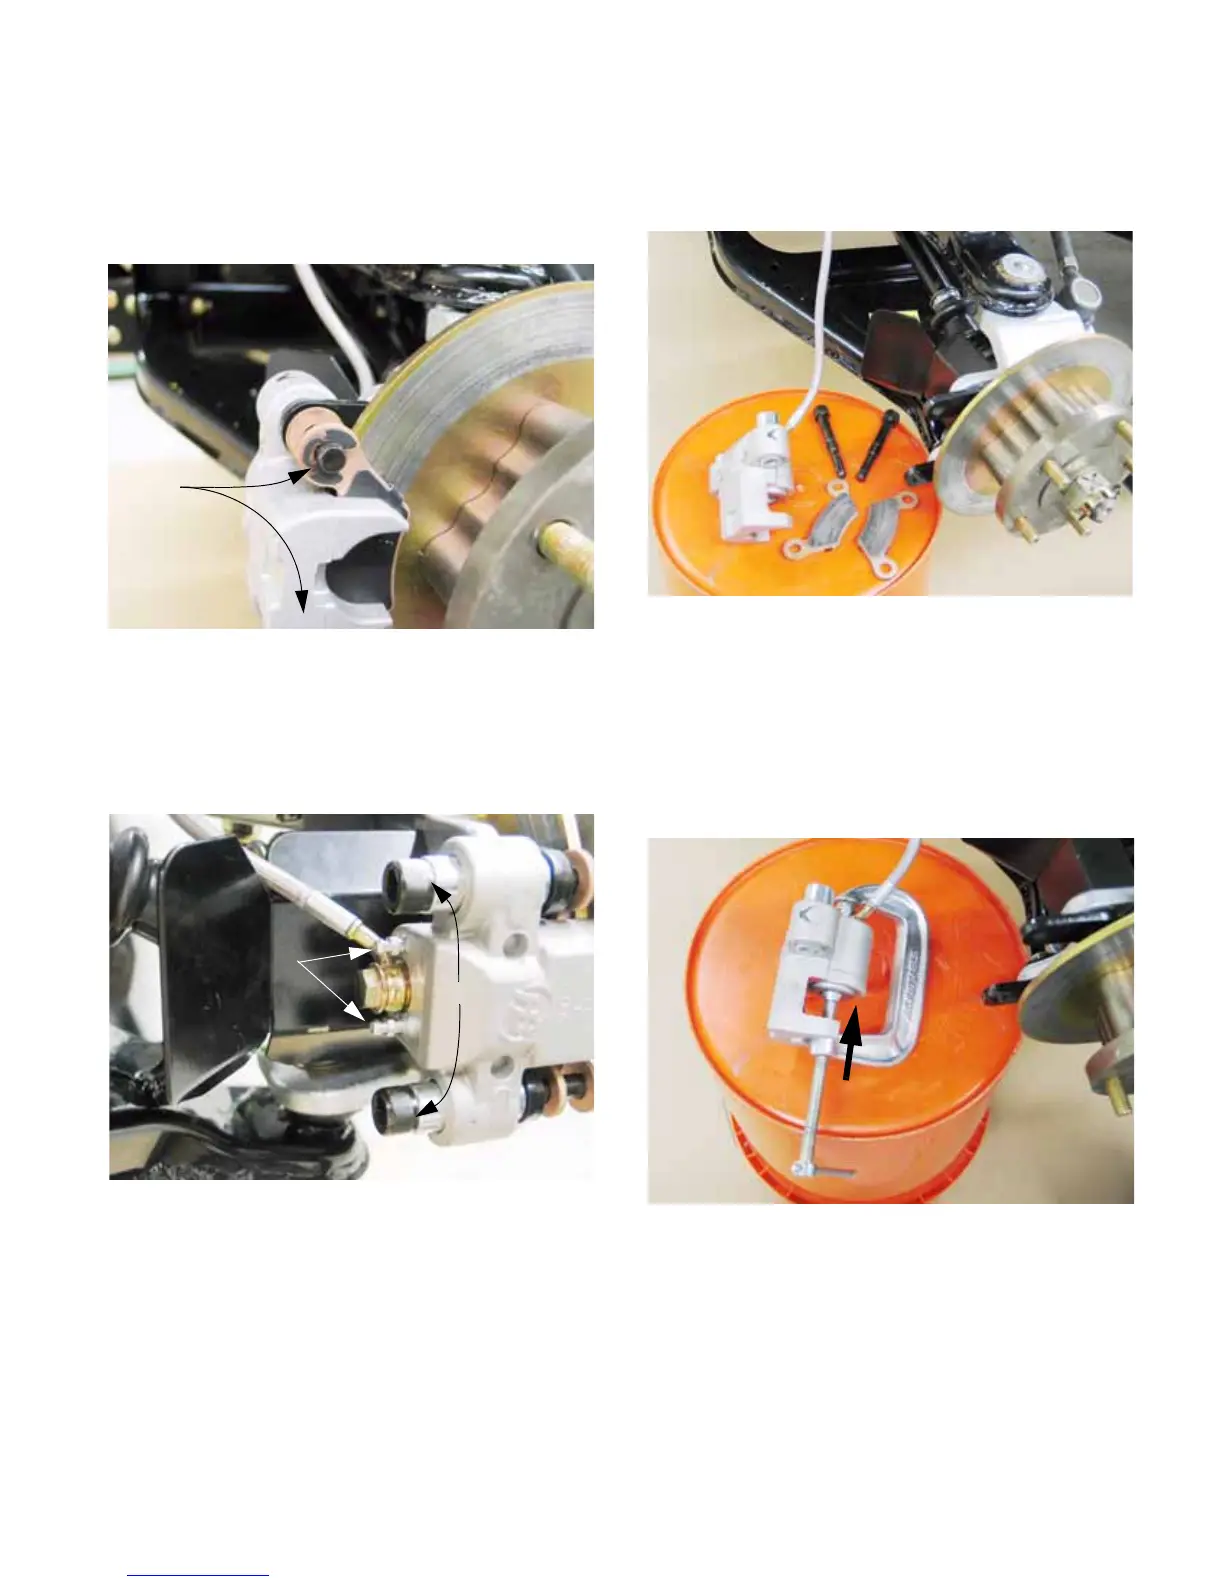
1. Remove the C-clips from the mounting pins
using a small screwdriver. See Figure 6.13.
2. Loosen the top bleed screw 1/2 turn using a 1/4”
wrench.
3. Remove the mounting pins using a 3/8” allen
wrench. See Figure 6.14.
4. As the mounting pins are withdrawn, the pads
will come free of the caliper.
Figure 6.13
C-clips
Figure 6.14
Mounting pins
Bleed screws
5. When the mounting pins are completely
removed, the caliper will come free of the
bracket on the hub. See Figure 6.15.
CAUTION: Support the caliper. Do not allow it
to hang on the flexible hydraulic line. While the
line will hold thousands of P.S.I. of internal pres-
sure, it was not designed to handle tensile loads.
6. Use a C-clamp to drive the piston back into the
caliper. See Figure 6.16.
• Retracting the piston will make room for the
additional thickness of the new pads.
• Be aware that driving one piston in, with the
bleeder closed, will displace fluid. That fluid may
return to the reservoir or force the piston out of
another dismounted caliper. Open the bleed
screw to avoid these issues. Be prepared to
catch any expelled fluid.
Figure 6.15
Caliper
removed
Figure 6.16
Brake piston
 Loading...