Chapter 8 - Caterpillar Engine and Related Systems
227
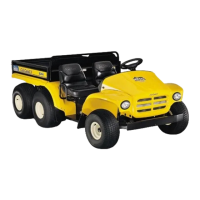
8f. Open the air bleed to drain the filter
assembly completely. See Figure 8.17.
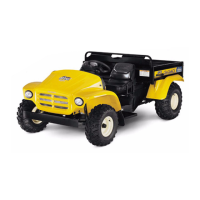
8g. Rotate the filter cartridge roughly 90
degrees (1/4 turn) counter-clockwise as
seen from the bottom to release it from
the filter housing. This will align the ears
on the filter cartridge with the notches in
the bayonet style fitting that holds it to the
filter housing. See Figure 8.18.
8h. Pull the filter cartridge straight down to
remove it.
Figure 8.17
Air bleed
screw
Catch pan
Figure 8.18
Ear
Notch
Turn
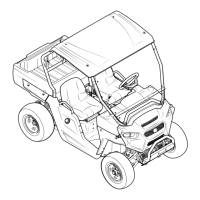
8i. Install the replacement filter cartridge by
pushing it straight onto the filter housing,
with the ears aligned to fit the notches in
the housing. The unlock icons on the filter
cartridge and filter housing should be
aligned or nearly aligned to show the ori-
entation of the ears when the filter can be
pushed-up. See Figure 8.19.
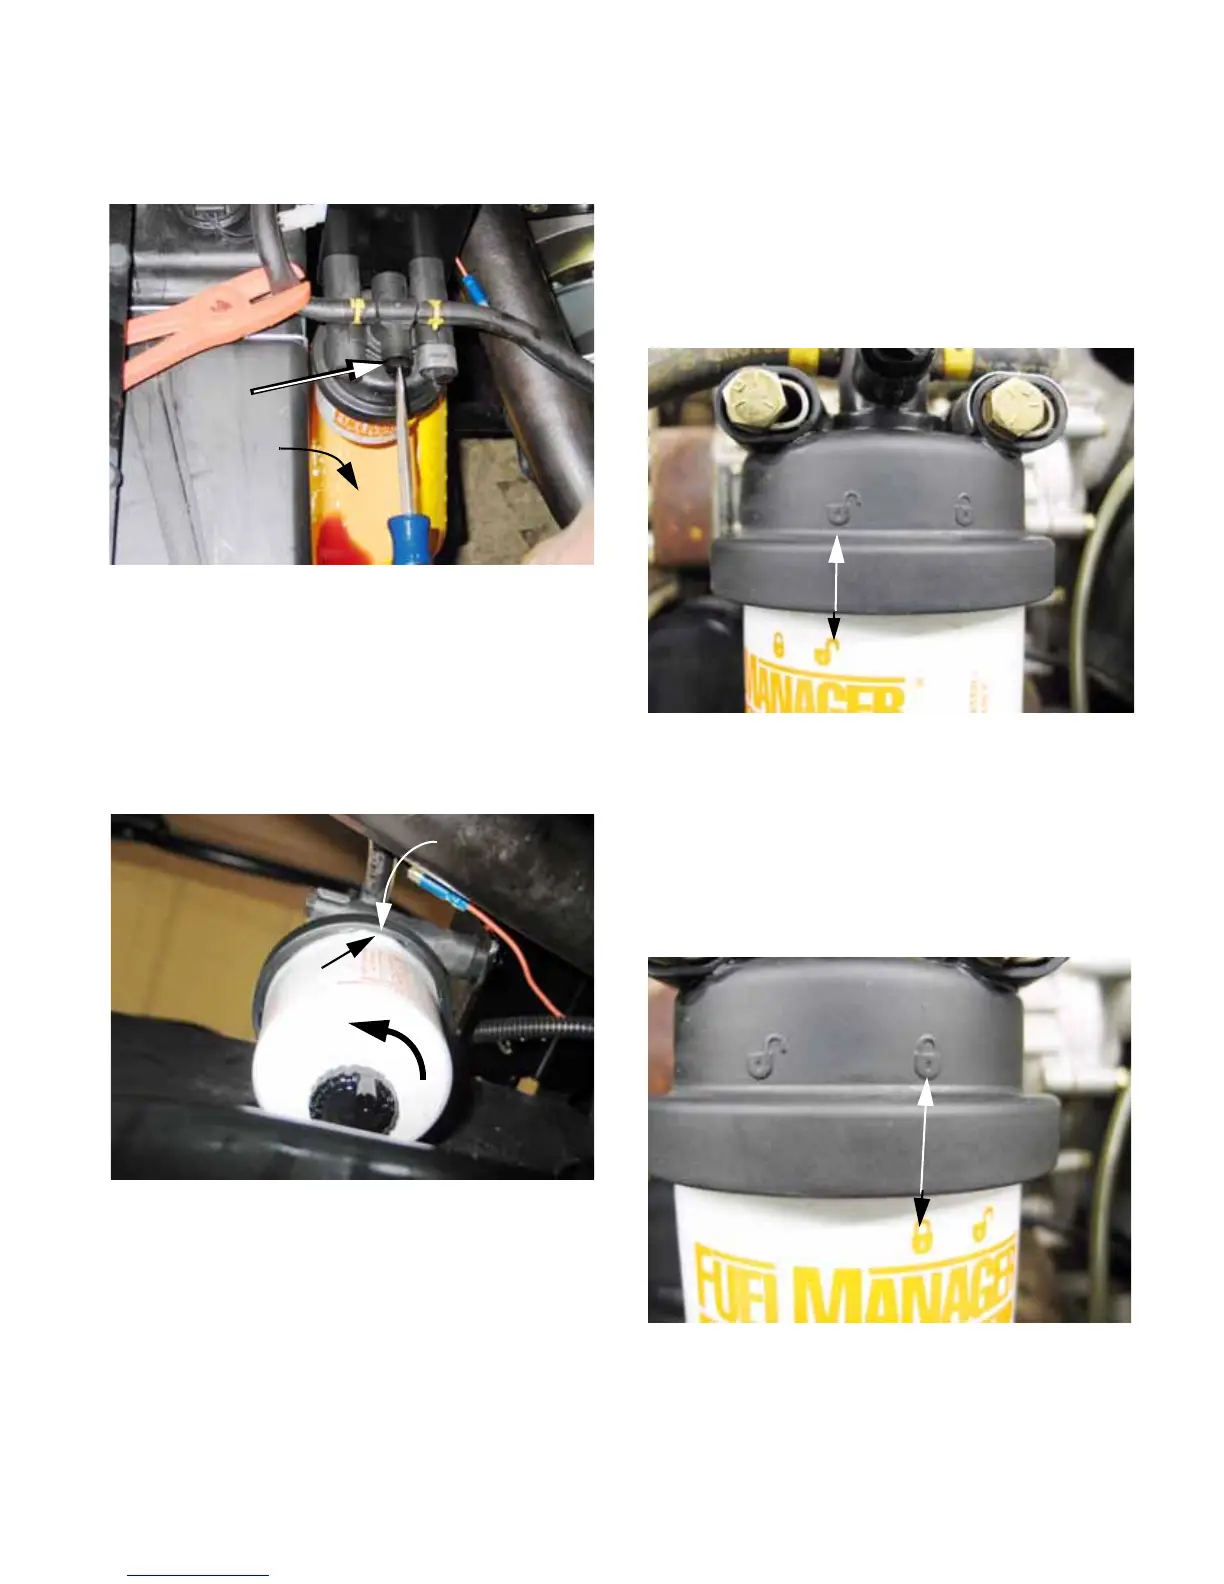
8j. Rotate the filter cartridge 90 degrees (1/4
turn) clockwise as seen from the bottom
to lock it to the filter housing. The lock
icons on the filter cartridge and filter hous-
ing should be aligned or nearly aligned
when the cartridge is secure.
See Figure 8.20.
8k. Close the air bleed fitting and confirm that
the water drain is closed.
8l. Remove the clamp from the fuel line.
Figure 8.19
“Unlock” icon
Figure 8.20
“Lock” icon
 Loading...