Chapter 2- Drive System: CVT and Transfer Case
37
2. If the parking brake is being removed for transfer
to a replacement transfer case:
2a. Remove the screws that hold the caliper
bracket to the transfer case housing using
a T-45 driver. See Figure 2.72.
2b. Draw-out and pivot the caliper and rotor as
an assembly so that they clear the shift
arm assembly, and remove them from the
transfer case. See Figure 2.73.
2c. Installation is essentially the reversal of
the removal process.
• The friction surfaces of the pads and rotor must
be clean and in good condition.
• Tighten the nuts according to the torque table
that accompanies this section of the chapter.
Figure 2.72
Brake caliper
bracket screws
Figure 2.73
3. If the parking brake is being removed for brake
replacement or other service:
NOTE: The inner brake pad is epoxied into the
caliper. Because the inner pad cannot be
replaced, the caliper is offered only as a com-
plete assembly. Individual parts are not avail-
able.
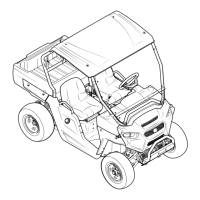
3a. Unhook and remove the return spring.
See Figure 2.74.
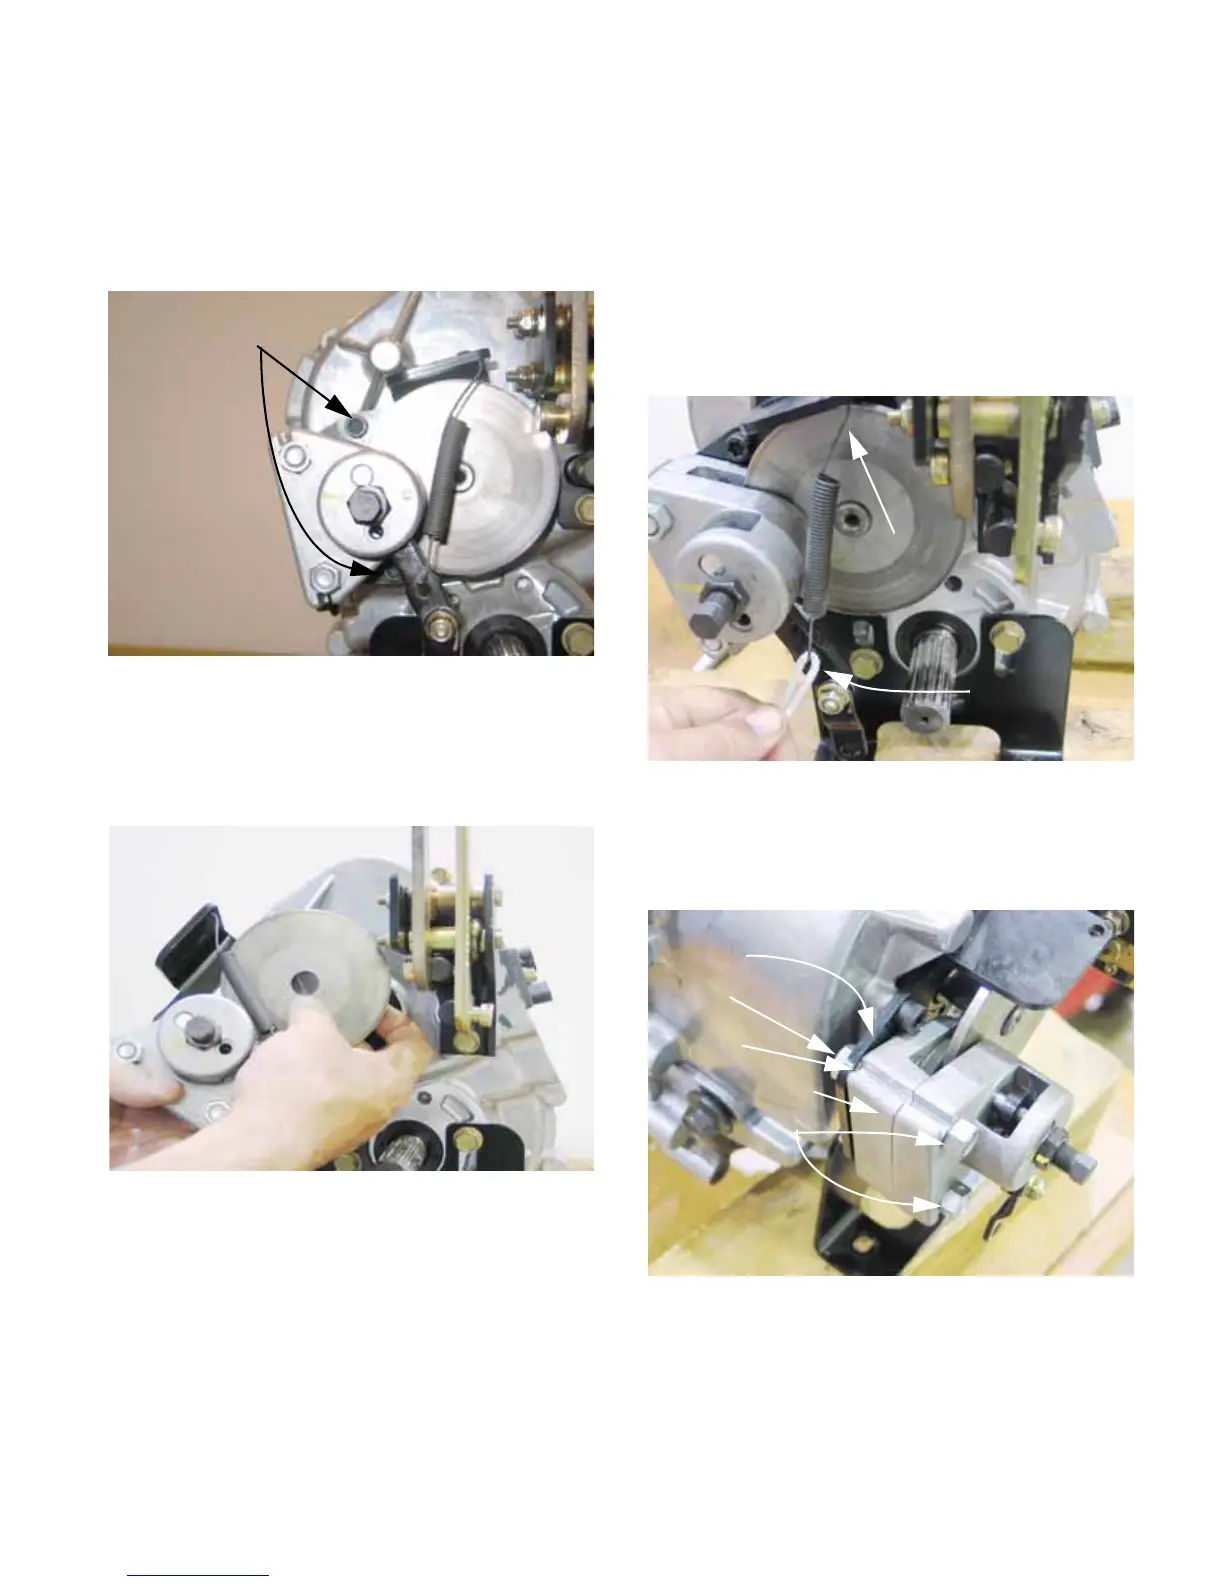
3b. Remove the two nuts that hold the caliper
to the caliper bracket using a pair of 9/16”
wrenches. See Figure 2.75.
Figure 2.74
Unhook the
bottom end
first
Long end
goes up
Figure 2.75
Bracket
Bolts
Shims
Caliper
Nuts
 Loading...