Kohler Enclosed CVT Addendum
68
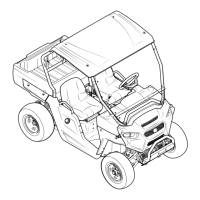
4c. Withdraw the bolt, washers, and shoulder
spacer.
4d. Install the clutch removal tool by threading
it into the clutch (driving pulley), pressing
against the crankshaft.
4e. Hold the pulley with a 30mm wrench, and
turn the tool using a 22mm wrench. This
will force the driving pulley (clutch) off of
the crankshaft. See Figure 2a.15.
CAUTION: There is a tapered fit between the
driving pulley and the crankshaft. Prying on the
perimeter of the driving element will
break it.
4f. Place the gear selector in H position, and
set the parking brake.
4g. Loosen the bolt holding the driven pulley
to the input shaft using a 9/16” wrench.
4h. Remove the bolt and washers.
4i. Slide the driven pulley off of the splined
transfer case input shaft.
See Figure 2a.16.
CAUTION: Do not pry on the outer edge of the
driven pulley. It will
bend, ruining the pulley.
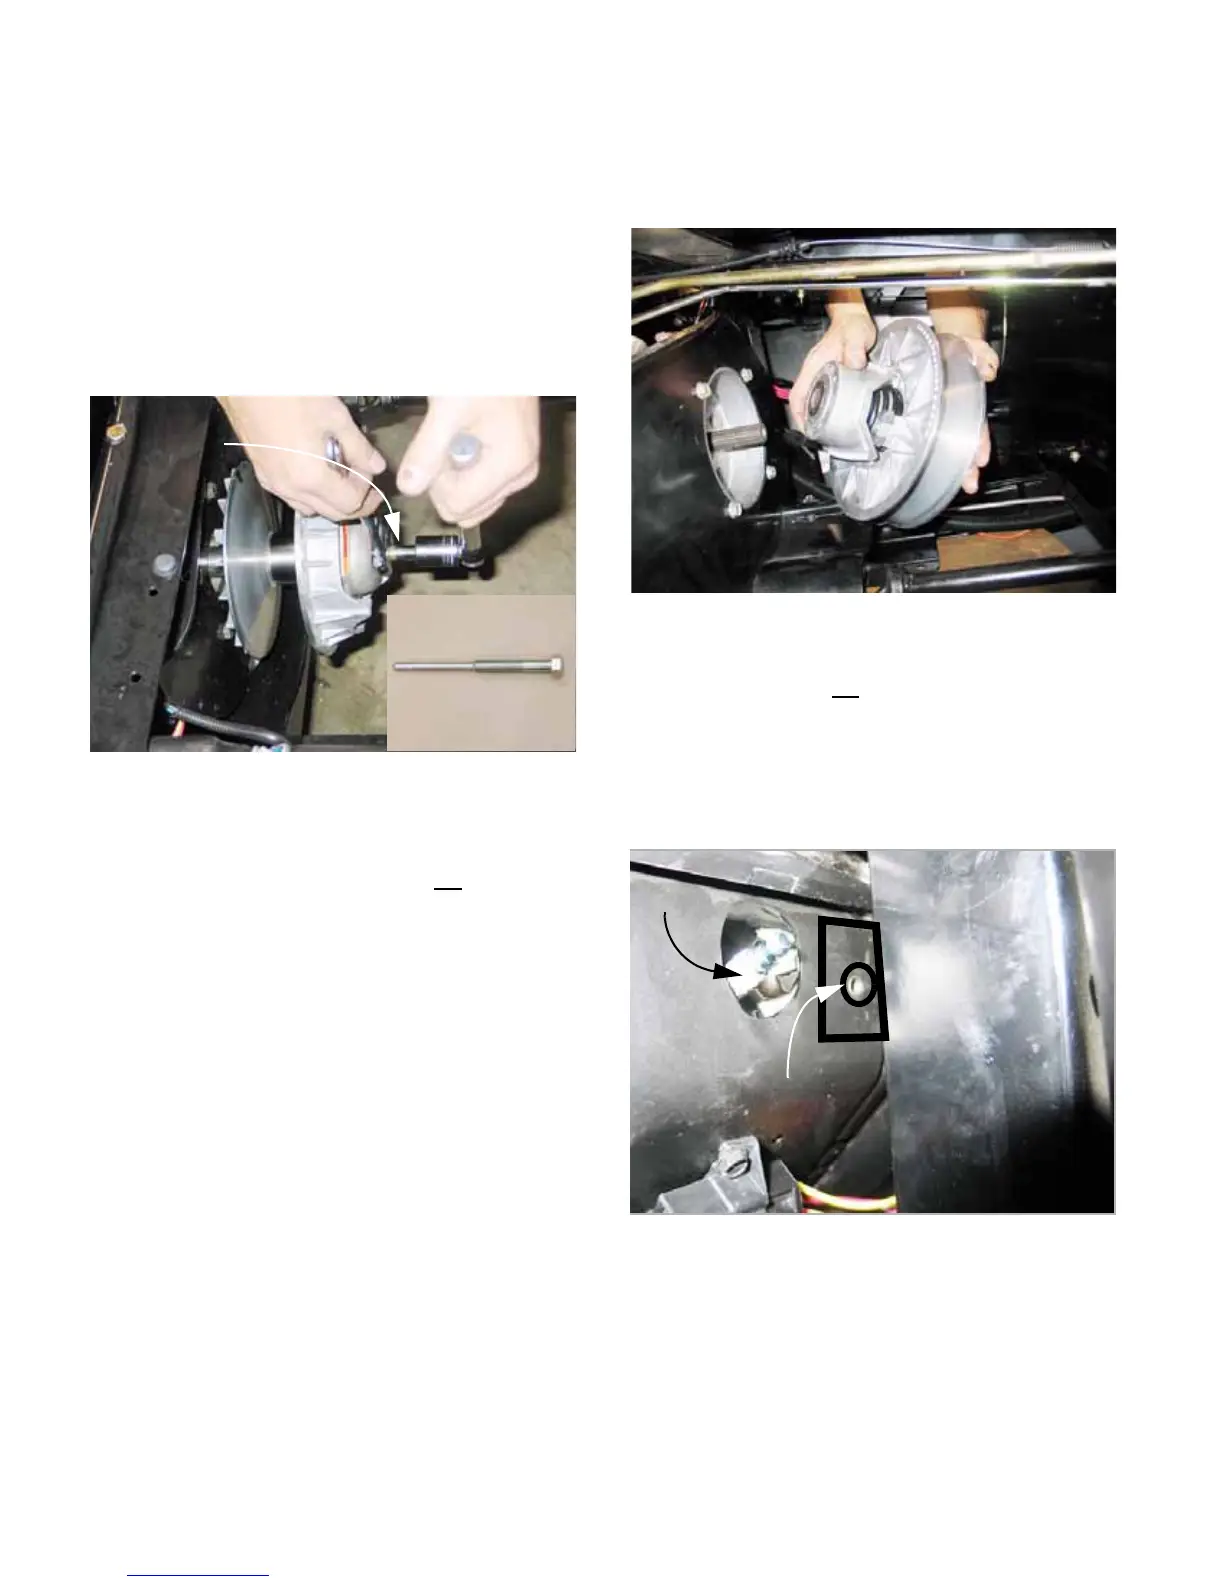
5. Change back plate
5a. Disconnect the heat shield from the engine
cooling shroud using a 10mm wrench.
See Figure 2a.17.
5b. Loosen all the screws that hold the back
plate to the engine using a 9/16” wrench.
Remove all but one.
Figure 2a.15
Inset: Clutch tool
P/N: 759-04111
Clutch tool
installed
Figure 2a.16
Driven pulley removal
Figure 2a.17
Spark plug
Heat shield
mounting point
 Loading...