Chapter 4: EDGE 2 Controller Installation
NOTICE
When using outdoor connections, mount the enclosure as close as possible to the
entry point of the wiring
IMPORTANT: The enclosures must be mounted near an AC Power with a disconnecting switch
IMPORTANT: Mount the system into a wooden or metal frame. Do not mount the system directly into the
drywall
NOTE: Install the enclosures (EDGE 2 Controller) with the hinges on the left hand side when facing the
enclosure.
NOTE: Install the enclosure horizontally, so text is readable when facing the enclosure. Consult wiring
diagrams for wire length restriction between enclosures.
NOTE: It is recommended to use Galvanized Flange Head Lag Screws for Wood that are 1/4" x 2” long.
EDGE 2 Controller Installation
1. Place the enclosure at a height at which you can properly see the screen.
2. Verify that you can easily open the enclosure cover.
3. Screw in the top left hand corner screw first.
4. Using a level, make sure the enclosure is straight, and then screw in the second screw at the lower
right hand corner.
5. Screw in the last two screws.
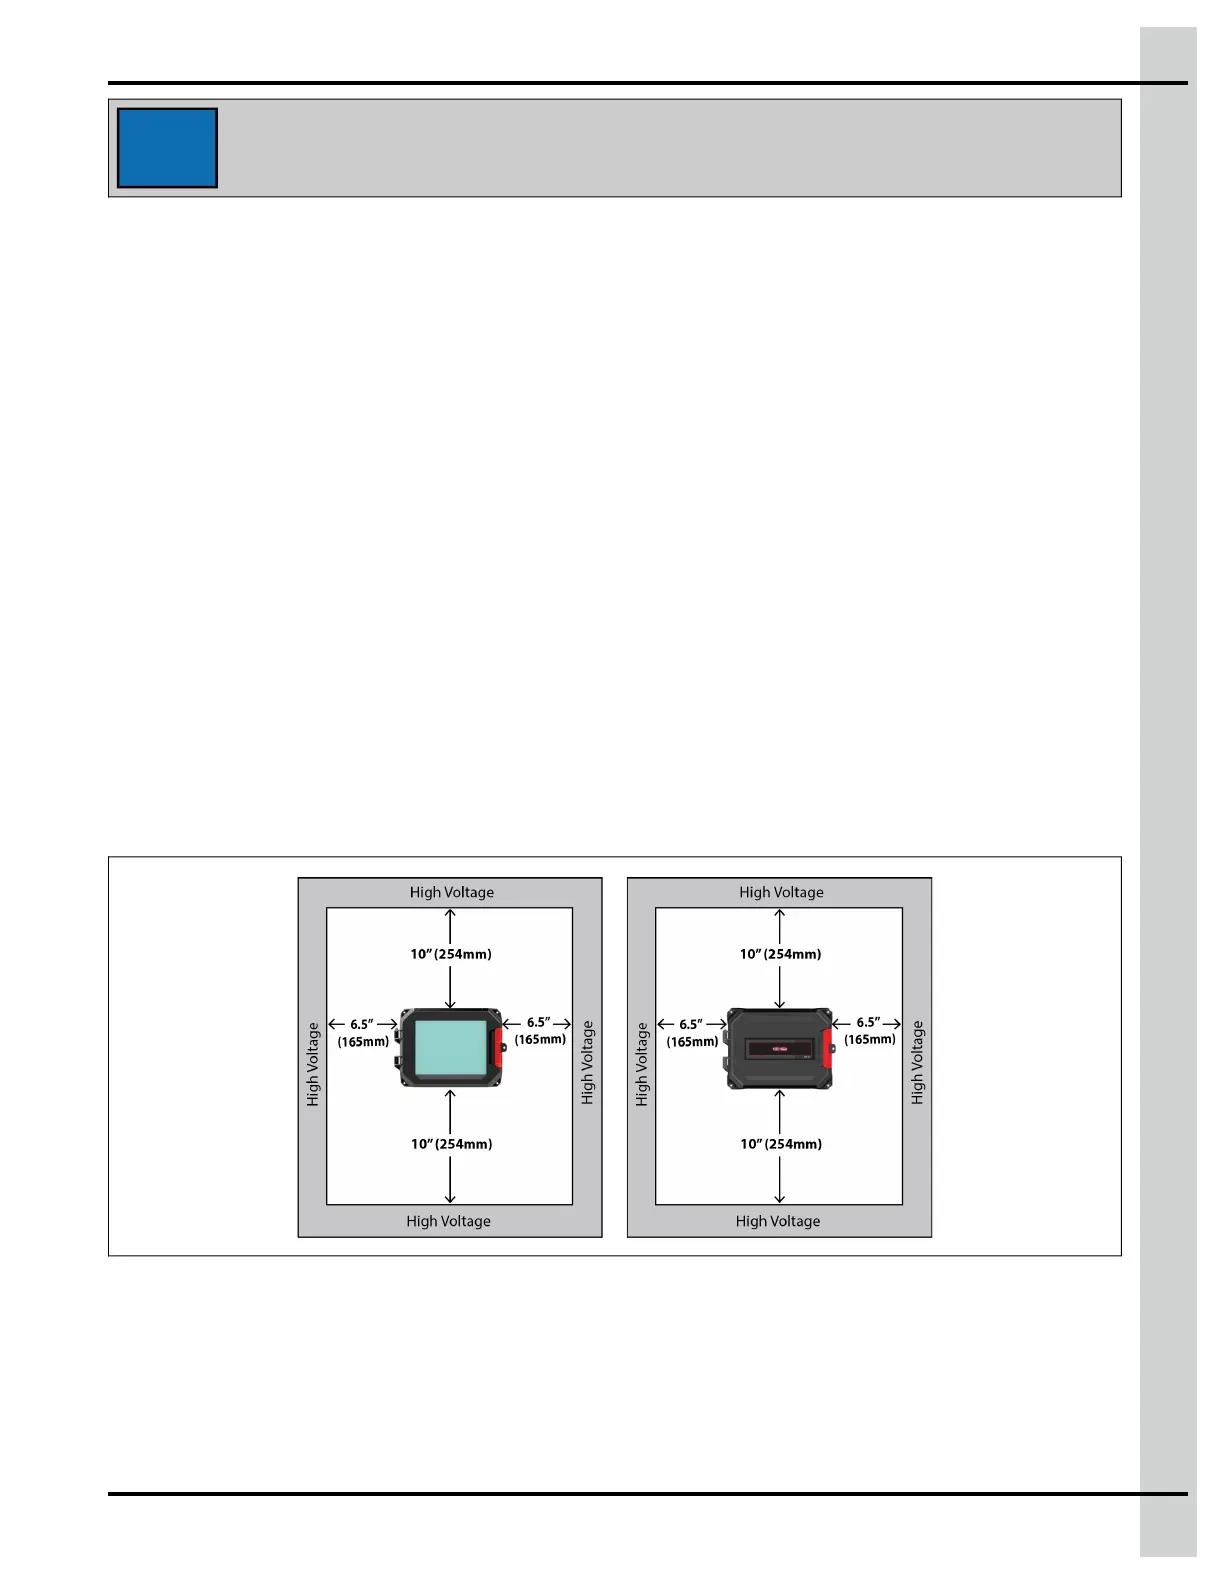
IMPORTANT: Leave a minimum clearance of 32” W x 34” H for the controller.
Figure 4-1 Minimum clearance
EDGE PSU 24V 36W Installation
1. Place the enclosure at a height at which you can properly access the EDGE PSU 24V 36W.
2. Screw in the top left hand corner screw first.
890–00687 EDGE 2
49