Chapter 5: Expansion Box and Virtual Expansion Box Installation
6. Make all the necessary wiring connections to the plug-in module.
7. Reconnect the main supply voltage, and ensure all equipment turns on correctly.
NOTICE
For the terminal blocks connected on the power relays, use a tightening torque
from 0.7N*m (6.2lbf*in) to 0.8N*m (7lbf*in) to fasten a wire gage from 10AWG to
14AWG. For the small terminal blocks used for inputs and low voltage outputs,
use a tightening torque from 0.5N*m (4.43lbf*in) to 0.6 N*m (5.2lbf*in) to fasten a
wire gage from 16AWG to 18AWG.
Installing the Plug-In Relays
When a new Expansion Box is ordered, the plug-in relays are already installed on the plug-in modules
that are installed in the enclosure. If you need to either add a plug-in relay or replace an existing one, you
must do so correctly in order to ensure the proper functioning of the system.
What You Should Know
WARNING
Installation must only be performed by qualified service personnel.
WARNING
Wear appropriate grounding devices such as an anti-static wristband to service the
system.
CAUTION
Before servicing the system, disconnect the main voltage supply.
1. Remove the nut and bolt, and then open the plastic cover on the Expansion Box.
2. Disconnect the main voltage supply and ensure the box is completely powered down.
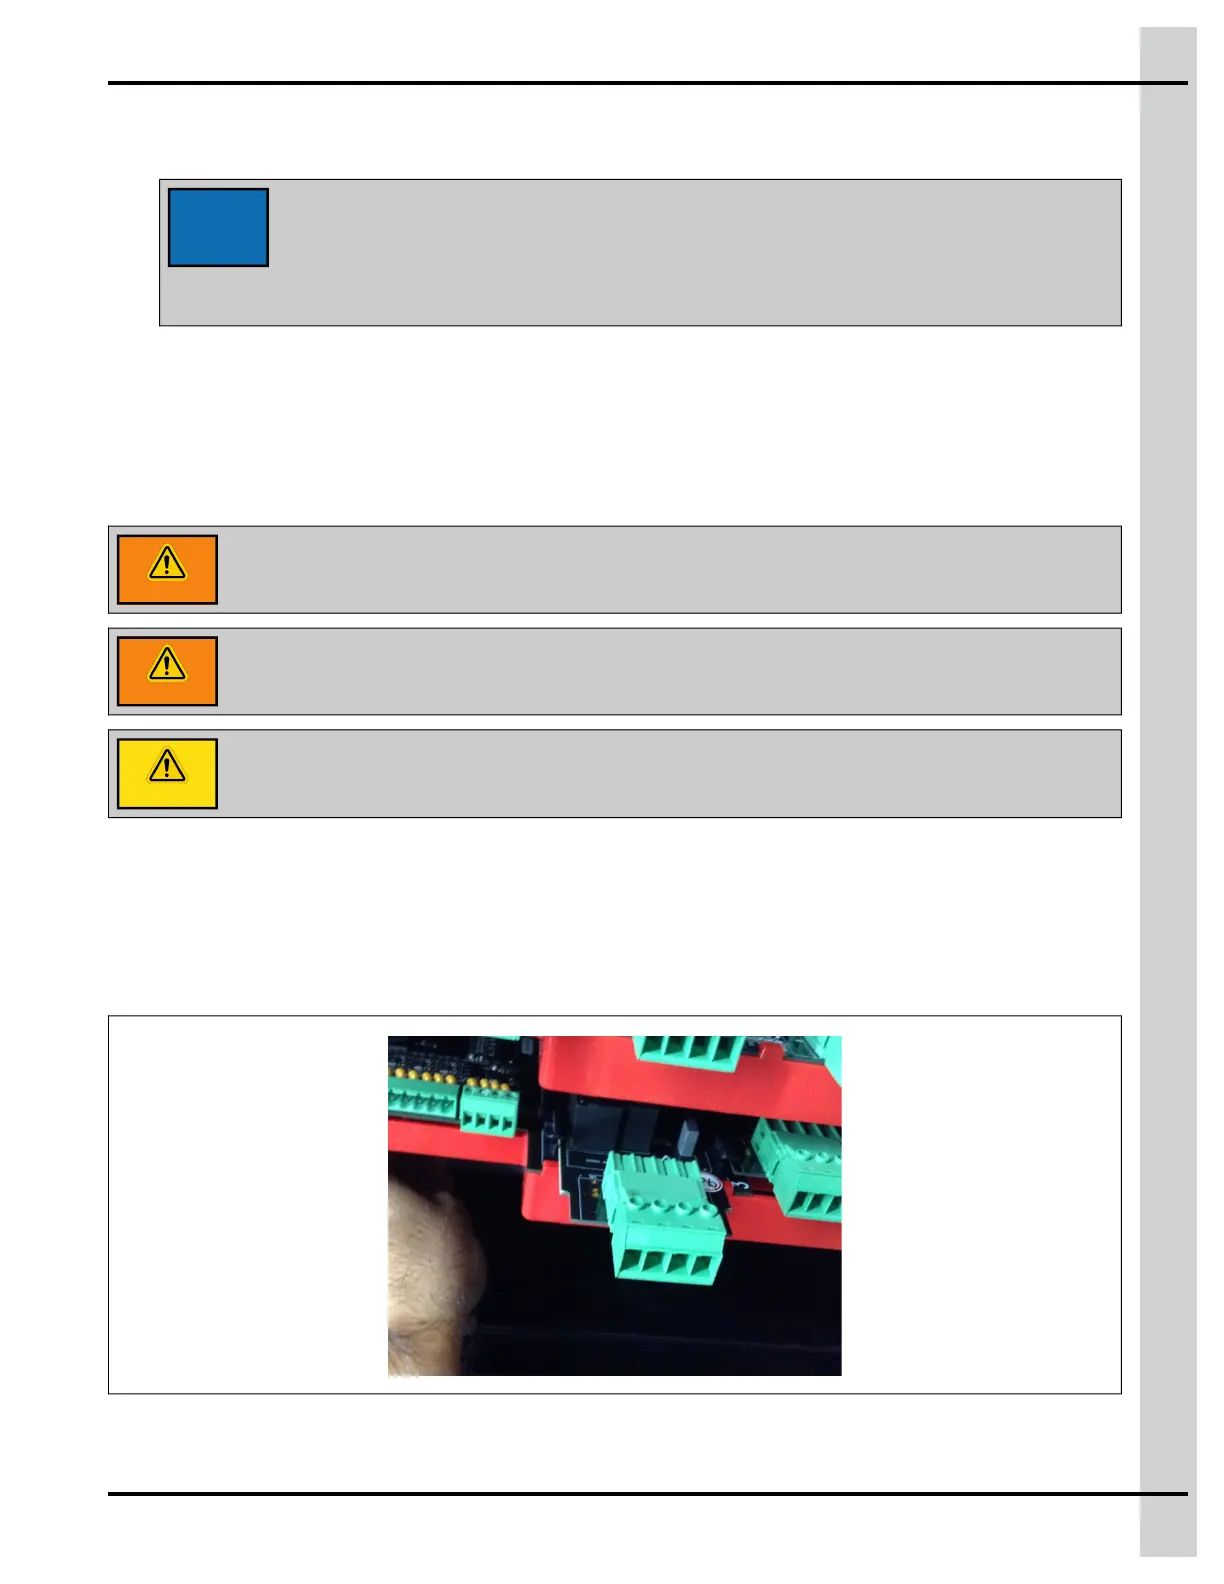
3. Locate the plug-in relay slot where you need to add the plug-in relay.
4. Align the plug-in relay with the card guide on the main plug-in card
890–00687 EDGE 2
63