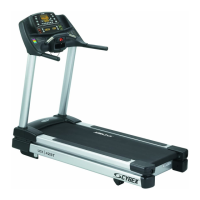
Cybex 425T Treadmill Service Manual
Service
Page 4-11
14. Secure the front roller.
A. Slide the front roller into the running belt.
B. Slide the new drive belt around the front roller before attaching the front roller.
C. Using a 9/16” socket wrench attach the two bolts that fasten the front roller to the
frame. NOTE: Tighten each of the two bolts evenly, making sure not to tighten one bolt
too many turns before moving to the other bolt.
15. Secure the drive belt.
A. Place the Phillips head screwdriver into the square hole located in the bottom of the
idler pulley assembly.
! WARNING: Do not pinch fingers while tensioning belt.
B. While pushing down on the Phillips head screwdriver carefully slide the drive belt into
the grooves on the flywheel pulley and front roller. Slowly release tension on the idler
pulley assembly.
C. Ensure that the drive belt is aligned properly in the grooves on the drive motor pulley
and front roller pulley.
16. Secure the running deck.
A. Place the deck in the correct position on the frame.
B. Using a 7/16” socket wrench, install the two screws, two split washers and two flat
washers that hold the back of the deck in place. See Figure 9.
C. Using a 3/16” allen wrench, install the two screws, two split washers and two flat
washers that hold the front of the deck in place. See Figure 9.
17. Secure the rear roller.
A. Slide the rear roller into the running belt. See Figure 8.
B. Install the bolt, bronze bushing and nut for each side of the roller into position. See
Figure 11.
C. Using a 3/4” socket wrench, tighten each rear roller bolt evenly, making sure not to
tighten either bolt too many turns before moving to the other bolt. NOTE: Do not
overtighten the belt. You will tension and center the belt in step 20. See Figure 8.
18. Secure the top platforms.
A. Place each top step in position.
B. Using a 7/16” socket wrench, install the four bolts, split washers and flat washers that
hold one of the top platforms in place. Repeat this step for the other side. See
Figure 5.
19. Secure the motor cover.
! CAUTION: Always use proper lifting methods when moving heavy items.

 Loading...