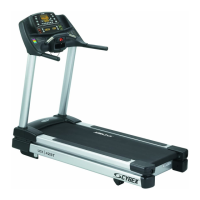
Cybex 425T Treadmill Service Manual
Service
Page 4-12
A. Carefully lower the treadmill to the ground.
B. Lower the motor cover center into position. See Figure 2.
C. Using a Phillips head screwdriver, tighten the two screws on each side and the two
screws in the front of the unit.
20. Adjust the running belt tension and tracking.
A. Follow the Tension and Center the Belt procedure located in the Preventive
Maintenance chapter of this manual.
Motor Brushes 110 VAC
Product Numbers SK-18553
NOTES: This procedure describes the replacement of motor brushes on the 425T model
treadmill.
Motor brushes are wear items that will periodically need to be replaced.
Both drive motor brushes must be replaced as a pair. This will ensure even
commutator contact and brush wear. However, the negative brush will wear 20%
faster than the positive brush. Therefore, always measure the negative brush length to
determine whether you should replace the pair. The negative brush is located closest
to the front of the frame. You should still check the positive brush for cracks or chips.
It is not necessary to remove the drive motor in order to reach the motor brushes.
Tools Required
• Phillips head screwdriver
• Flat head screwdriver
• 7/16” open end wrench
• 1/2” open end wrench
! WARNING: Keep wet items away from inside parts of the treadmill. Electrical shock
could occur even if the treadmill is unplugged. Motor brush removal and
replacement should be performed by a qualified service technician.
1. Read and understand all instructions thoroughly before installing this kit.
2. Verify the kit contents shown in
Figure 12.
A. Brush Assembly, 110 VDC, Red (1)
B. Brush Assembly, 110 VDC, Black (1)
C. Brush Retainer, Molded (2)
D. Wire tie, 18”, EH-12260 (1)
E. Wire tie, 9”, EH-00986 (3)
3. Remove motor cover.
Figure 12
A
B
C
D
E

 Loading...