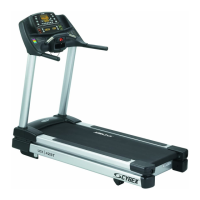
Cybex 425T Treadmill Service Manual
Service
Page 4-13
A. Using a Phillips head screwdriver loosen but do not remove the two screws securing
the left motor cover in place. Loosen the two screws securing the right motor cover.
B. Lift the top motor cover up and off of the treadmill.
4. Elevate the treadmill.
A. Without standing on the belt, press the Start key and begin running the treadmill.
B. Press the up arrow and elevate the treadmill fully.
5. Disconnect the power.
A. While the treadmill is still fully elevated and running unplug the power cord from the wall
outlet.
6. Access drive motor.
A. Carefully lift the rear of the treadmill until the top of the console is resting on the ground.
! WARNING: Drive belt is under tension. Do not pinch fingers while releasing tension.
B. Release drive belt tension by placing the Phillips head screwdriver into the square hole
located in the bottom of the idler pulley assembly.
C. While pushing down on the Phillips head screwdriver carefully slide the drive belt off of the
drive motor pulley. Slowly release tension on the idler pulley assembly.
! WARNING: Motor plate is heavy and will drop down when motor plate bolts are
removed.
D. Using a 1/2” open end wrench remove the two motor plate bolts and washers.
E. Slowly and carefully lower the drive motor plate.
7. Disconnect the motor cables.
A. Locate the red and black drive motor cables exiting the drive motor and connected to A1
and A2 on the lower control board.
B. Disconnect the two motor cables from the lower board. ! WARNING: Avoid touching
lower board components such as resistors and capacitors.
C. Cut the wire ties securing the drive motor cables to the drive motor housing and other
cables on the lower control board.
D. Remove the ferrite from the two motor cables. Set aside for installation in step 11D.
E. Using the 7/16” open end wrench loosen the nut securing the wire clamp retainer at the
end of the motor. Remove drive motor cables from retainer.

 Loading...