6Installation
Installerreferenceguide
10
AZQS100~140B8V1B+AZQS100~140B7Y1B
Splitsystemairconditioners
4P3855291–2014.08
NOTICE
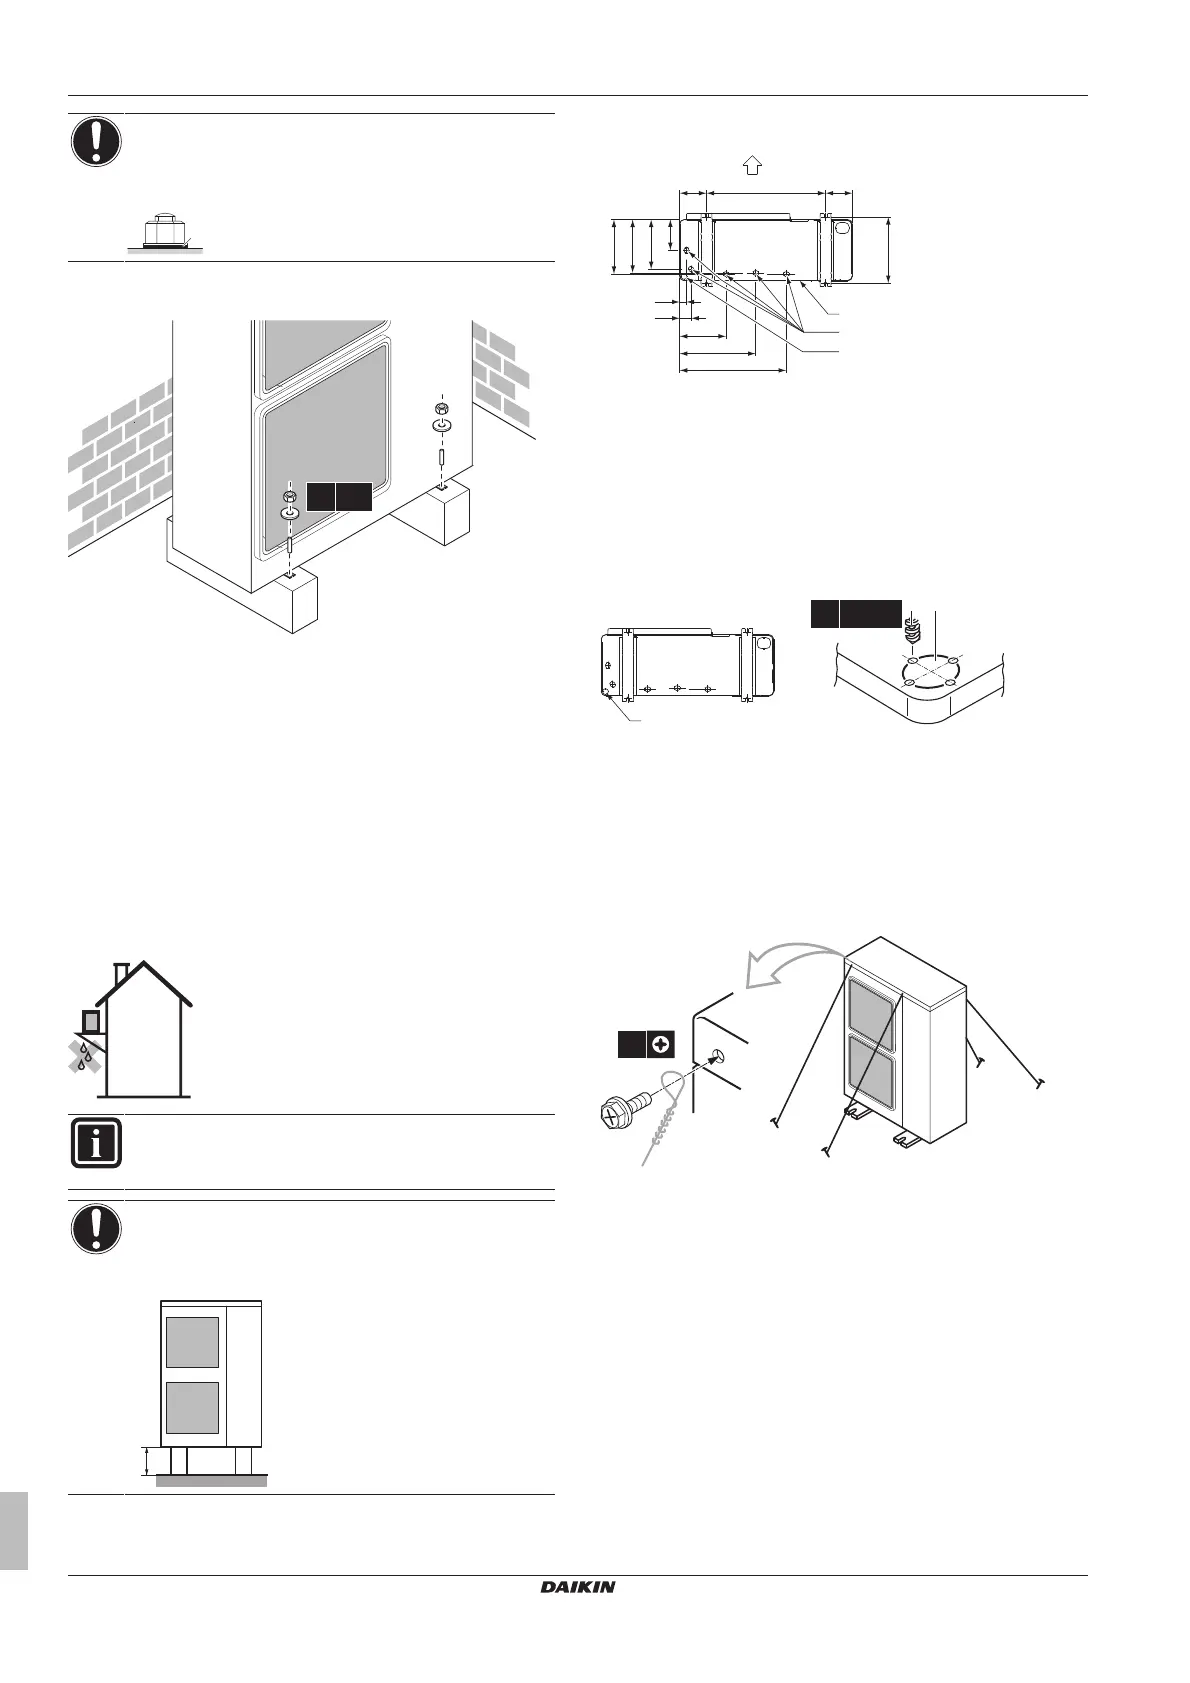
Fixtheoutdoorunittothefoundationboltsusingnutswith
resin washers (a). If the coating on the fastening area is
strippedoff,thenutsrusteasily.
6.3.4 Toinstalltheoutdoorunit
6.3.5 Toprovidedrainage
▪ Makesurethatcondensationwatercanbeevacuatedproperly.
▪ Install the unit on a base to make sure that there is a proper
drainageinordertoavoidiceaccumulation.
▪ Prepareawaterdrainagechannelaroundthefoundationtodrain
wastewatersurroundingtheunit.
▪ Avoid drain water flowing over the footpath, so that it does not
becomeslipperyincaseofambientfreezingtemperatures.
▪ Ifyou install theuniton a frame,install a waterproofplatewithin
150 mm of the underside of the unit in order to prevent the
invasionofwaterintheunitandtoavoidthedrainwaterdripping
(seethefollowingillustration).
INFORMATION
Ifnecessary,youcanuseadrain plugkit(fieldsupply)to
preventdrainwaterfromdripping.
NOTICE
Ifdrainholesoftheoutdoorunitarecoveredbyamounting
base or by floor surface, raise the unit to provide a free
spaceofmorethan150mmundertheoutdoorunit.
Drainholes(dimensionsinmm)
A
B
B
C
D
E
160 160620
36
61
262
416
595
285
279
260
161
(345~355)
A Dischargeside
B Distancebetweenanchorpoints
C Bottomframe
D Drainholes
E Knockoutholeforsnow
Snow
Inregionswithsnowfall,snowmightbuildupandfreezebetweenthe
heat exchanger and the external plate. This might decrease the
operatingefficiency.Topreventthis:
1 Drill(a,4×)andremovetheknockouthole(b).
2 Remove the burrs, and paint the edges and areas around the
edgesusingrepairpainttopreventrusting.
6.3.6 Topreventtheoutdoorunitfromfalling
over
Incase theunit isinstalled inplaceswherestrongwindcantilt the
unit,takefollowingmeasure:
Connectcables(fieldsupply)asshown:
6.4 Connectingtherefrigerantpiping
6.4.1 Aboutconnectingtherefrigerantpiping
Beforeconnectingtherefrigerantpiping
Makesuretheoutdoorandindoorunitaremounted.
Typicalworkflow
Connectingtherefrigerantpipinginvolves:
▪ Connectingtherefrigerantpipingtotheoutdoorunit
▪ Connectingtherefrigerantpipingtotheindoorunit
▪ Installingoiltraps
▪ Insulatingtherefrigerantpiping