6Installation
Installerreferenceguide
13
AZQS100~140B8V1B+AZQS100~140B7Y1B
Splitsystemairconditioners
4P3855291–2014.08
Tohandletheservicecap
Takethefollowingguidelinesintoaccount:
▪ Always use a charge hose equipped with a valve depressor pin,
sincetheserviceportisaSchradertypevalve.
▪ After handling the service port, tighten the service port cap
securely. For the tightening torque, refer to the table in chapter
"Tohandlethestemcap"onpage12.
▪ Checkforrefrigerantleaksaftertighteningtheserviceportcap.
6.4.8 Toconnecttherefrigerantpipingtothe
outdoorunit
1 Dothefollowing:
▪ Removetheservicecover(a)withscrew(b).
▪ Removethepipingintakeplate(c)withscrew(d).
2 Chooseapipingroute(a,b,cord).
3 Ifyouhavechosenthedownwardspipingroute:
▪ Drill(a,4×)andremovetheknockouthole(b).
▪ Cutouttheslits(c)withametalsaw.
4 Dothefollowing:
▪ Connecttheliquidpipe(a)totheliquidstopvalve.
▪ Connectthegaspipe(b)tothegasstopvalve.
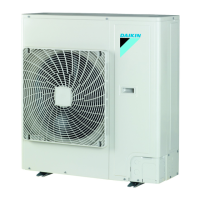
5 Dothefollowing:
▪ Insulatetheliquidpiping(a)andthegaspiping(b).
▪ Wind heat insulation around the curves, and then cover it
withvinyltape(c).
▪ Make sure the field piping does not touch any compressor
components(d).
▪ Sealtheinsulationends(sealantetc.)(e).
6 If the outdoor unit is installed above the indoor unit, cover the
stop valves (f, see above) with sealing material to prevent
condensedwateronthestopvalvesfrommovingtotheindoor
unit.
NOTICE
Anyexposedpipingmightcausecondensation.
7 Reattachtheservicecoverandthepipingintakeplate.
8 Sealallgaps(example:a)to prevent snow and small animals
fromenteringthesystem.
WARNING
Provideadequatemeasurestopreventthattheunitcanbe
used as a shelter by small animals. Small animals that
makecontactwithelectricalpartscancausemalfunctions,
smokeorfire.
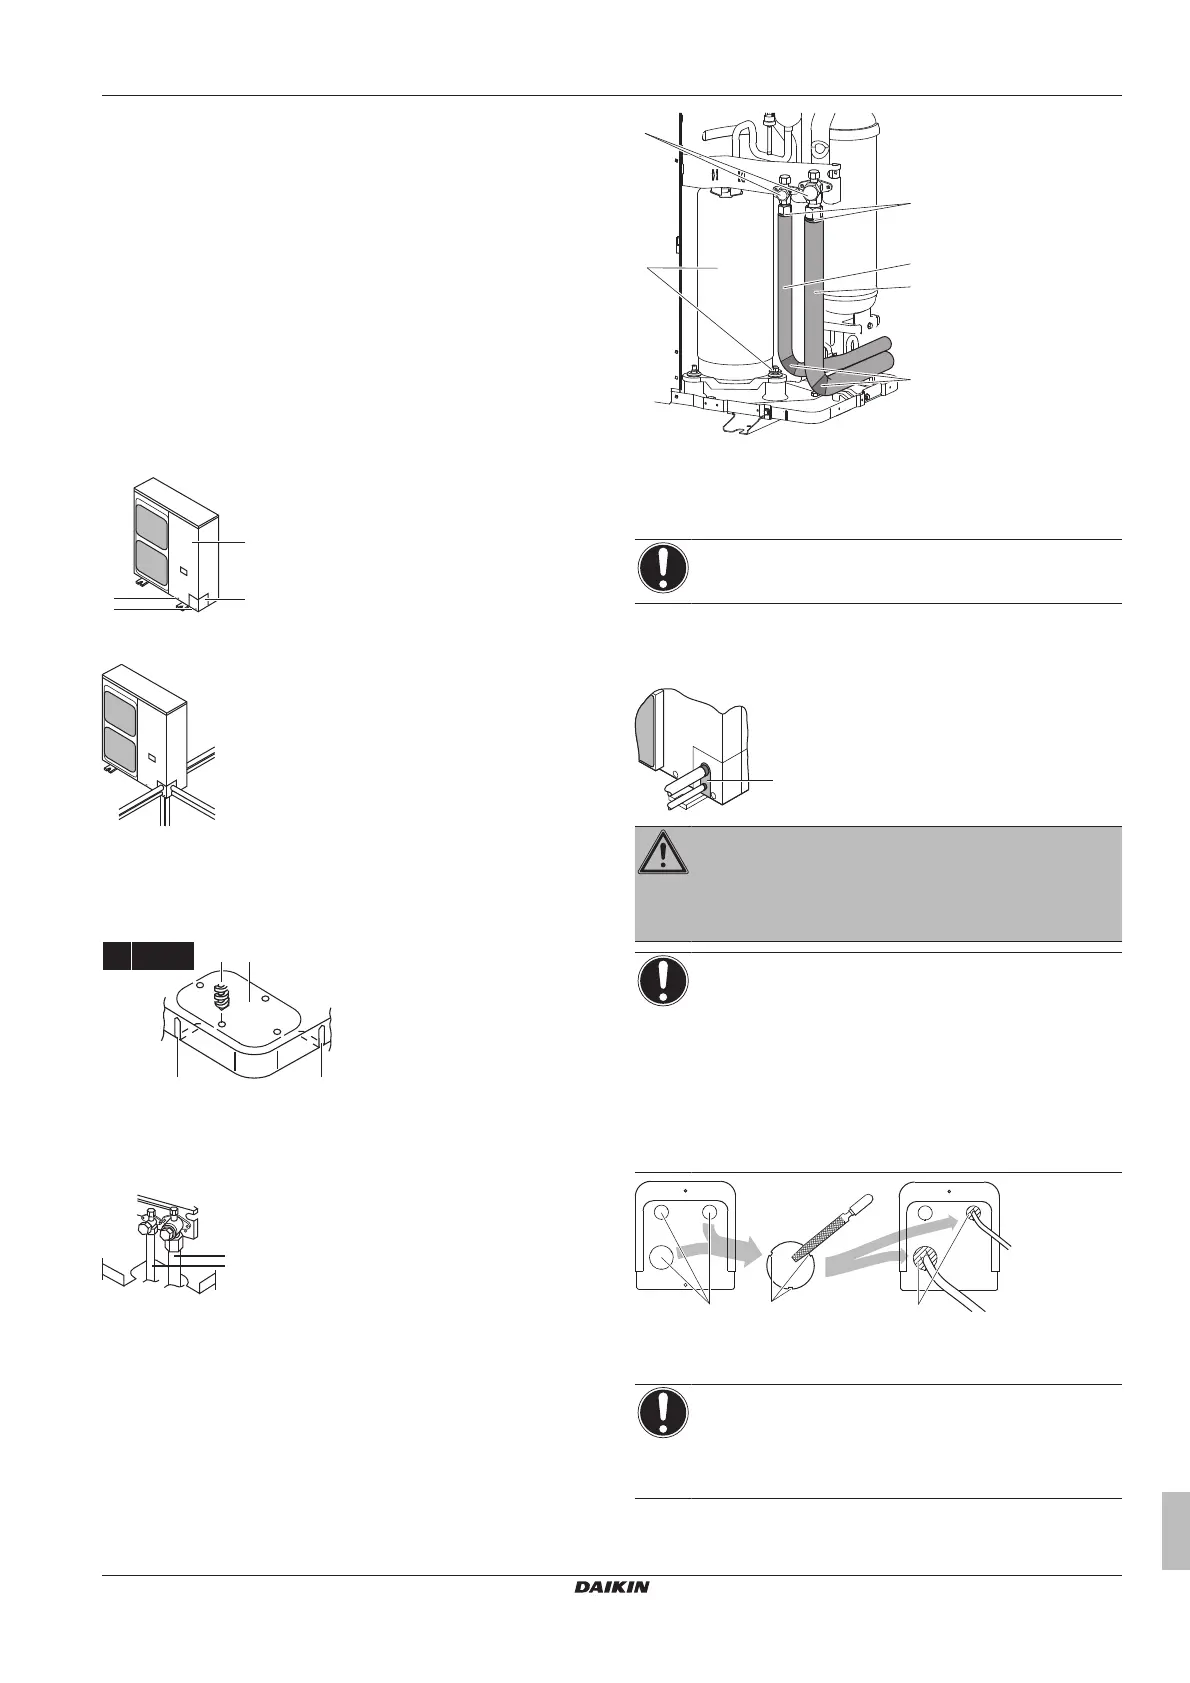
NOTICE
Precautionswhenmakingknockoutholes:
▪ Avoiddamagingthecasing.
▪ After making the knockout holes, we recommend you
remove the burrs and paint the edges and areas
aroundtheedgesusingrepairpainttopreventrusting.
▪ When passing electrical wiring through the knockout
holes, wrap the wiring with protective tape to prevent
damage.
a Knockouthole
b Burr
c Sealantetc.
NOTICE
Make sure to open the stop valves after installing the
refrigerantpipingand performing vacuumdrying.Running
the system with the stop valves closed may break the
compressor.