Dakewe (Shenzhen) Medical Equipment Co., Ltd
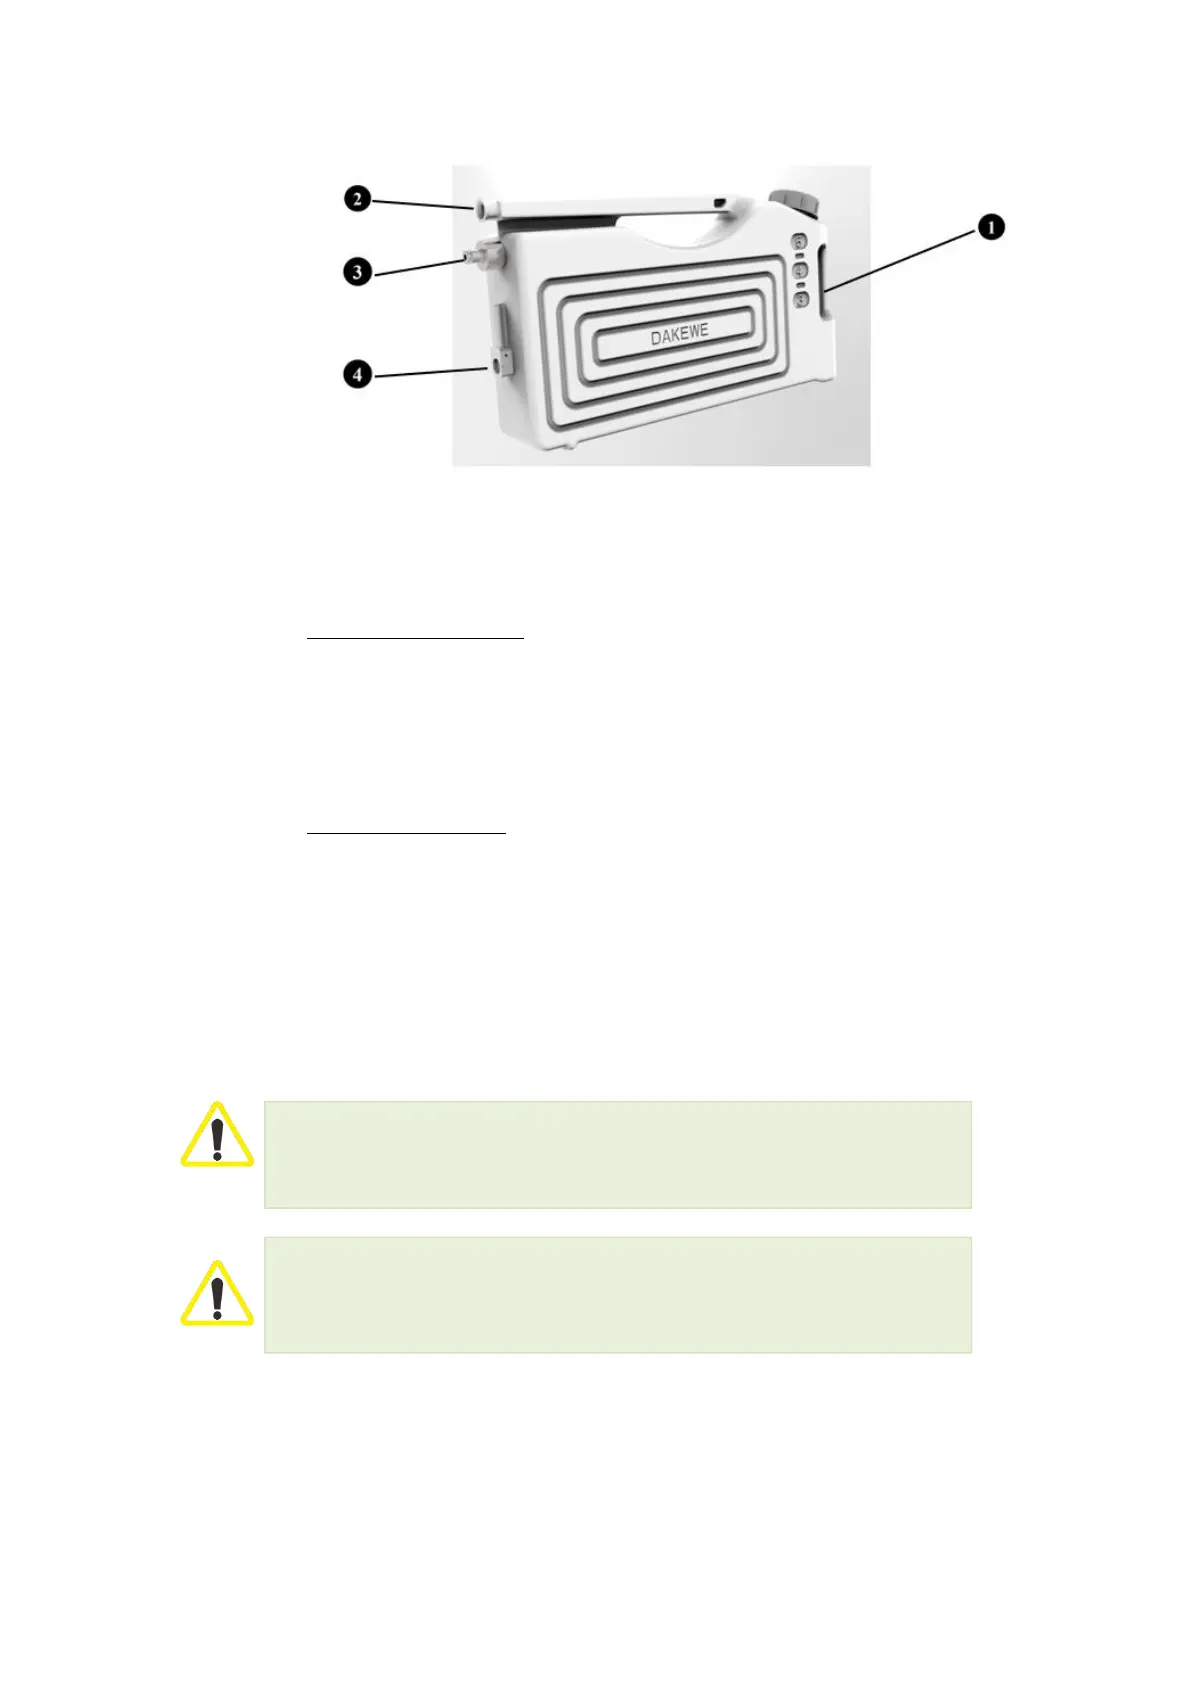
Pull out the reagent bottle
Hold the reagent bottle’s handle with the front end recessed (Figure 21-1). Pull
the bottle out halfway. Grasp the horizontal handle (Figure 21-2) on the top of
the bottle and use both hands to pull out firmly to remove the bottle from the
reagent compartment.
Insert the reagent bottle
Hold the horizontal handle at the top of the bottle with one hand, and hold the
reagent bottle’s handle with the front end and recessed with the other hand.
Insert the bottle in the middle of the site marking in front of the reagent
compartment. When you hear the shrapnel action sound of “click”, you can
observe the blue light transmitted from the rear of the bottle. At this point, the
software will show that the reagent bottle is in a colored state and installed
in place.
Ensure that all reagent bottles are installed in place before the use of the device, after
reagent replacement and after maintenance.
Use only the reagent bottles that come with the HP300 Plus.
The connection interface of the reagent bottles needs to be pushed in place until you hear
a click.
4.3.11 Reagent Bottle Label
The standard configurations of HP300 Plus include a set of sticky labels to
adhere to the reagent bottles for identification of different reagents.
Make sure that the surface of the reagent bottle is clean and dry prior to affix