m2 Version 3.11 Manual RS.8A.N5.02 © Danfoss 10-2007 21
Defrosts per This eld only becomes active if ‘Master’ is selected in the
Day previous eld. Enter the amount of defrosts per day
required, then whether the times are to be set ‘Manually’
or ‘Auotmatically’.
Manual - all defrost times entered manually.
Auto - select the number of defrosts per day, enter
the rst defrost time, then the remaining
times will be calculated for a 24 hour period.
Day Night Select either ‘Yes’ or ‘No’ depending on whether the Day/
Control Night Control on the controller is to be activated of not.
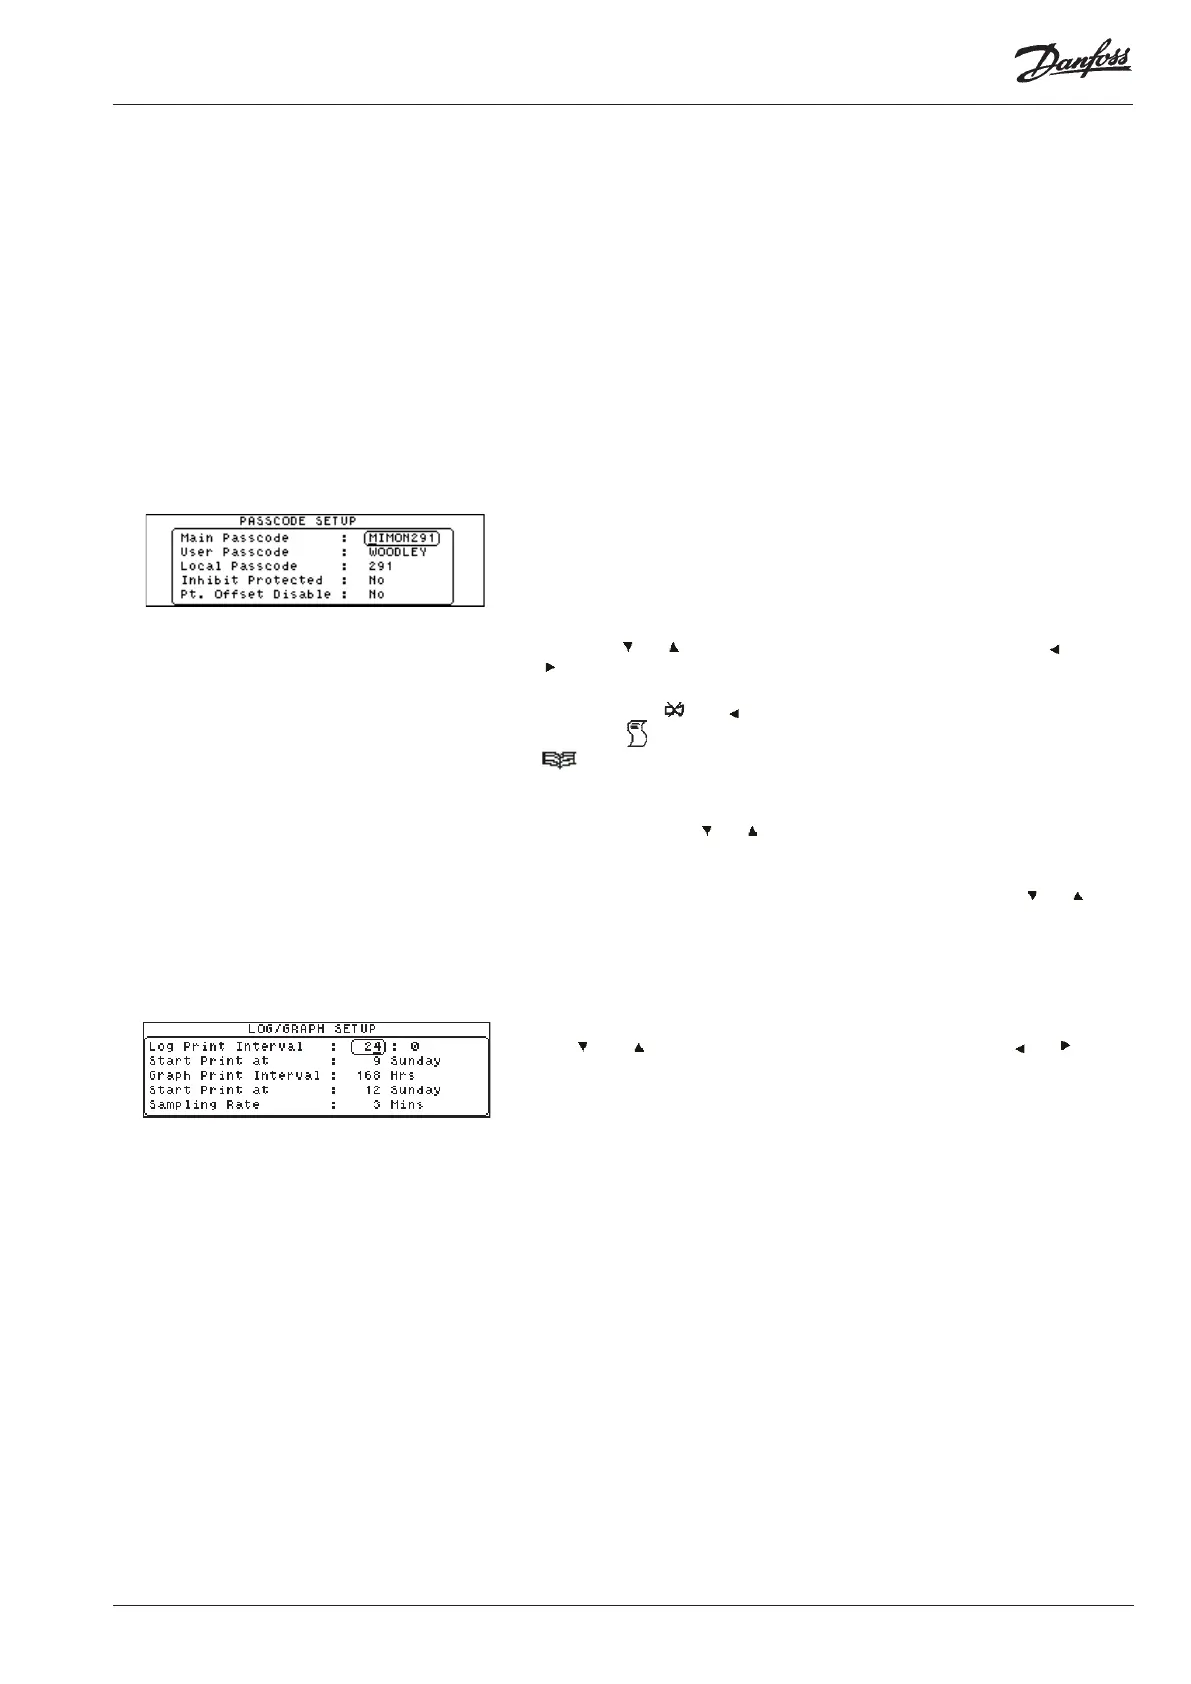
This option allows you to change the three dierent levels of passcodes – Main,
Local and User, also the Inhibit Protection can be activated. The Main and Local
Passcode provides access to all the setup screens. The User Passcode only
provides access to the Time/Date setup.
From the Setup Menu, select the Password Setup option.
Use the ‘↵’ to highlight the passcode to be modied. Type in the passcode
using the ‘ ’ or ‘ ’ keys to cycle through the character list and the ‘ ’ or ‘
’ key to move the cursor left or right respectively. N.B. Local passcode is
numeric only.
You can use the ‘ ‘ and ‘ ’ keys together to delete the character before the
cursor and ‘ ‘ to change case. When the passcode has been set, press ‘↵’ then ‘
’ to return to the Setup Menu.
To set the Inhibit Protection, use the ‘↵’ key to highlight the 'Inhibit Protected'
eld, then using the ‘ ’ or ‘ ’ keys to select either 'Yes' or 'No'.
To set the Point Oset Passcode Disable, use the ‘↵’ key to highlight the ‘Pt
Oset Disable’ eld in the Passcode Setup menu, then using the ‘ ’ or ‘ ’ keys
select either ‘Yes’ or ‘No’.
To set the print frequencies, select the Log/Chart Frequency option from the
Setup Menu.
Use the ‘↵’ to highlight the eld to be modied. Type in the time required using
the ‘ ’and ‘ ’ keys to cycle through the character list and the ‘ ’ or ‘ ’ key to
move the cursor left or right respectively.
Set the values as follows:
Log Print Interval Set this value to determine the interval between
log prints (hours : minutes).
Start Print at Enter the time in the day in which you require the
printing of the automatic log readings to start. (Only
points that have been set as Timed or ON will be
printed).
Graph Print Interval Set this value to determine the interval
between graph prints.
Start Print at Enter the time in the day that you require the
automatic graph to be printed. (Only points that
have been set as Timed or ON will be printed.)
Sampling Rate Set this eld to the frequency of sampling
required for the graphs.
Setting the Log/Chart Frequency
Password Setup
Point Oset Passcode Protection