EasyManuals Logo

Datamax E-Class Mark II User Manual

Datamax E-Class Mark II
58 pages
To Next Page IconTo Next Page
To Previous Page IconTo Previous Page
Page #51 background imageLoading...
Page #51 background image
Appendix B – Ethernet Setup 45
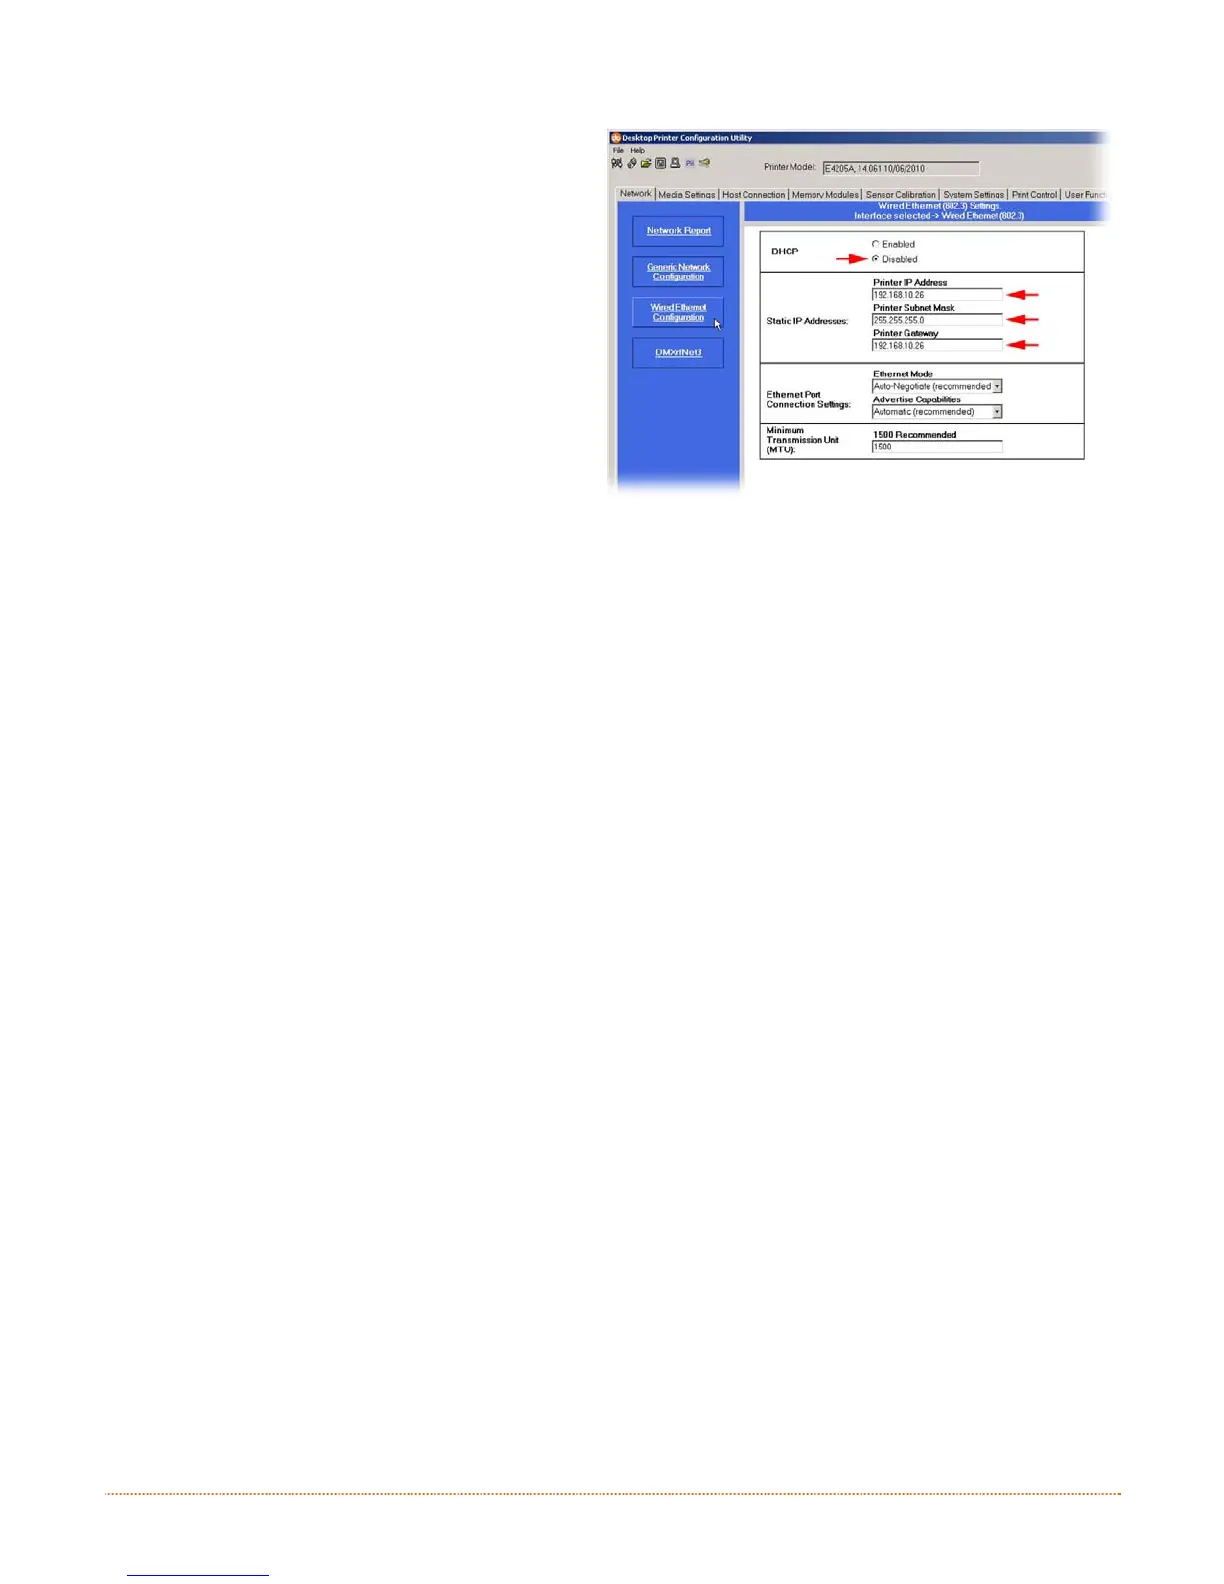
6) Click on the Wired Ethernet Configuration
button. First select the ‘Disabled’ radio
button. Then enter valid values (within your
network’s range) for the following fields:
- Printer IP Address
- Printer Subnet Mask
- Printer Gateway
7) Send the settings to the printer using the
Configure Printer toolbar button.
8) The printer will reset and will connect to
your network with the values you specified.
Once the previous steps have been successfully completed you may now use the IP Address to:
> Install a printer driver, and start printing from your Windows applications; see Section B.3.
-or-
> Browse to the internal web pages for advanced configuration; see Section B.2.

Other manuals for Datamax E-Class Mark II

Questions and Answers:

Question and Answer IconNeed help?

Do you have a question about the Datamax E-Class Mark II and is the answer not in the manual?

Datamax E-Class Mark II Specifications

General IconGeneral
Resolution203 dpi (8 dots/mm) or 300 dpi (12 dots/mm)
Operating Temperature40°F to 95°F (4°C to 35°C)
Storage Temperature-40°F to 140°F (-40°C to 60°C)
Print MethodDirect Thermal / Thermal Transfer
Max Print Speed6 inches per second (ips)
Memory8 MB DRAM
InterfaceSerial, Parallel, USB
Media TypeLabels, Tags, Receipts
Media Width0.75" (19 mm) to 4.65" (118 mm)
Media Thickness0.0025 to 0.008 inches (0.0635 to 0.2032 mm)
Power Requirements100-240 VAC, 50-60 Hz

Related product manuals