G3
™
User’s & Installation Manual
7/October/2020
21
2.5 VIP Installation (Optional)
If your G3™ has come with the optional Vehicle Interface Portal™
(VIP™) then use the following installation instructions.
WARNING
• BeforeconnectingtheVIP™,ensurealldevices,
including the motor vehicle and radar are powered o.
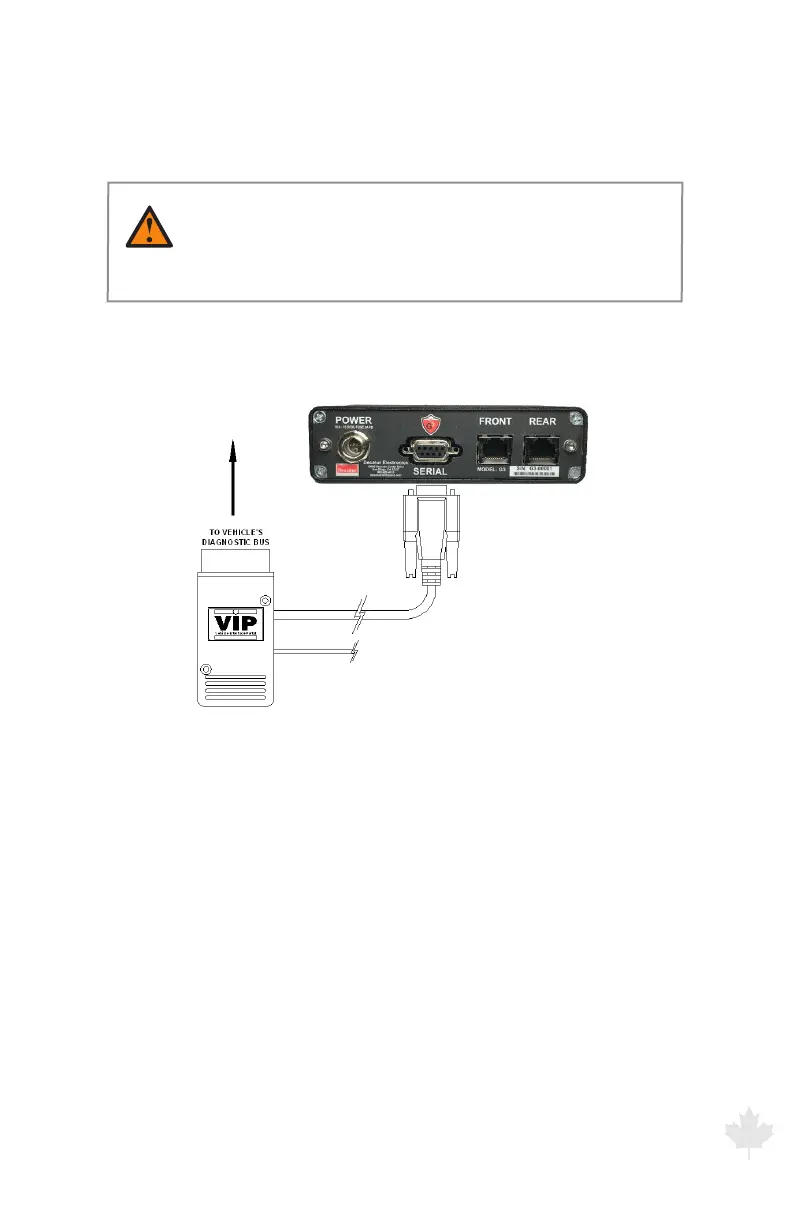
2.5.1 Connecting to the Radar
Connect the VIP's™ communications cable to the SERIAL port
located on the back panel of the radar unit.
Figure 2.5.1a
VIP connection to Radar
2.5.2 Connecting to the On-Board Diagnostic Port (OBD II)
Connect the VIP™ to the motor vehicle’s On-Board Diagnostics
port. (Refer to your owner’s manual for the location of your motor
vehicle's OBD-II port.)
In some motor vehicles the clearance between where the
diagnostics port is located and the bottom of the dash is very close
and can cause the port and VIP™ to be bumped by the ocer’s
leg when getting into the motor vehicle. In those cases, Decatur
oers a two-foot right angle extension cable (S769-15) to allow the
VIP™ to be relocated away from the port so as not to be damaged.
Contact your Decatur Sales Representative for more information on
this product.