055
055
/
CHAPTER 10: ACTIVE-VENTING ASSEMBLY
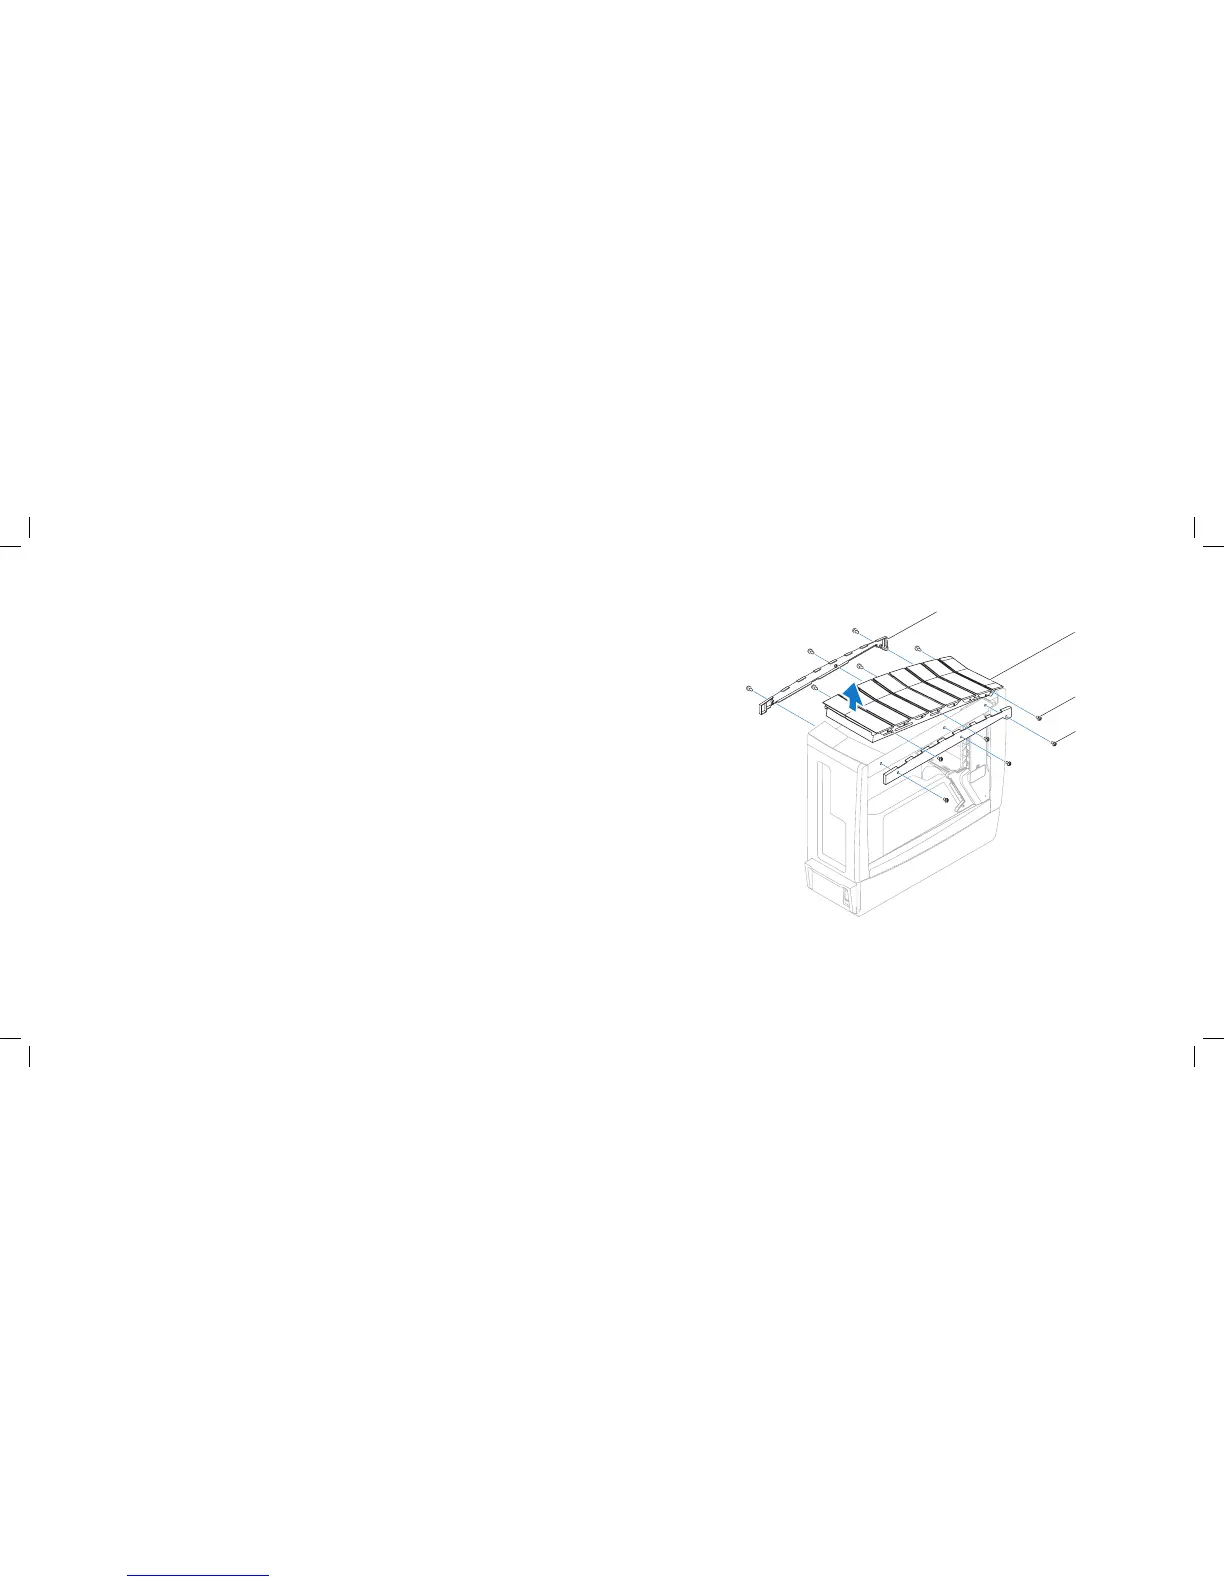
Removing the Active-Venting Assembly
Follow the instructions in “Before You Begin” on page 1. 6.
Remove the left side-panel (see “Removing the Left Side-Panel” on page 2. 15).
Remove the right side-panel (see “Removing the Right Side-Panel” on 3.
page 16).
Disconnect the active-venting assembly cables from the connectors on the 4.
master I/O board.
Remove the six screws (three on each side) that secure the active-venting 5.
panels to the active-venting assembly.
Remove the active-venting panels.6.
Remove the six screws (three on each side) that secure the active-venting 7.
assembly to the chassis.
Pivot the back of the active-venting assembly upwards and lift it o the 8.
chassis.
1 active-venting panels (2) 3 active-venting assembly screws (6)
2 active-venting assembly 4 active-venting panel screws (6)