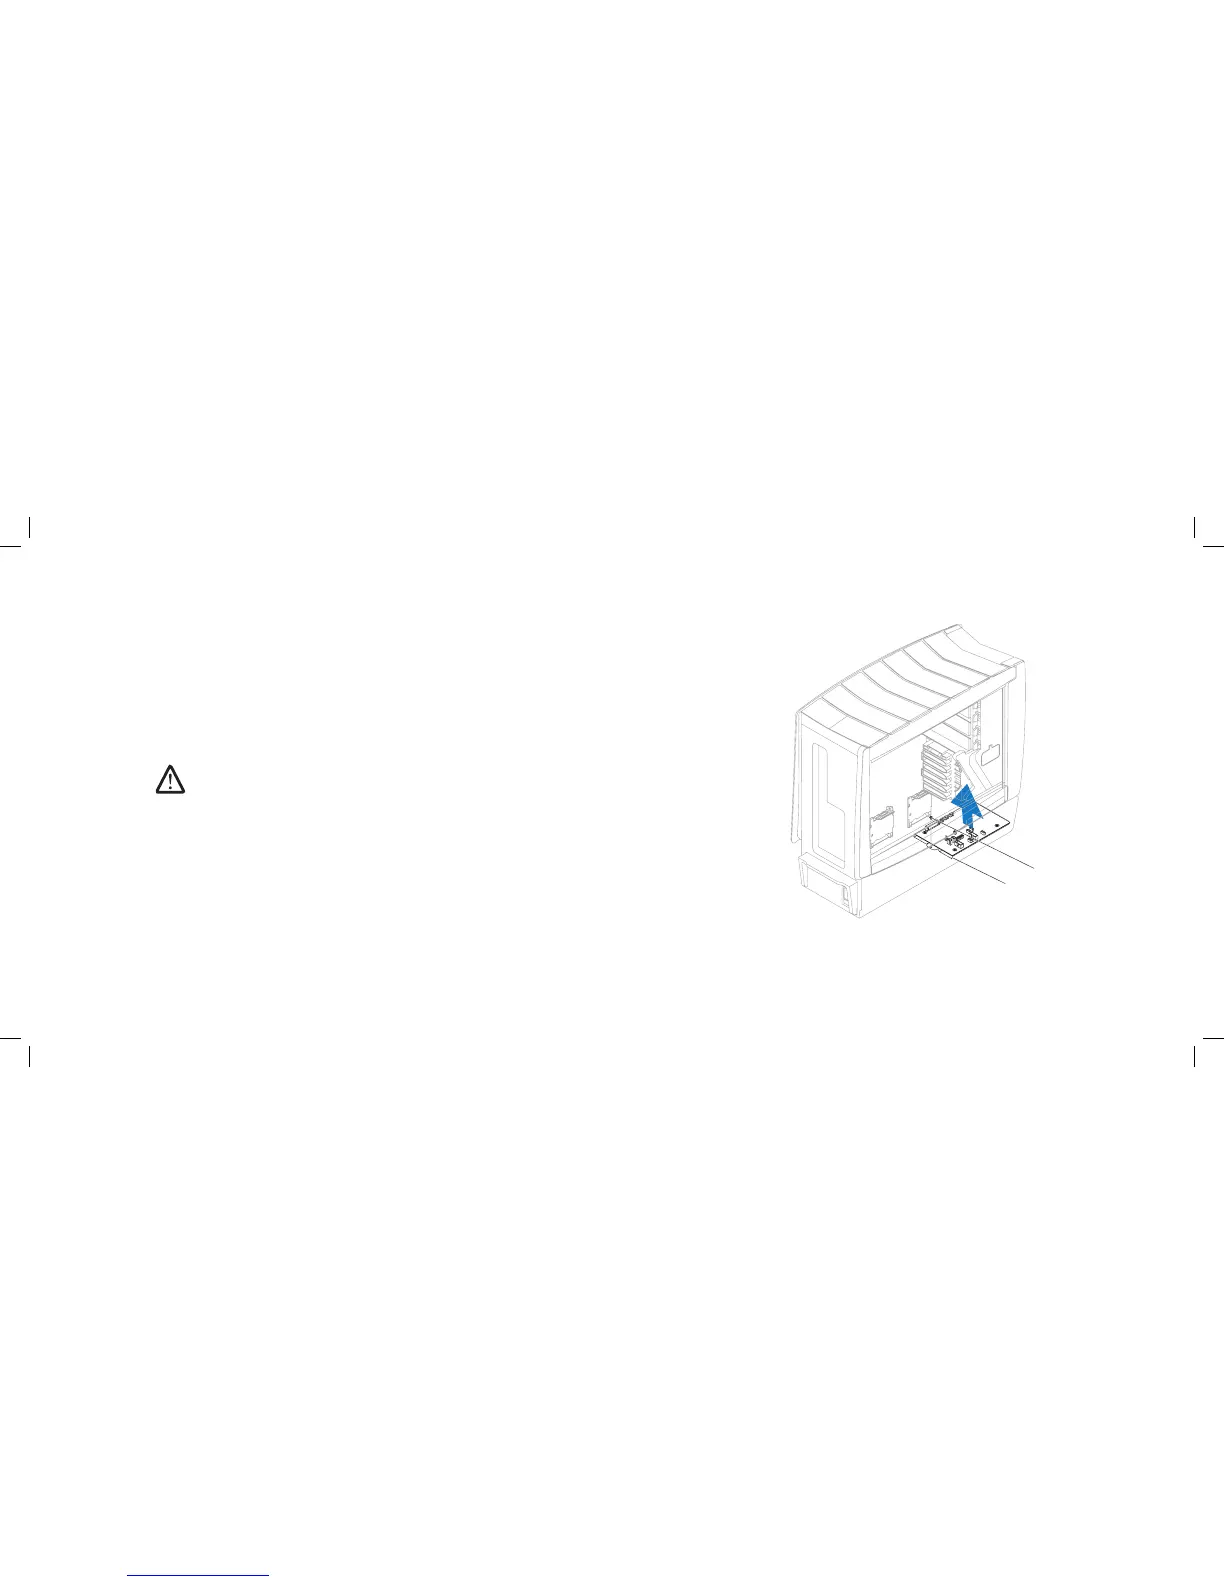
1 master I/O board tray 2 screw
Removing the Master I/O Board
Follow the instructions in “Before You Begin” on page 1. 6.
Remove the left side-panel (see “Removing the Left Side-Panel” on page 2. 15).
Remove the PCI shroud (see “Removing the PCI Shroud“ on page 3. 22).
Disconnect all cables from the master I/O board. Note the routing of all 4.
cables as you remove them so that you can re-route them correctly after
installing the new master I/O board.
Remove the screw that secures the master I/O board tray to the chassis.5.
Lift the master I/O board tray up and out of the chassis.6.
NOTE: Do not remove the master I/O board from the master I/O board
tray. e master I/O board tray is shipped together with the replacement
master I/O board.