6. Remove the solid-state drive from M.2 slot one.
7. Remove the solid-state drive from M.2 slot two.
8. Follow the procedure from step 1 to step 4 in Removing the hard drive, if applicable.
9. Remove the solid-state drive from M.2 slot three, if applicable.
10.Remove the
solid-state drive from M.2 slot four, if applicable.
11. Remove the solid-state drive interposer board, if applicable.
12. Remove the rear-I/O cover.
13. Remove the
computer base.
14. Remove the heat-sink assembly.
15.Remove the left power-adapter port.
16.Remove the graphics card.
17. Remove the processor.
About this task
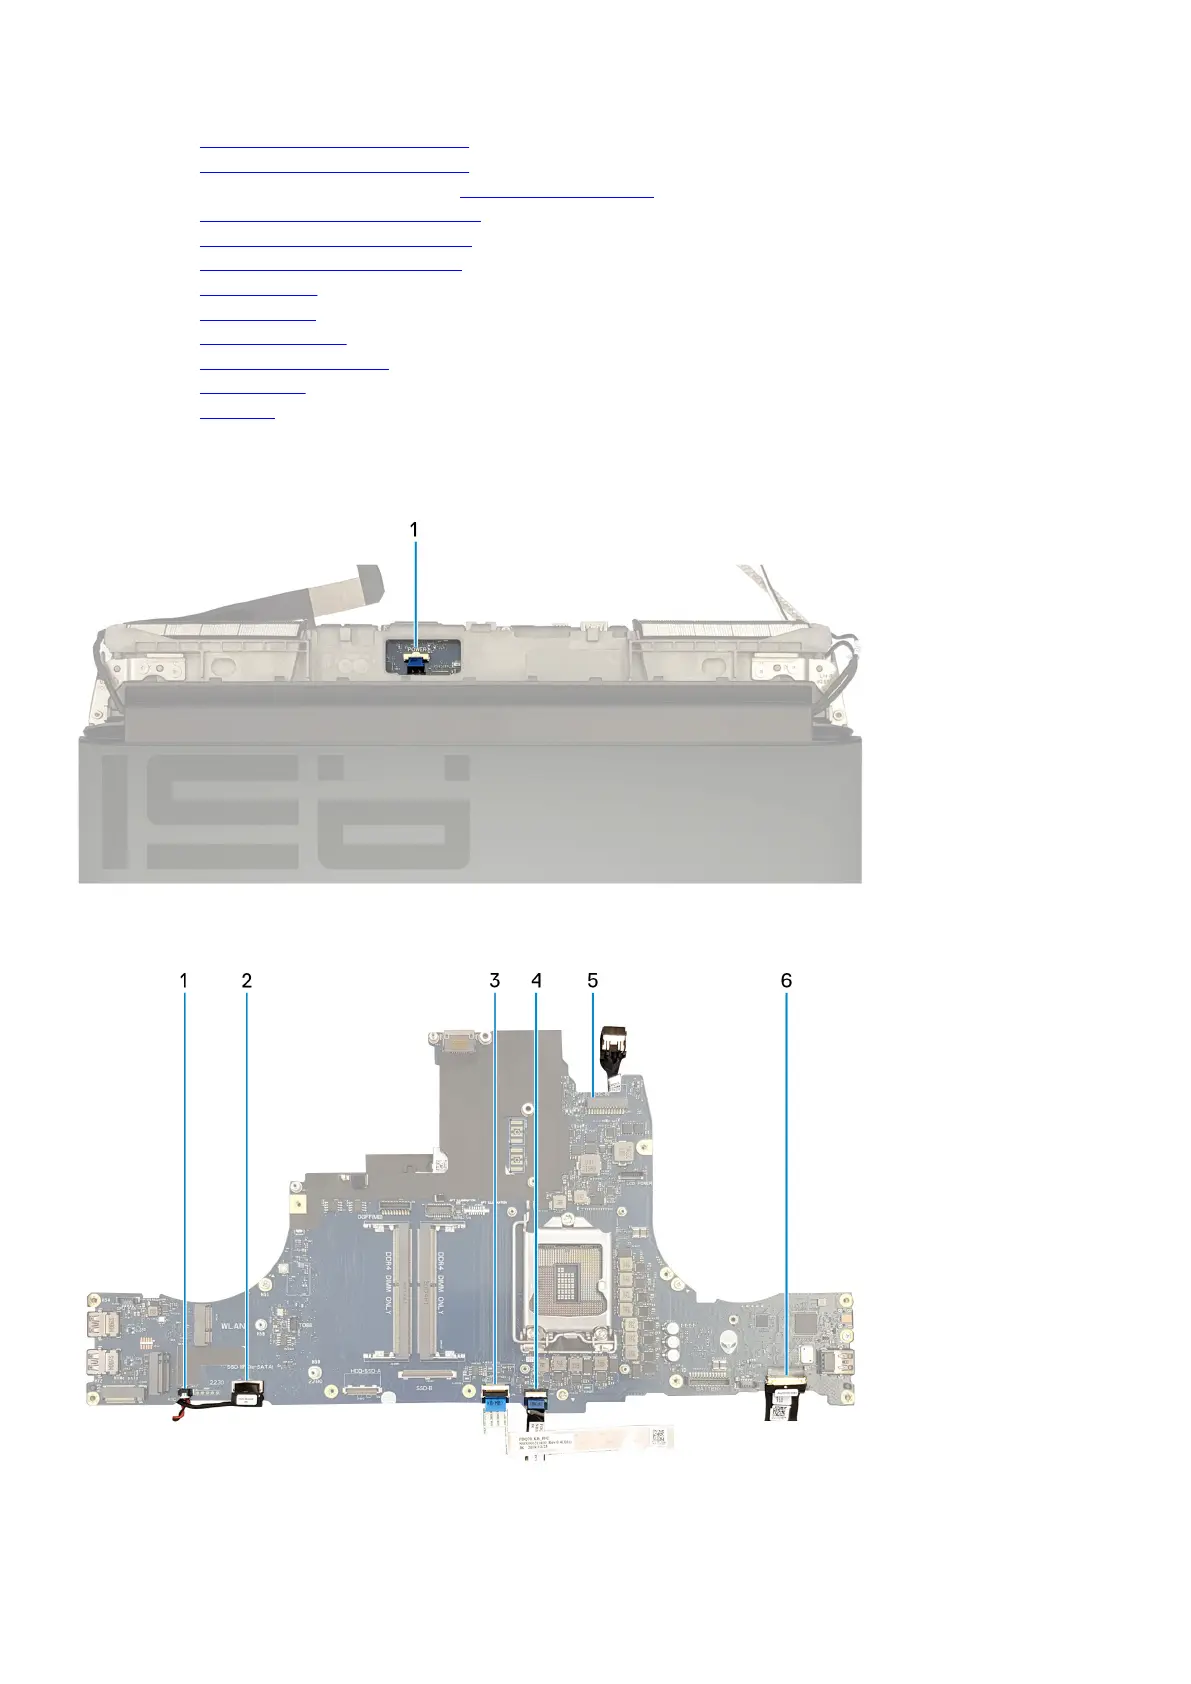
The following image indicates the connectors on the bottom side of your system board.
1. Power-button board cable
The following image indicates the connectors on the top side of your system board.
1.
Coin-cell battery cable 2. Card-reader board cable
66