Removing and Replacing Parts 4-19
([SDQVLRQ&DUGV
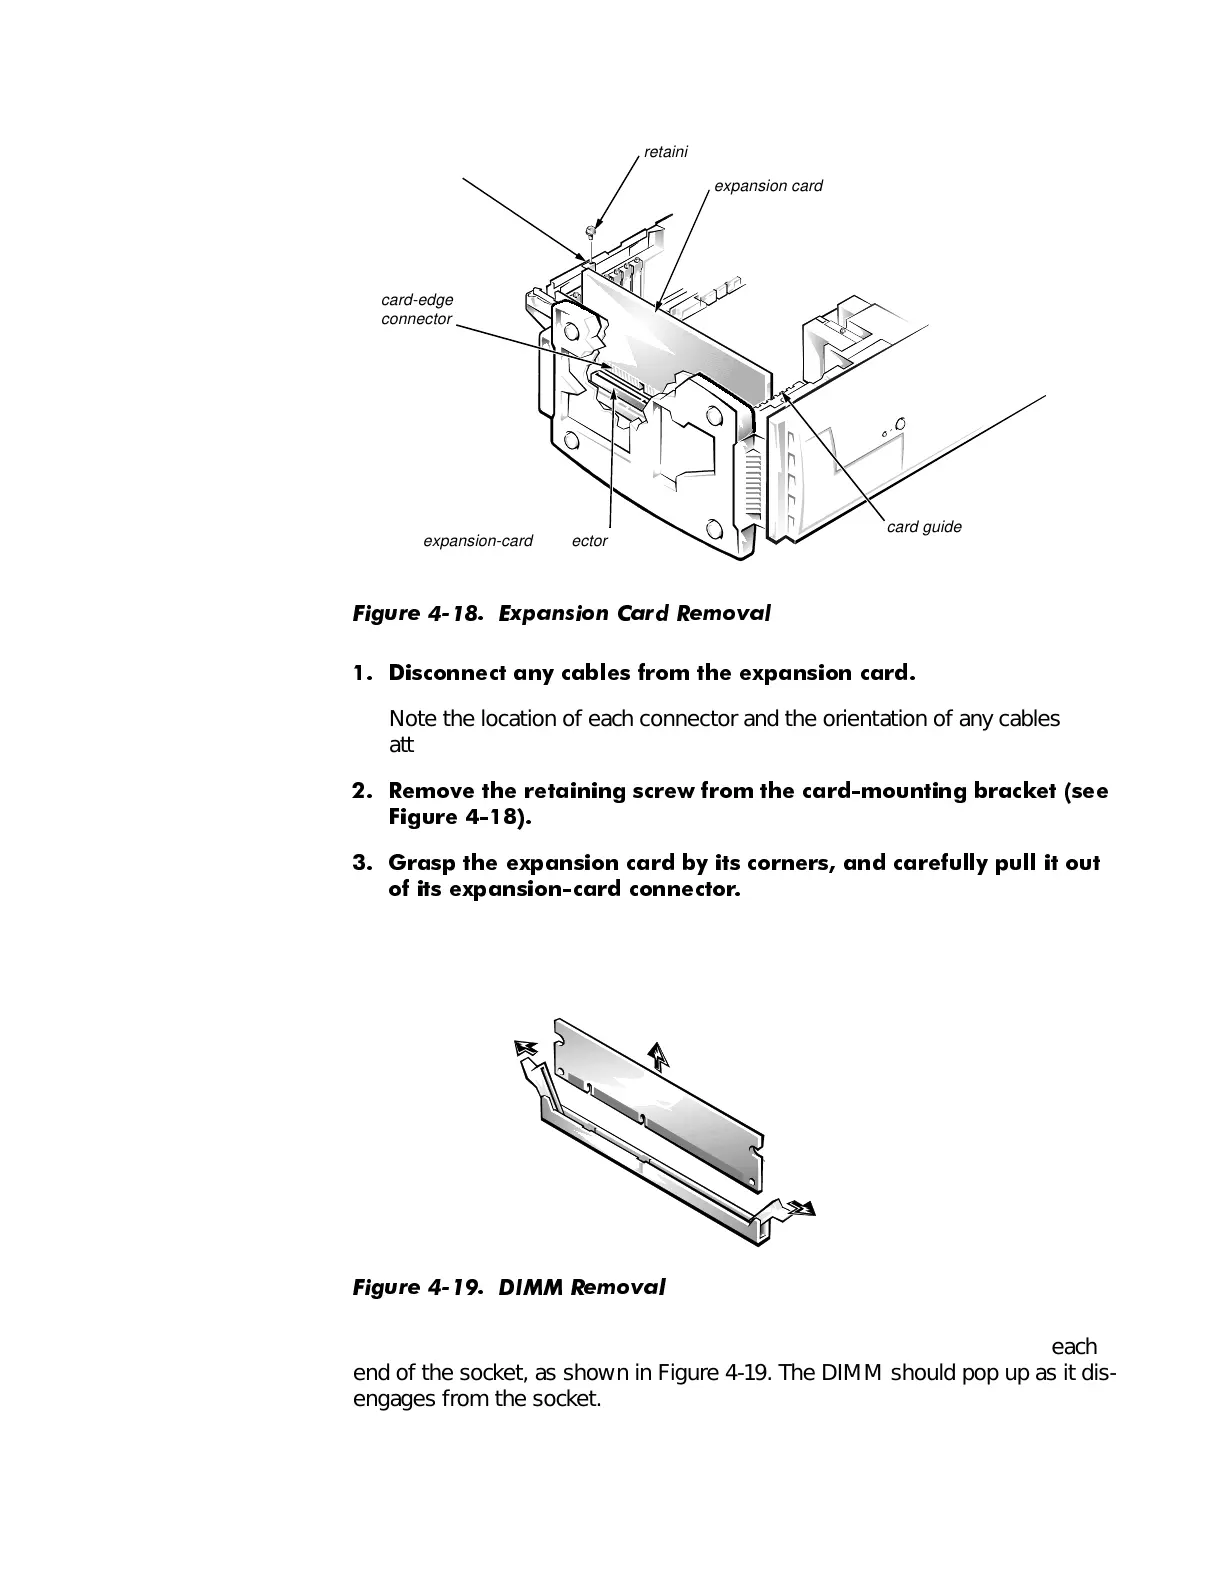
)LJXUH ([SDQVLRQ &DUG 5HPRYDO
'LVFRQQHFW DQ\ FDEOHV IURP WKH H[SDQ VLRQ FDUG
Note the location of each connector and the orientation of any cables
attached to the expansion card before disconnecting these cables.
5HPRYH WKH UHWDLQLQJ VFUHZ IURP WKH FDUGPRXQWLQJ EUDFNHW
VHH
)LJXUH
*UDVS WKH H[SDQVLRQ FDUG E\ LWV FRUQHUV DQG FDUHIXOO\ SXOO LW RXW
RI LWV H[SDQVLRQFDUG FRQQHFWRU
',00V
)LJXUH ',00 5HPRYDO
To remove a DIMM, press down and out on the plastic securing tabs at each
end of the socket, as shown in Figure 4-19. The DIMM should pop up as it dis-
engages from the socket.
 Loading...