Next steps
1. Install the hard-drive and optical-drive bracket.
2. Install the 3.5-inch hard-drive.
3. Install the 2.5-inch hard-drive.
4. Install the front bezel.
5. Install the side cover.
6. Follow the procedure in after working inside your computer.
Solid-state drive
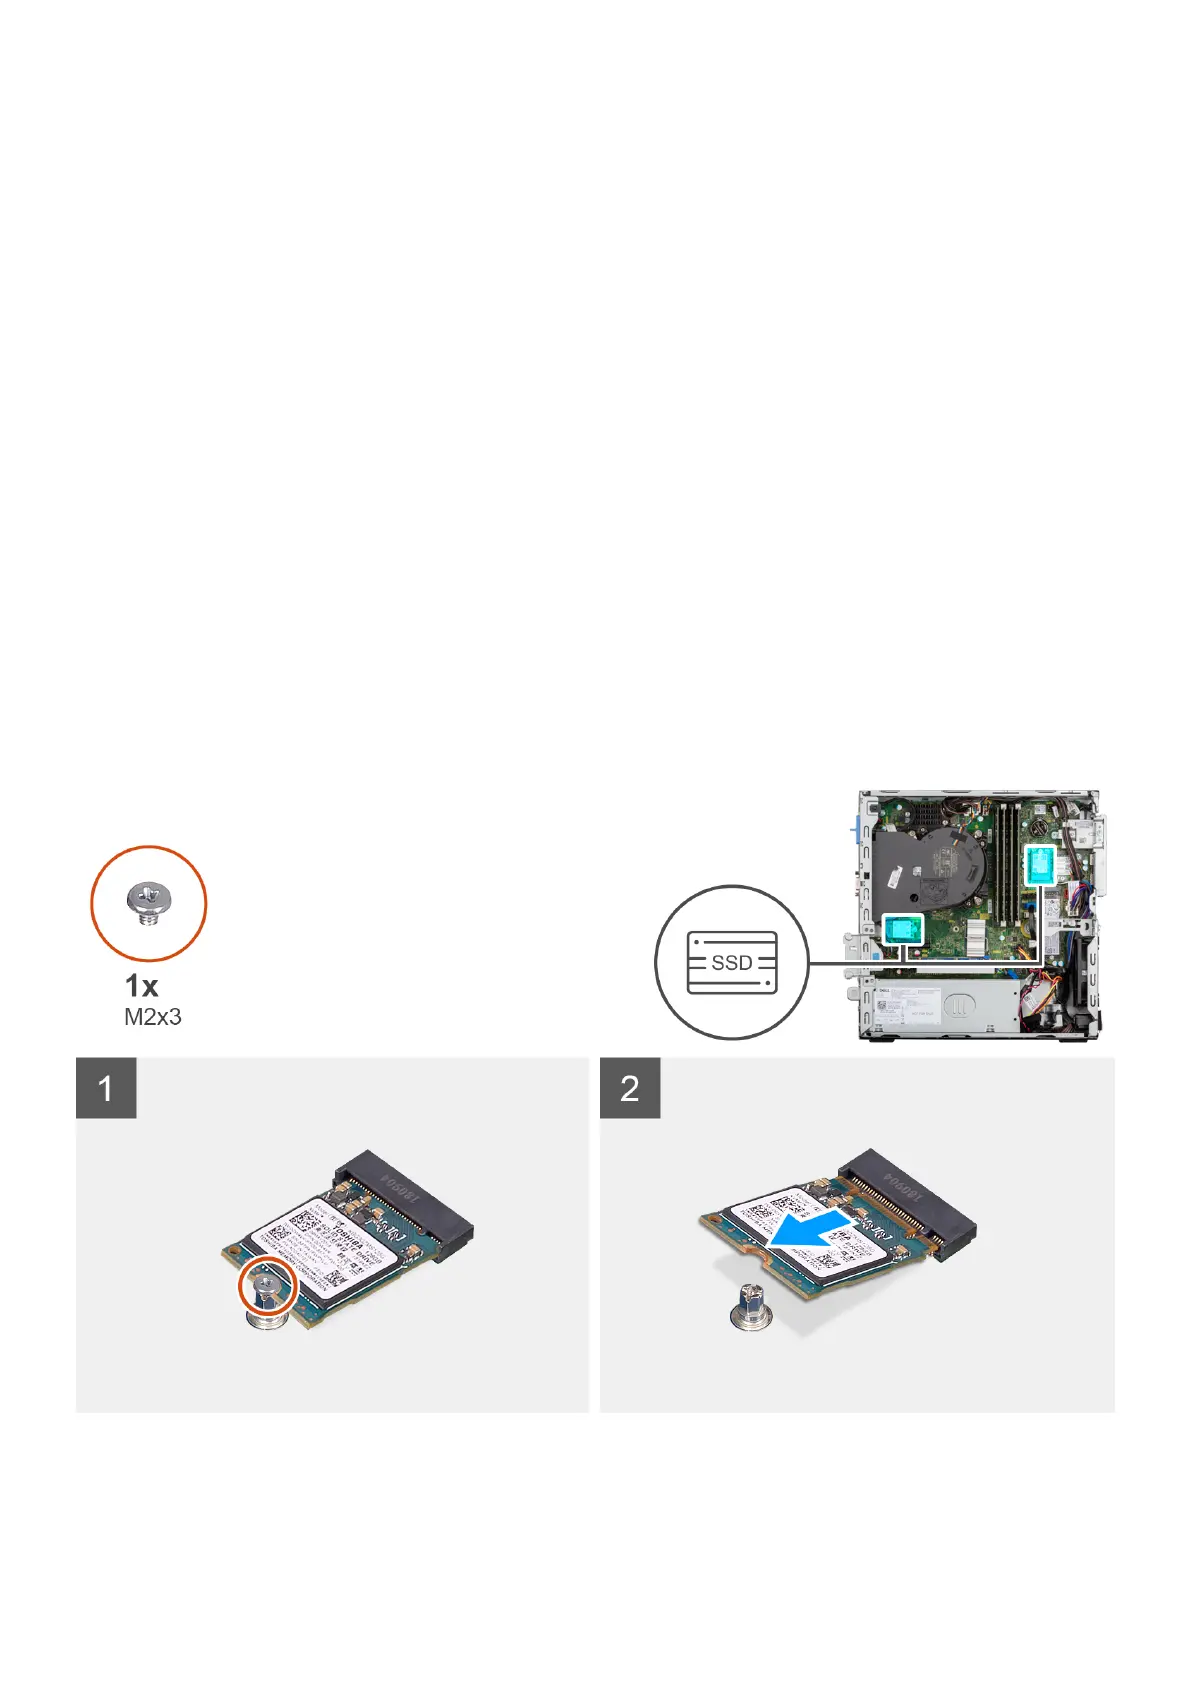
Removing the M.2 2230 solid-state drive
Prerequisites
1. Follow the procedure in before working inside your computer.
2. Remove the side cover.
3. Remove the front bezel.
4. Remove the 2.5-inch hard-drive.
5. Remove the 3.5-inch hard-drive.
6. Remove the hard-drive and optical-drive cage.
About this task
The following images indicate the location of the M.2 2230 solid-state drive and provide a visual representation of the removal
procedure.
Steps
1. Remove the single (M2x3) screw that secures the solid-state drive to the system board.
2. Slide and lift the 2230 solid-state drive from the M.2 card slot on the system board.
Removing and installing components
33