Steps
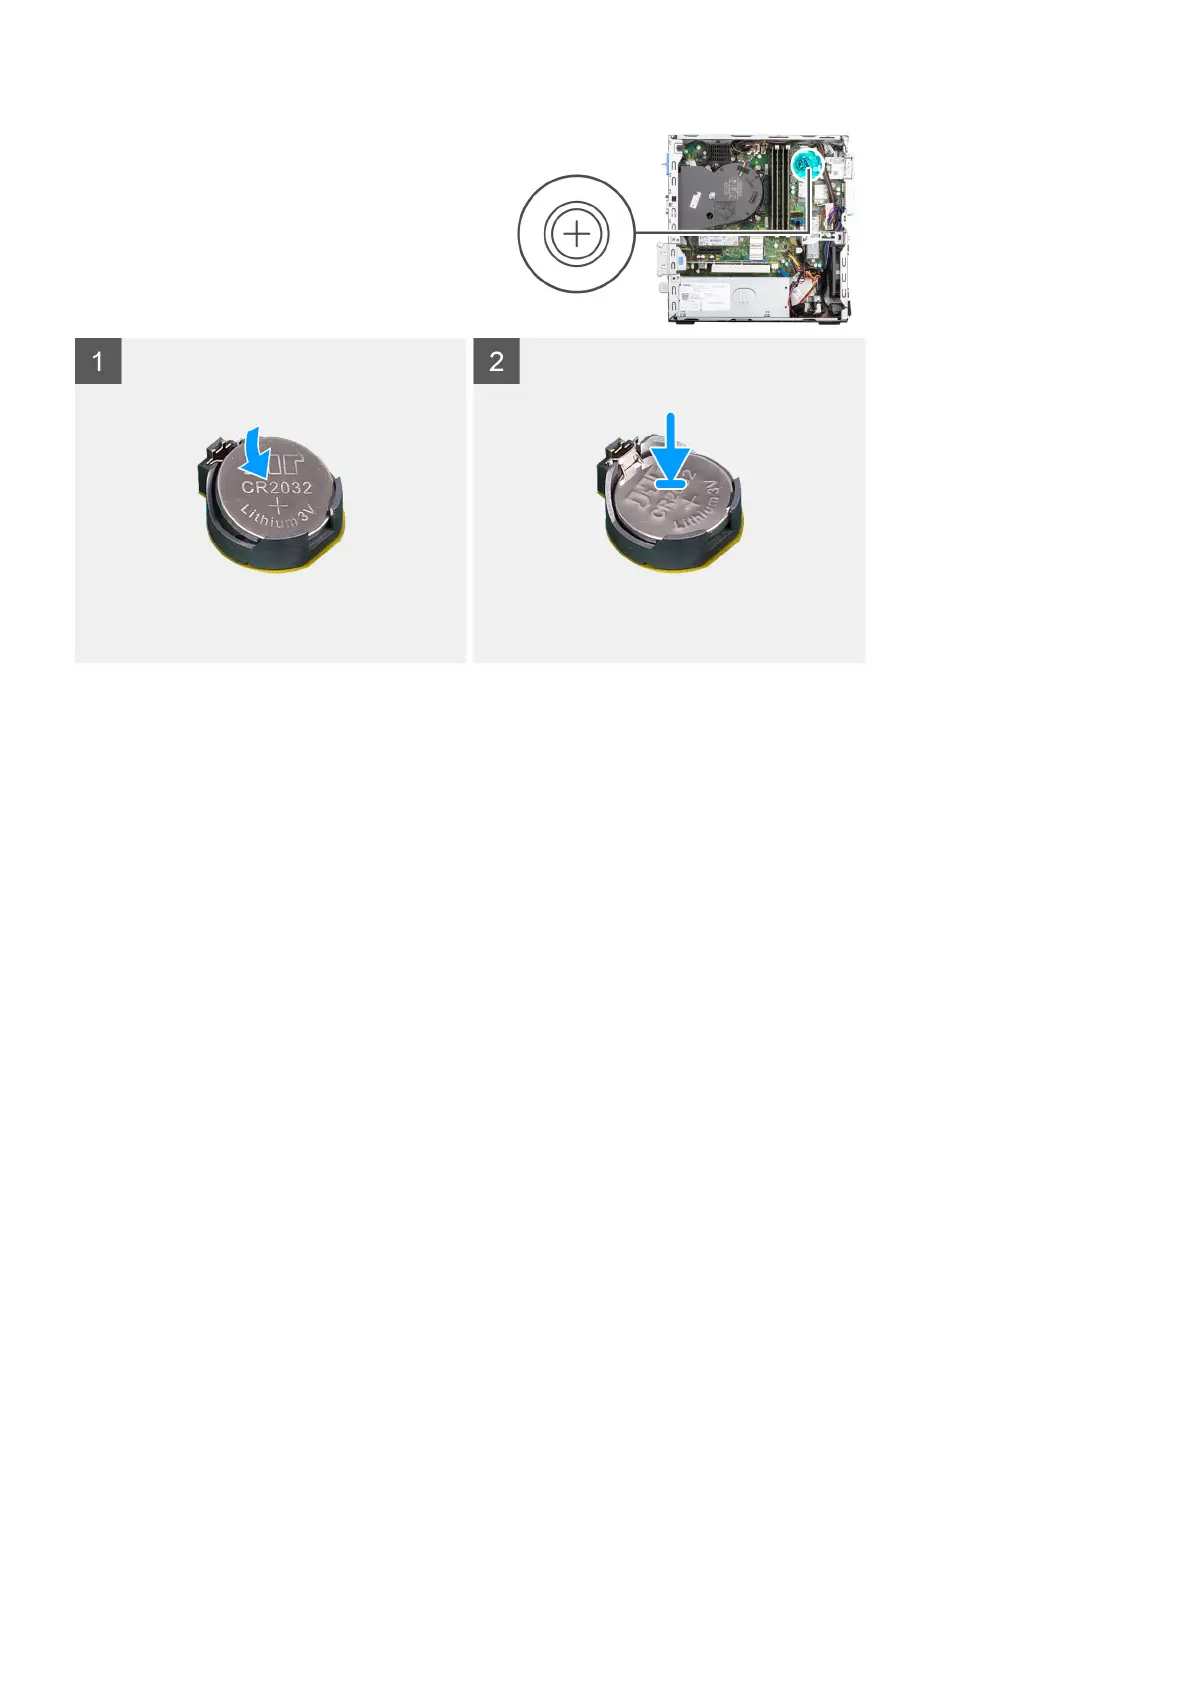
Insert the coin-cell battery into the socket with the positive side (+) label facing up and snap the battery in the socket.
Next steps
1. Install the hard-drive and optical-drive bracket.
2. Install the 3.5-inch hard-drive.
3. Install the 2.5-inch hard-drive.
4. Install the side cover.
5. Follow the procedure in after working inside your computer.
Power button
Removing the power button
Prerequisites
1. Follow the procedure in before working inside your computer.
2. Remove the side cover.
3. Remove the front bezel.
4. Remove the 2.5-inch hard-drive.
5. Remove the 3.5-inch hard-drive.
6. Remove the hard-drive and optical-drive cage.
About this task
The following images indicate the location of the power button and provide a visual representation of the removal procedure.
42
Removing and installing components