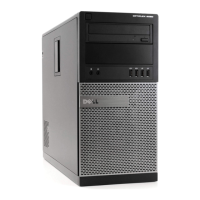
Figure 90. Installing the system board
5. Close the PCIe door and press it gently until it clicks in place on the chassis.
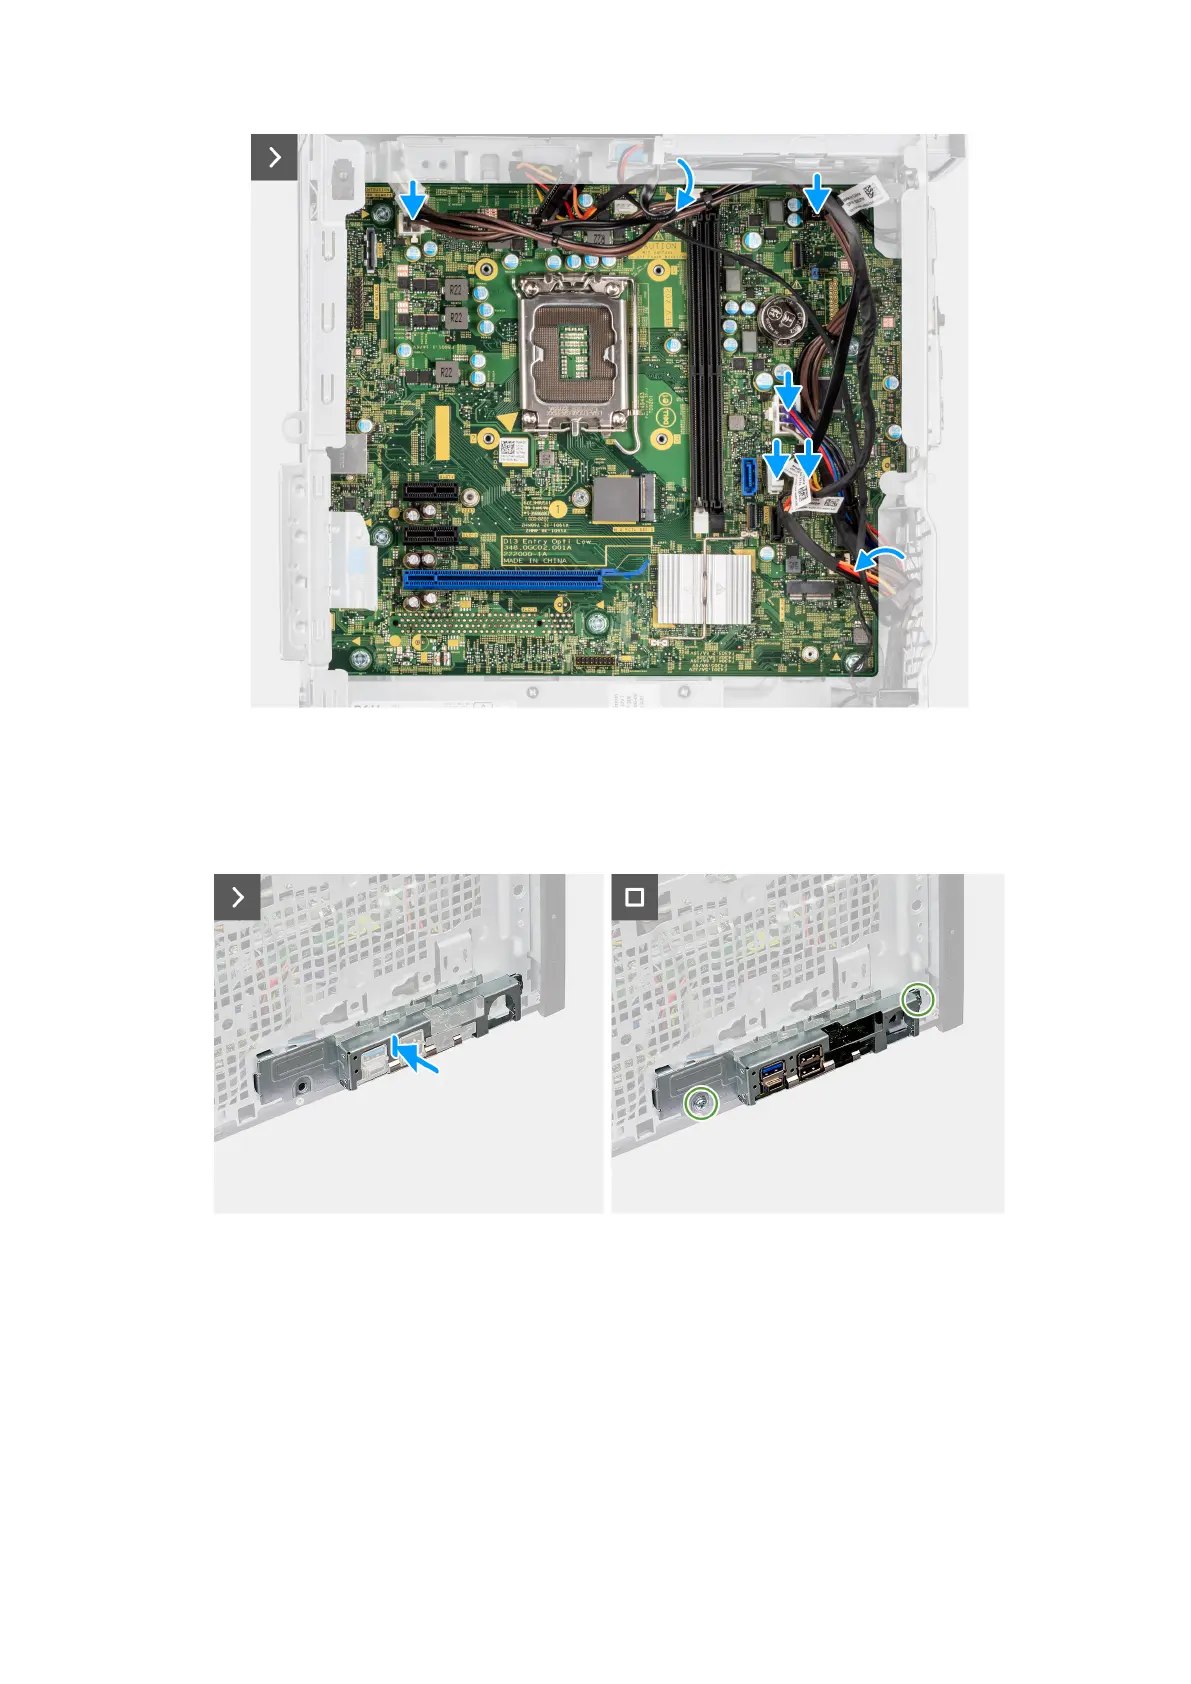
6. Align the tabs on the front I/O-bracket with the slots on the chassis.
7. Replace the two screws (#6-32) to secure the front I/O-bracket to the chassis.
Figure 91. Installing the system board
Next steps
1. Install the optional I/O modules, if applicable.
2. Install the processor.
3. Install the processor fan and heat-sink assembly.
4. Install the fan duct.
5. Install the external SMA antenna module, if applicable.
6. Install the power button.
7. Install the expansion card, if applicable.
114
Removing and installing Field Replaceable Units (FRUs)