S4048–ON installation
To install the S4048–ON switch, Dell Technologies recommends completing the installation procedures in the order that is in
this chapter.
Always handle the S4048–ON and its components with care. Avoid dropping the switch or its field replaceable units (FRUs).
NOTE: ESD damage can occur if components are mishandled. Always wear an ESD-preventive wrist or heel ground strap
when handling the S4048–ON and its components. As with all electrical devices of this type, take all the necessary safety
precautions to prevent injury when installing this switch.
Topics:
• Unpack the switch
• Rack or cabinet hardware installation
• SFP+ and QSFP+ optic installation
• Switch power-up
• After S4048–ON installation
Unpack the switch
NOTE: Before unpacking the switch, inspect the container and immediately report any evidence of damage.
When unpacking the S4048-ON switch, ensure that the following items are included:
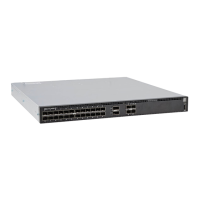
● One S4048-ON switch
● One RJ45 to DB-9 female cable
● Two sets of rail kits, no tools required
● One PSU—a second PSU is sold separately.
● One AC country or region-specific power cable
● S4048–ON Getting Started Guide
● Safety and Regulatory Information
● Warranty and Support Information
Unpack
1. Place the container on a clean, flat surface and cut all straps securing the container.
2. Open the container or remove the container top.
3. Carefully remove the switch from the container and place it on a secure and clean surface.
4. Remove all packing material.
5. Inspect the product and accessories for damage.
Rack or cabinet hardware installation
You may either place the switch on the rack shelf or mount the switch directly into a 19" wide, EIA-310- E-compliant rack—
four-post, two-post, or threaded methods. The ReadyRails™ system is provided for one 1U front-rack and two-post installations.
The ReadyRails system includes two separately packaged rail assemblies and two rails that are shipped attached to the sides of
the switch.
WARNING:
This is a condensed reference. Read the safety instructions in your Safety, Environmental, and
Regulatory information booklet before you begin.
5
16 S4048–ON installation
 Loading...