42 I/O Board
Replacing the I/O Board
1
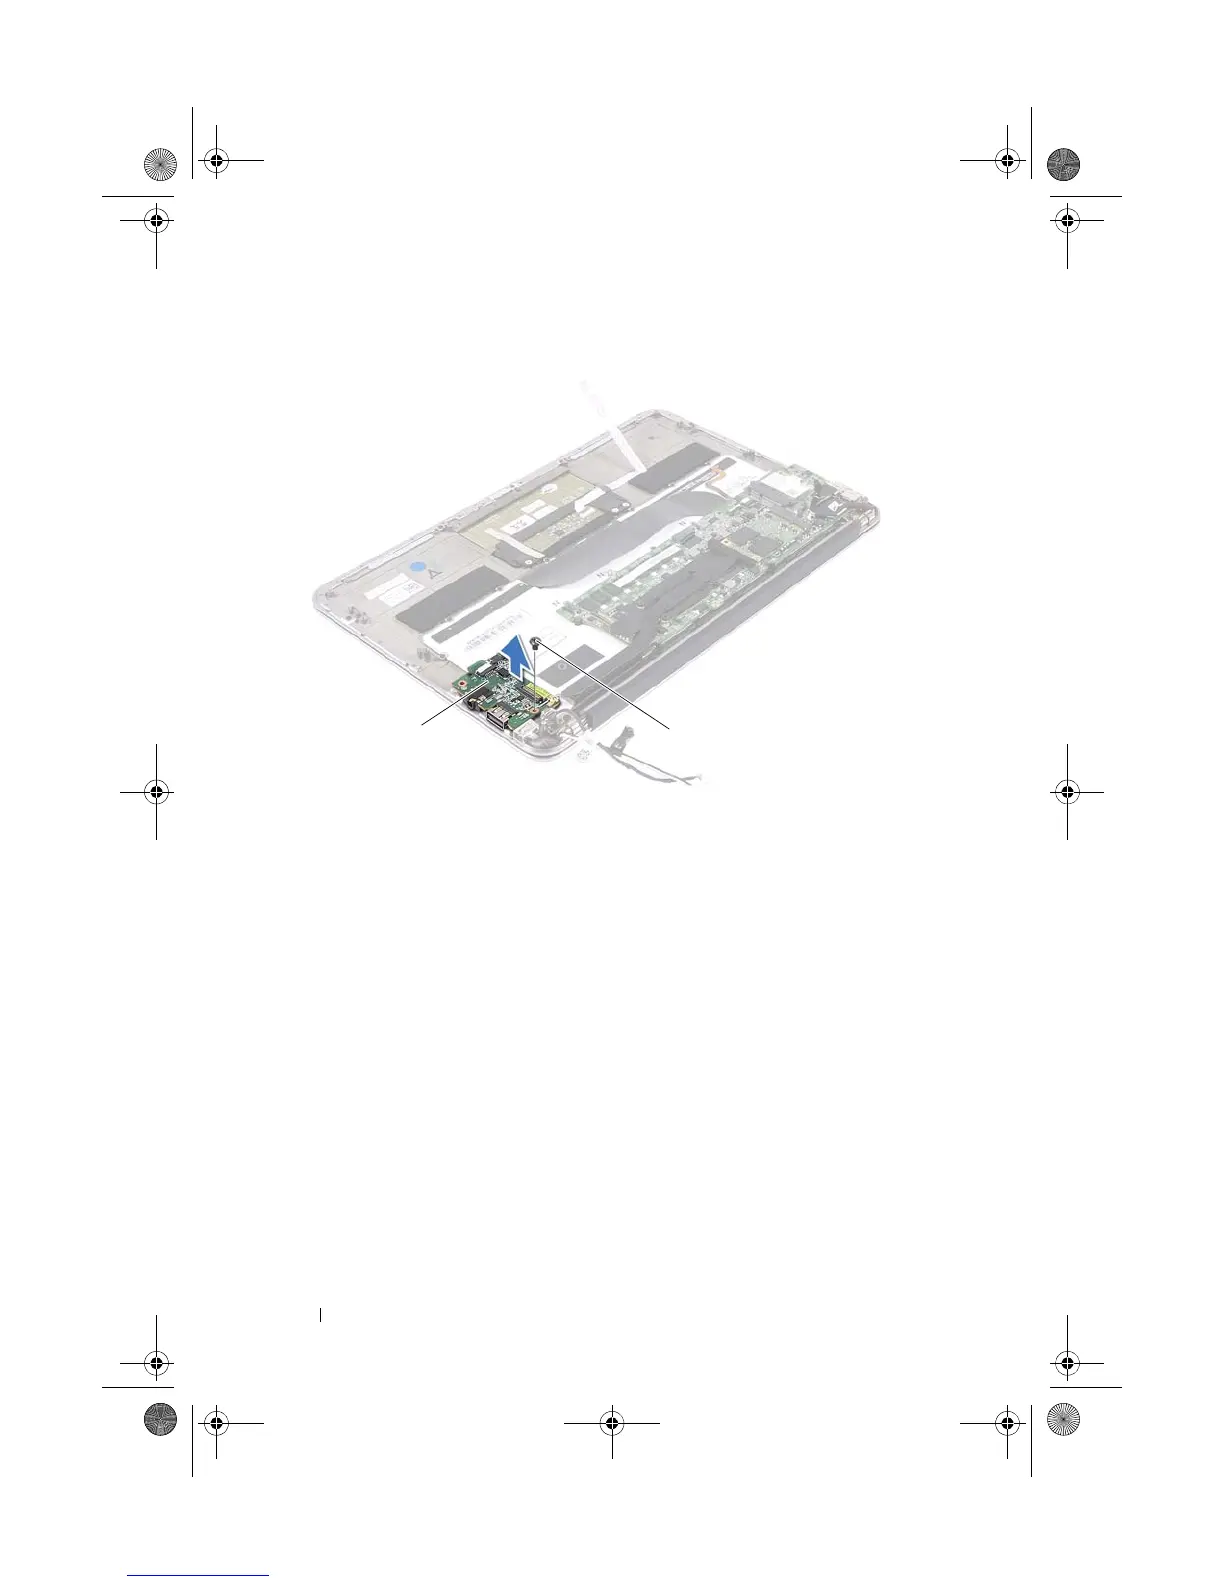
Align the screw holes on the I/O board with the screw holes on the palm-
rest assembly.
2
Replace the screw that secure the I/O board to the palm-rest assembly.
Postrequisites
1
Replace the power-adapter connector. See "Replacing the Power-Adapter
Connector" on page 39
2
Replace the fan. See "Replacing the Fan" on page 35
3
Replace the right speaker. See "Replacing the Speakers" on page 21
4
Replace the battery. See "Replacing the Battery" on page 18
5
Replace the base cover. See "Replacing the Base Cover" on page 14
1 I/O board 2 screw
Spyder_OM_Book.book Page 42 Monday, January 16, 2012 11:02 AM