60 Display Assembly
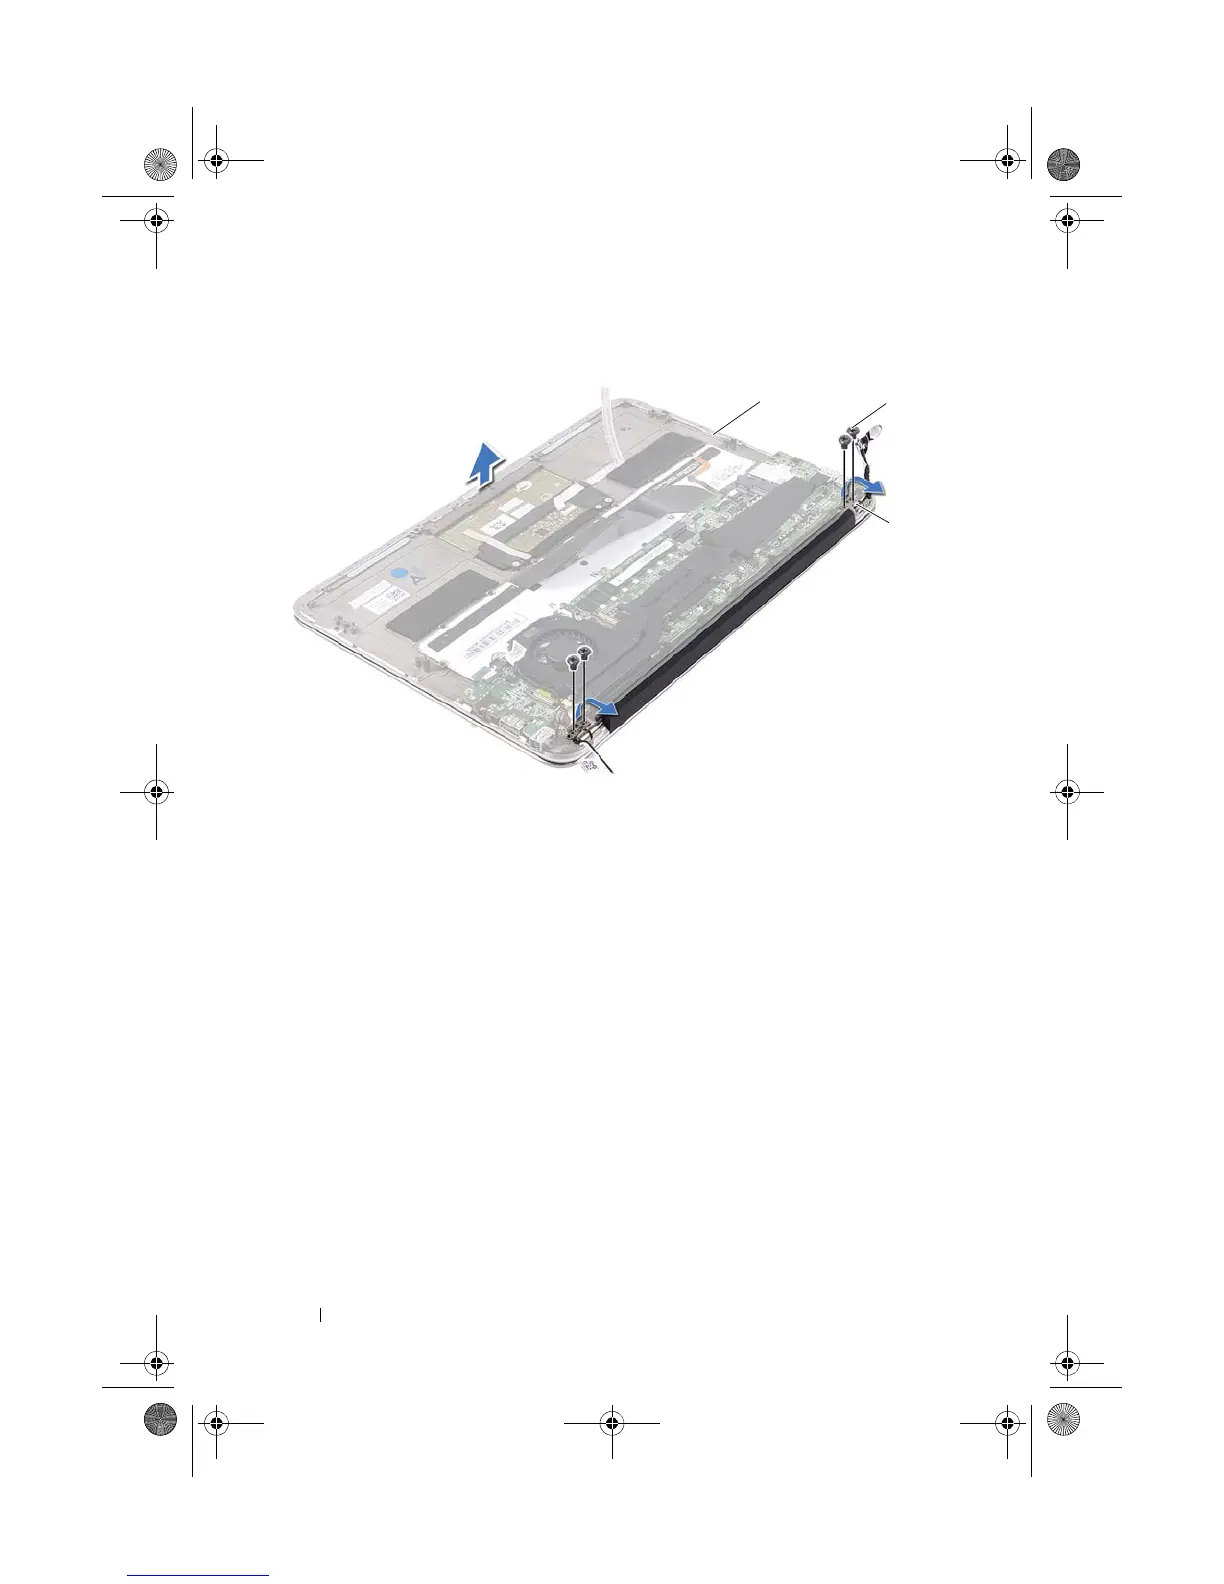
Replacing the Display Assembly
1
Slide and place the palm-rest assembly over the display assembly.
2
Press down on the display hinges and ensure that the screw holes on the
display hinges align with the screw holes on the palm-rest assembly.
3
Replace the four screws that secure the display assembly to the palm-rest
assembly.
4
Route the Mini-Card cables through the routing guides.
5
Slide the touchpad cable into the system-board connector and press down
on the connector latch to secure the keyboard cable.
6
Connect the Mini-Card cables to the connectors on the Mini-Card.
1 palm-rest assembly 2 screws (4)
3 display hinges (2)
Spyder_OM_Book.book Page 60 Monday, January 16, 2012 11:02 AM