13 CANopen Communication Card
DVP-PM Application Manual
13-22
2. Set A2 Keypad P3-00 as 0x01~0x04 (Node ID of servo drives)
3. Set up A2 Keypad P3-01 as 0x0403(1M bps) for baud rate setting. (2: 500 kbps; 4: 1Mbps) DVP-FPMC
currently supports communication speed up to 1M (default) and 500k.
z DVP-FPMC settings
When all parameter settings for CANopen in connected drives are completed, create a CANopen network
by DVP-FPMC as below:
1. Set the content of CR#500 as 1 to set up DVP-FPMC in A2 mode.
2. Set up CR#053 for DVP-FPMC node ID setting. Default: 127
3. Set the content of CR#010 as H’FFFF to scan all connected drives.
4. Read the content of CR#010 by FROM instruction to check if the content is cleared.
5. Set the content of CR#050 as 1 to set On all connected drives.
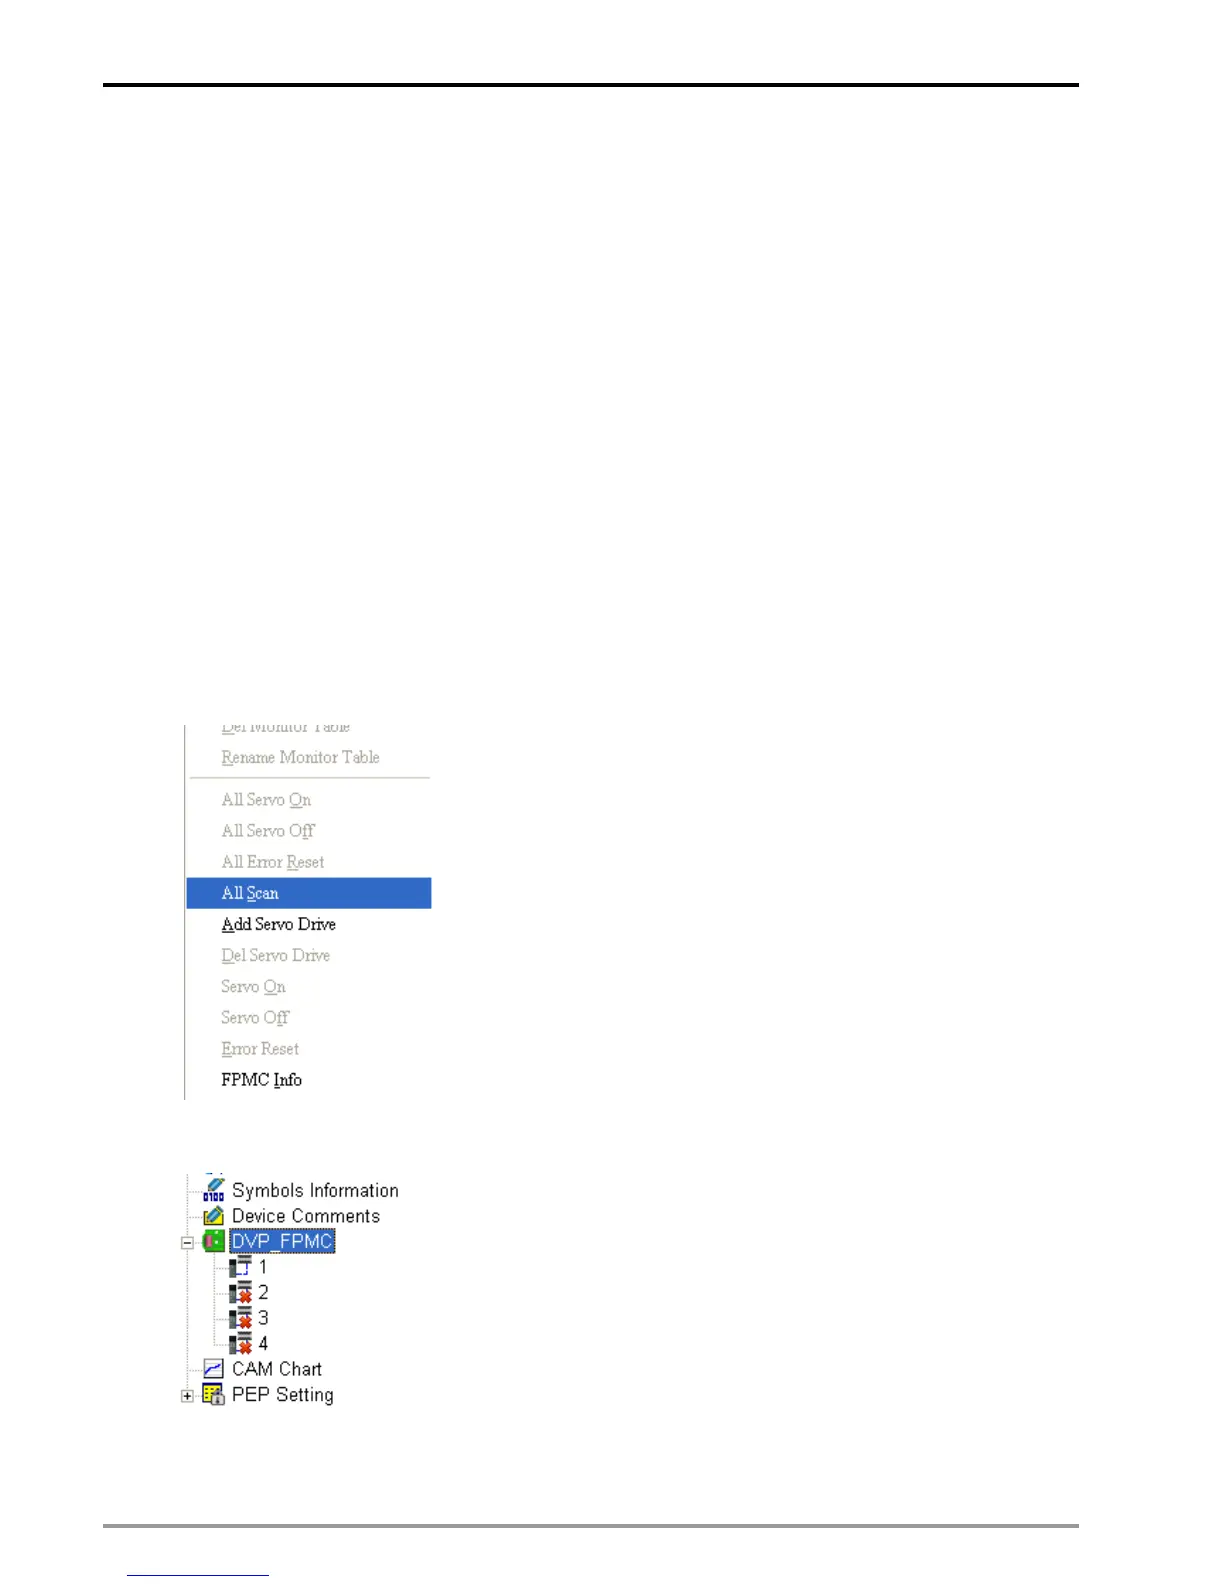
Step 2 ~ step 4 can be performed on PMSoft. Right click at the icon of DVP-FPMC in the column of System
Information, select All Scan and the connected drives will be displayed under DVP-FPMC. Please see the
steps below for further setting.
1. Right click at DVP-FPMC icon and select All Scan.
2. Display the connection status of nodes after the scan is completed.
3. Right click at DVP-FPMC and select All Servo On. When the connected servos are enabled, a
confirmation message will pop up. In addition, servo running status will be added after each node.
 Loading...