LT-2329
10
MAINTENANCE
c. Install the new nal bacteria lter with the “IN” tting toward the ow
meter.
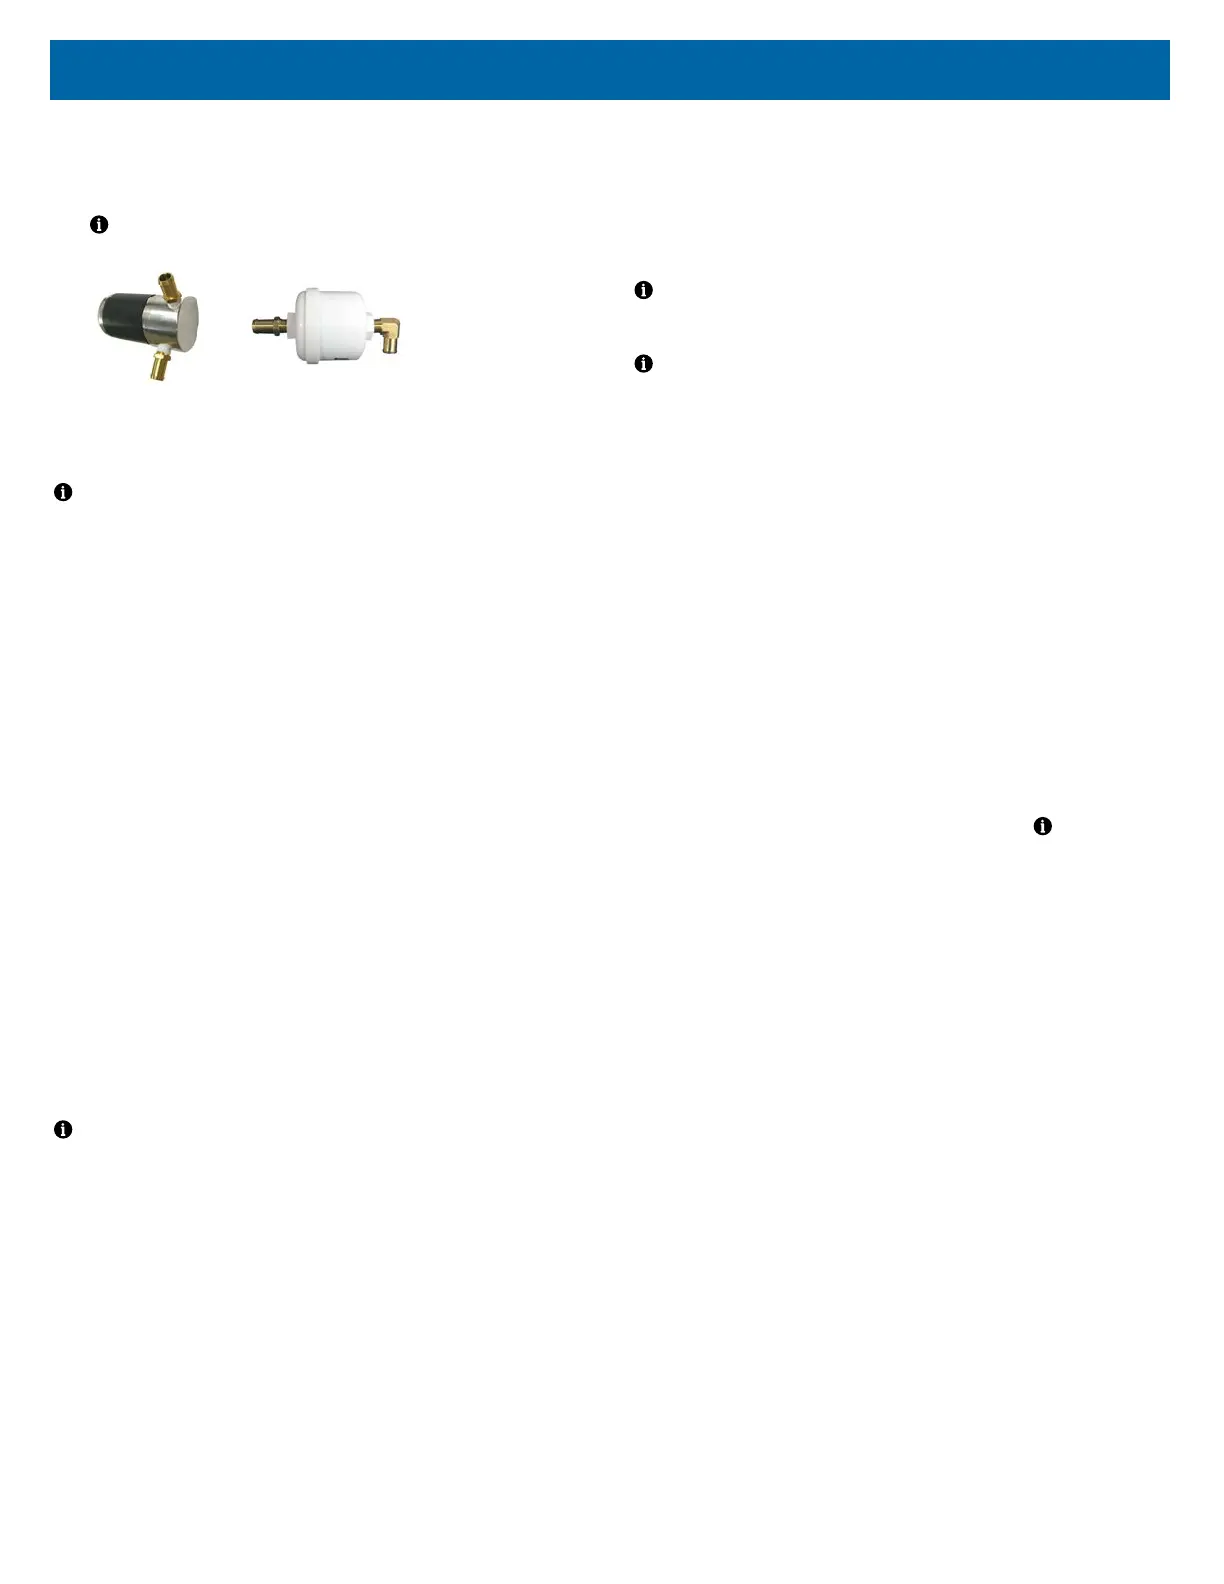
6. Inspect the compressor lter (part #1025D-682) during every compressor
service. Replace if the compressor is replaced.
NOTE– A new style compressor lter with an aluminum housing is now
being used. See below:
New Style Old Style (no longer used)
7. Inspect the AC power cord, power switch and circuit breaker between every
patient change. Replace any damaged or defective components.
NOTE– This PM Schedule reects:
• 4000 hour usage equal to one year
• a normal, clean operating environment.
The homecare provider is responsible for:
• determining the condition of the concentrator operating environment.
• determining a preventative maintenance interval frequency* which
takes into consideration the specic operating environment.
* Standard intervals are noted below. Service interval may be more
or less frequent than stated below provided that the Home Care
Provider establishes and documents appropriate protocols.
PREVENTATIVE MAINTENANCE SUMMARY
Patient / Caregiver
Clean and replace oxygen tubing, cannula / mask, and humidier bottle (if used)
according to manufacturer’s instructions.
Homecare Provider
During each inspection
Wash/Replace cabinet lter.
Check audible alert and indicator lights.
During each PM check – every 3 years for the 1025 series
Inspect/Replace intake bacteria lter as necessary.
Check oxygen purity.
During compressor service
Inspect/ Replace nal bacteria lter.
Inspect/ Replace the compressor lter
NOTE– There is no portion of the gas pathways through the concentrator that
could be contaminated with body uids under normal conditions.
The device patient connection may unintentionally become contaminated with
expired gases if a hose internal to the device becomes disconnected. This
condition will cause no ow out of the device and/or an alarm condition. Should
this occur, remove the front cabinet in order to determine where the
disconnection occurred.
Replace all components from the free end of the disconnect through the outlet
port. Reference the pneumatic diagram and replacement part numbers/
instructions.
PROVIDER’S NOTES - Cleaning and
Disinfection When There is a Patient
Change
DeVilbiss Healthcare recommends that at least the following procedures be
carried out by the manufacturer or a qualied third party between uses by
different patients.
NOTE– If the following described complete processing of the concentrator by
an appropriately trained individual is not possible, the device should not be used
by another patient.
NOTE– If preventive maintenance is due at this time, these procedures
should be carried out in addition to the servicing procedures.
1. Use disinfectants safely. Always read the label and product information
before use.
2. Always wear personal protective equipment when performing this
procedure. Use suitable gloves and safety glasses. Cover exposed skin on
arms to prevent accidental contact with bleach solution that has been
applied to the concentrator.
3. Dispose of all accessories that are not suitable for reuse. This includes but
may not be limited to the oxygen tubing, tubing connectors, nasal cannula
and/or mask, oxygen outlet connector, and humidier bottle.
4. Clean the exterior of the concentrator with a clean lint-free cloth. Heavy soil
should be removed with a clean lint-free cloth dampened with water. A soft
bristled brush dampened with water can be used to remove stubborn soil.
Dry the concentrator using a clean lint-free cloth if water was used to
remove soil.
5. Use 5.25% chlorine bleach (Clorox Regular Liquid Bleach or equivalent).
Mix one (1) part bleach with four (4) parts water in an appropriate clean
container. This ratio produces a one (1) part bleach to ve (5) total parts
solution (1:5). The total volume (amount) of solution required is determined
by the number of concentrators in need of disinfection.
NOTE– An
alternate suitable disinfecting agent (e.g. Mikrobac® forte or Terralin®
Protect) may also be used. Follow disinfectant manufacturer’s instructions.
6. Apply the bleach solution in an even manner to the cabinet and power cord
using a clean lint-free cloth. The cloth should be dampened only and not
dripping of solution. Do not use a spray bottle to apply the solution. Do not
saturate the device with the solution. Take care that no solution enters the
vent areas on the concentrator base or the Auxiliary O2 tting area on the
back of the unit. Avoid over-saturating the cabinet seams so that no solution
residue builds up in these areas. Avoid the caster wells located on the
bottom of the unit.
7. Exposure time of the disinfectant solution should be 10 minutes minimum to
15 minutes maximum.
8. After the recommended exposure time, all surfaces of the concentrator
should be wiped with a clean lint-free cloth dampened with drinking quality
water no warmer than room temperature. Dry the unit with a dry, clean lint-
free cloth. This is to remove residue that may stain or leave a lm on the
unit, especially after repeated disinfections.
9. Check the cord, the plug on the back of the device, the power switch, the
fuse holder, and the indicator lights for possible damage. Replace all
damaged or worn components.
10. Replace the cabinet air lter on the back of the device.
11. Check the oxygen concentration. If the device is within specication, the
extended life intake bacteria lter does not need to be replaced between
patients. If the oxygen concentration is not within specication, the provider
should refer to the service manual section on Troubleshooting.
12. OPTIONAL INSIDE CLEANING: The concentrator must be disconnected
from the power supply for this step: Open the concentrator and remove all
dust deposits inside the cabinet with an appropriate vacuum cleaner. Close
the concentrator.