25
LT-2329
COMPONENT TESTING, REPAIR AND REPLACMENT
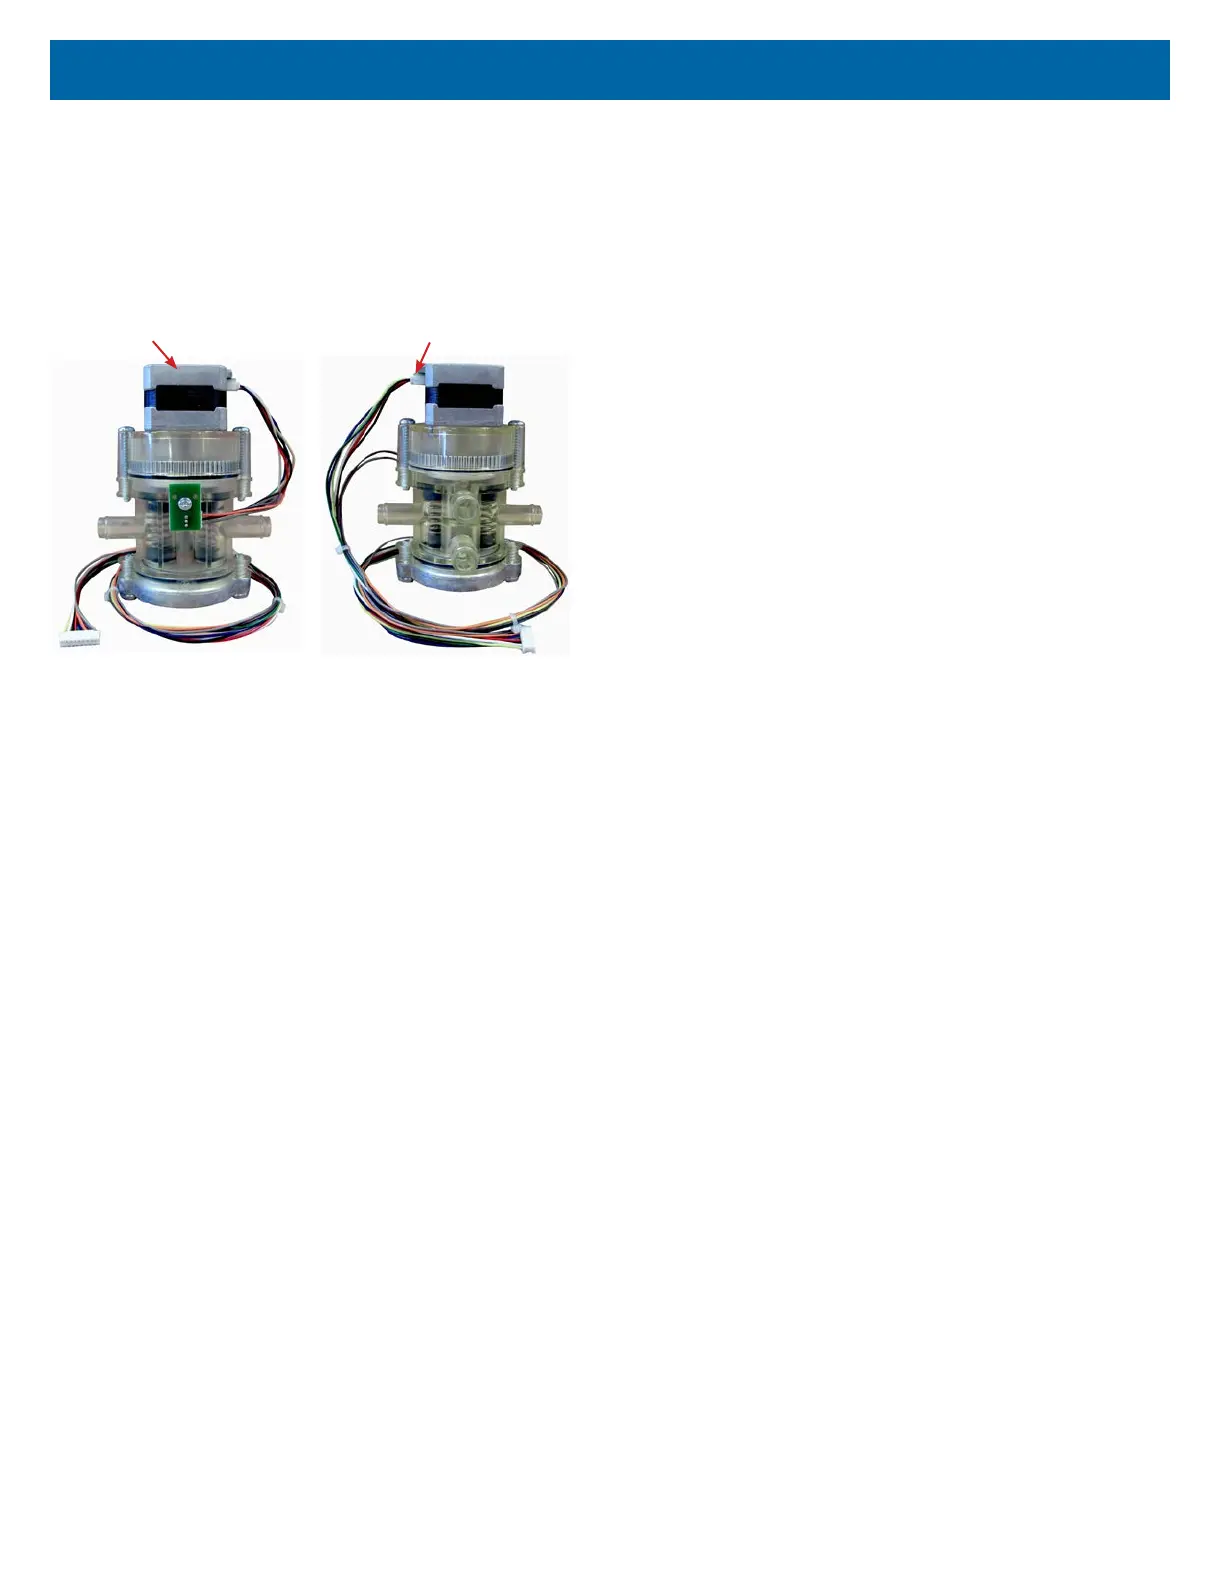
ROTARY VALVE
The timed rotary valve alternately distributes pressure supplied by the
compressor to the sieve beds. While one bed is being pressurized the other bed
is being exhausted through the valve exhaust port.
The valve contains two revolving discs powered by a stepper motor to cycle the
pressure between the beds. DC voltage is supplied by the PC board to the motor
windings causing the internal discs to turn and direct pressure to the proper sieve
bed.
Rear View
Valve Wire Harness
Front View
Stepper Motor
If the rotary valve is not shifting properly, one bed may pressurize continuously;
the pressure building until the pressure relief valve on the compressor releases
the excess with a sputtering sound.
There are several reasons why the rotary valve could malfunction; therefore the
cause of failure must be determined before corrective action can be taken.
To test the rotary valve:
1. Use the Cabinet Removal instructions listed previously to open the unit for
testing.
2. Connect a pressure gauge to the test point on the accumulator tank to
observe unit cycling and the high and low bed pressures. Refer to the
section on Normal Operating Sequence and also Accumulator Pressure
Test.
a. If it is determined that the valve is shifting properly and the high and
low pressures are consistent, the valve is operating correctly.
b. If it is determined that the valve did not shift properly or the high
pressures or low pressures are uneven, check the valve wire harness
for any loose or broken connections. If harness connections are good,
then the problem is caused by either the rotary valve or PC board.
To replace the rotary valve:
1. Make sure the unit is unplugged from the wall outlet.
2. Use the Cabinet Removal instructions listed previously to open the unit.
3. Unplug valve wire harness from the valve.
4. Loosen clamps and remove bed hoses from each side of valve.
5. Loosen ladder clamps and remove pressure intake and exhaust hoses from
backside of valve, then remove valve.
6. Install the new rotary valve by reversing the above procedure.