9
LT-2329
MAINTENANCE
condition.
d. Reconnect the AC power cord and conrm that the alarm condition
ends.
8. Malfunction – O2S Gas Temperature High
a. This alarm condition is tested automatically during start-up.
9. Malfunction – Corrupted Settings
a. This alarm condition is tested automatically during start-up.
10. Malfunction – Non-Recoverable Valve Error
a. This alarm condition is tested automatically during start-up.
11. Malfunction – O2S Oxygen Sensor Communication Failure
a. This alarm condition is tested automatically during start-up.
12. Low Oxygen Concentration – Startup Period
a. Connect the oxygen concentrator to AC power and turn the power
switch off.
b. Leave the device off for several minutes until the outlet ow is zero
(ow meter ball at zero).
c. Turn the power switch to the on position. The alarm condition (yellow
light) occurs during startup until the oxygen concentration reaches
85%.
13. Low Oxygen Concentration – Startup Period Over
a. This alarm condition is tested automatically during start-up. Once the
oxygen concentration reaches 85% the green light comes on.
SERVICE LIFE
The expected service life of the 1025 is 5 years of operation, when used in
accordance with all manufacturer guidance for safe use, maintenance, storage,
handling and general operation. Expected service life of the unit, and in
particular the sieve beds and compressor, may vary based on the operating
environment, storage, handling and the frequency and intensity of use.
ROUTINE PATIENT MAINTENANCE
DeVilbiss recommends using only original DeVilbiss parts and lters in order to
guarantee a reliable operation of the product.
The oxygen patient should perform the following maintenance:
Cannula, Tubing, and Humidifier Bottle
The patient should clean and replace the cannula, tubing, and humidier bottle
according to the manufacturer’s instructions.
Air Filter
The air lter should be inspected periodically and cleaned as needed by the
user or caregiver. Replace if torn or damaged. To clean, follow these steps:
NOTE– Frequency of inspection and cleaning of lter may be dependent
upon environmental conditons like dust and lint.
1. Remove the air lter located in the door on the back of the unit.
2. Wash in a solution of warm water and dishwashing detergent.
3. Rinse thoroughly with warm tap water and towel dry. The lter should be
completely dry before reinstalling.
CAUTION
Do not attempt to operate the unit without the air lter or while the
lter is still damp
NOTE– The air lter should be monitored more closely in environments with
abnormal amounts of dust and lint.
CAUTION
Operation of the Drive DeVilbiss Oxygen Concentrator in extreme
environments or without the air lter will prematurely occlude the
intake bacteria lter and cause a decrease in the unit performance.
Exterior Cabinet
The patient should clean the concentrator exterior cabinet weekly by using a
damp cloth or sponge with a mild household cleaner and wiping it dry.
WARNING
Do not apply liquids directly to the cabinet or utilize any petroleum-
based solvents or cleaning agents.
PERIODIC HOMECARE PROVIDER
PREVENTATIVE MAINTENANCE
Use only DeVilbiss concentrator replacement parts and accessories.
Every Drive DeVilbiss Oxygen Concentrator is tested at the factory. To assure
continued trouble-free performance, the following preventative maintenance
should be performed by the homecare provider during periodic oxygen patient
visits. Failure to properly maintain the unit will void the warranty.
1. Check the oxygen concentration with an oxygen analyzer (part #R217P62)
– every 3 years.
a. Calibrate the oxygen analyzer prior to checking the oxygen
concentration. The analyzer should be properly calibrated using the
manufacturer’s recommended procedure.
NOTE– Changes in temperature, altitude or humidity may affect the
analyzer’s oxygen concentration reading. The analyzer should be calibrated in
similar conditions to the location of the concentrator.
b. Power the unit. Set the ow meter to 10 LPM and connect the
analyzer to the unit’s oxygen outlet port.
c. Wait 20 minutes for the display to stabilize. The concentrator must
operate for a minimum of 20 minutes before checking the oxygen
concentration.
d. Record the reading.
2. Check the audible alert and indicator lights during every service. When the
power is turned “ON,” listen for the audible alert and check to see if the
front panel indicator lights are operating.
3. Inspect cabinet air lter (part #303DZ-605) every PM check. Replace if
lter is torn or damaged.
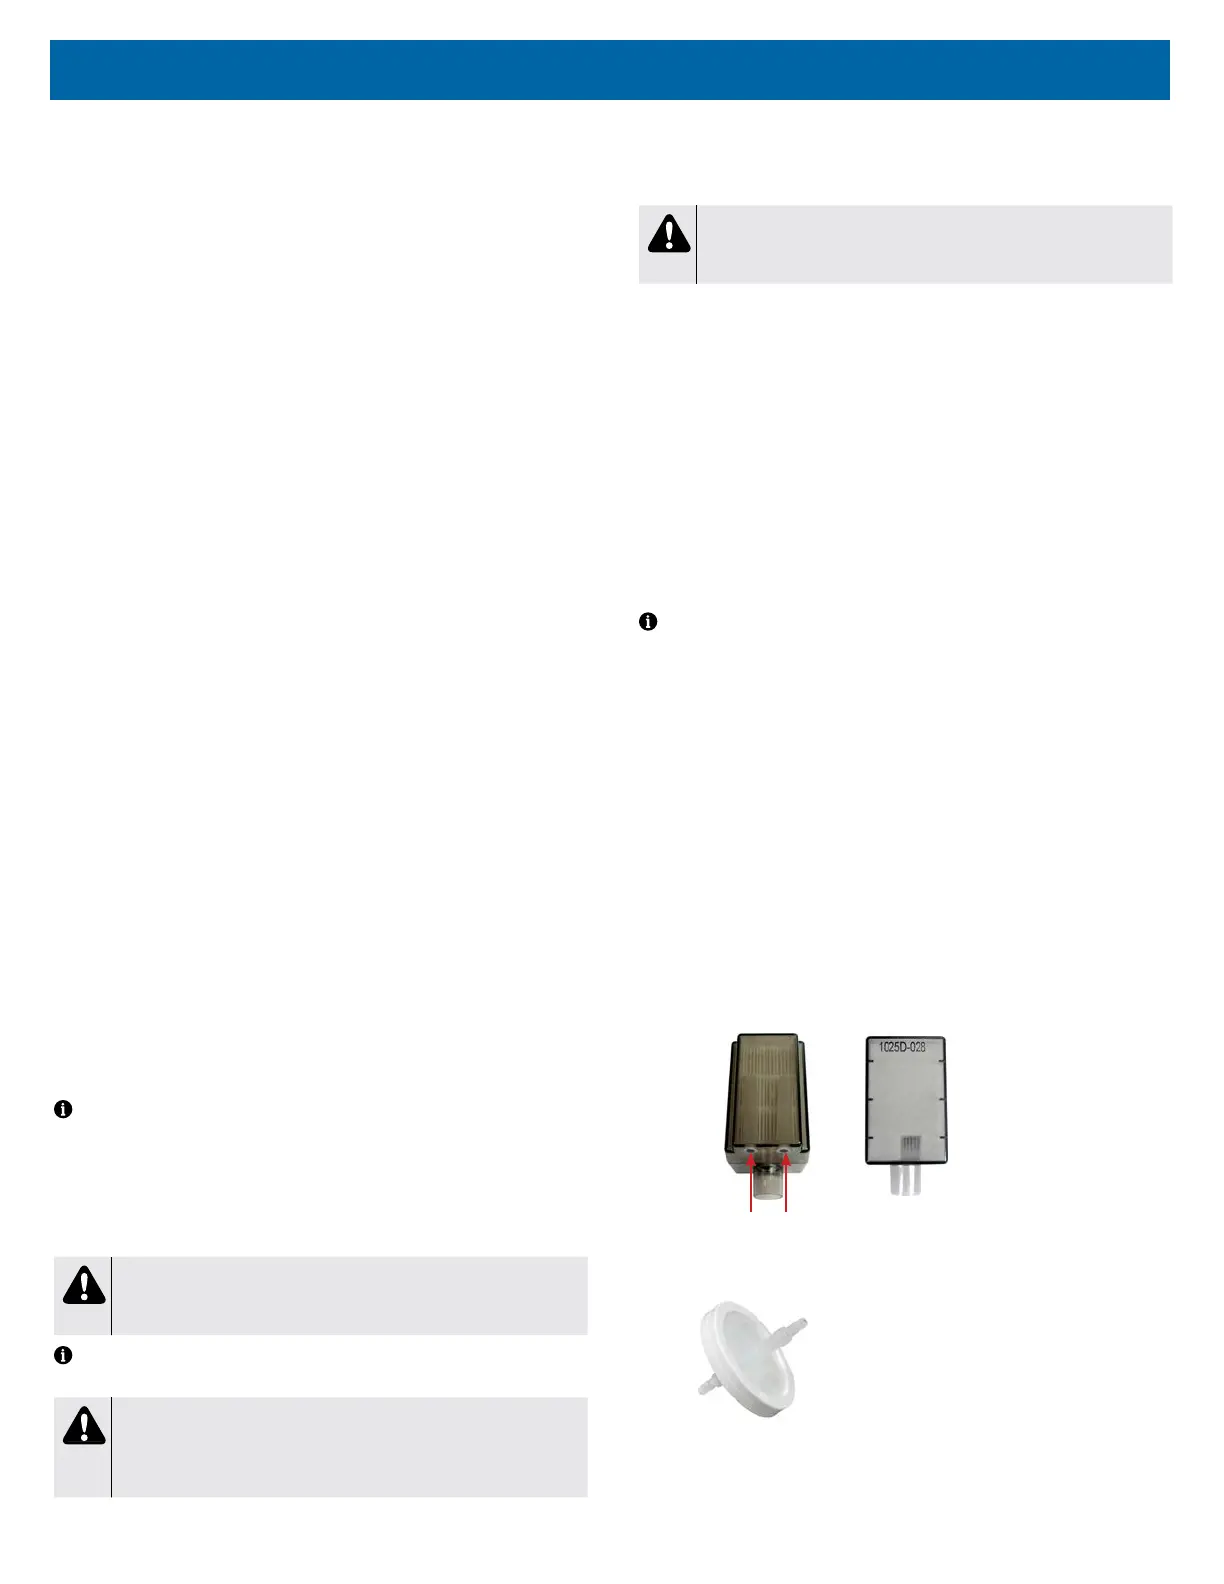
4. Inspect intake bacteria lter (part #1025D-605) at every PM check.
Replace if the lter looks dirty or there is a drop in oxygen purity.
a. Open the lter door and replace lter as required.
Air Intake Holes
5. I nspect the nal bacteria lter (part #PV5LD-651) during every compressor
service.
a. Use the Cabinet Removal instructions found under CABINET
REMOVAL in this manual to remove and attach the cabinets.
b. Remove the hose from each end of the lter and discard the lter.