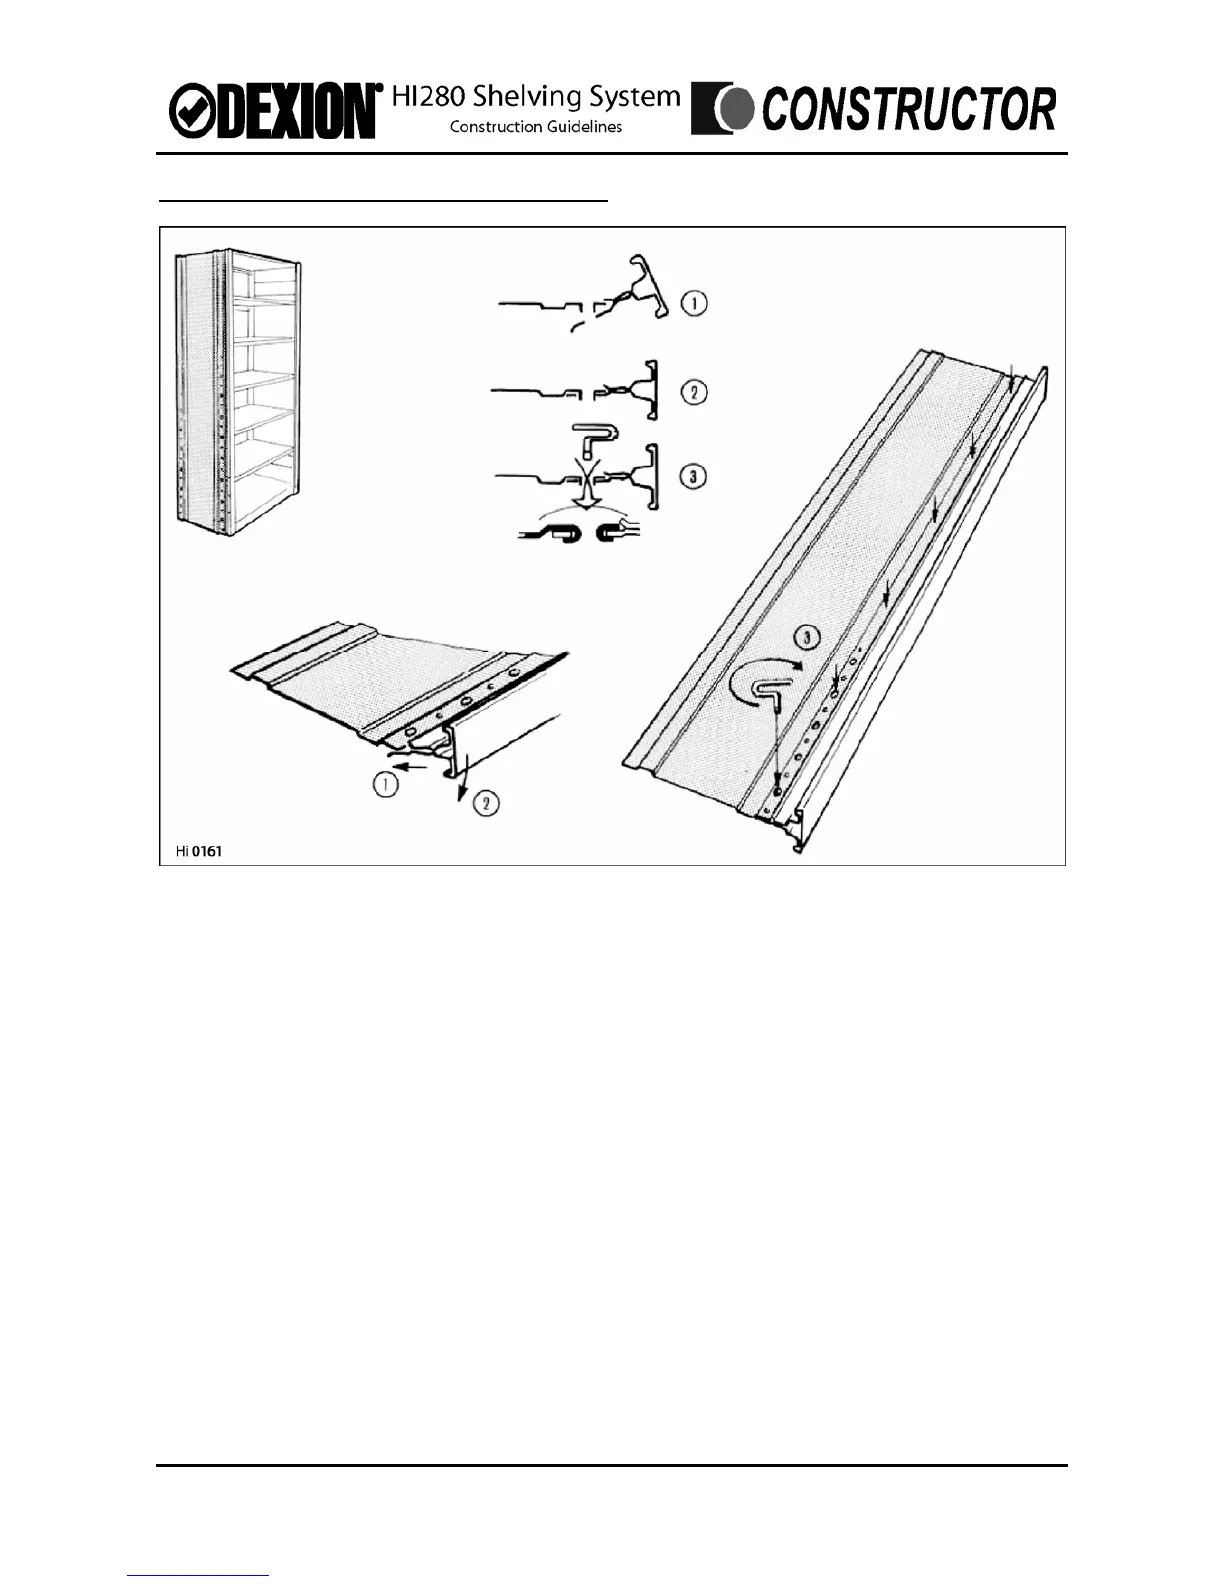
ASSEMBLY INSTRUCTIONS – CLAD FRAMES
Note: To assist assembly we recommend the use of an assembly jig and work bench.
When using swage connections ensure the swage tool corresponds to the type of
upright, i.e. the ‘K’ tool for the ‘K’ upright and the ‘EK’ tool for the ‘EK’ upright.
A. Insert the long edge of the cladding sheet into the open U-shaped part of the upright
(1), and align the oval holes in both sheet and upright.
B. To make a swage connection, first pass the tool through the oval hole in the cladding
and then through the oval hole in the upright, then rotate the tool through 180°. (2)(3).
C. Each cladding sheet must be secured with 12 swage connections, (6 to each upright),
positioned at the top, bottom, and the rest evenly distributed in between.
D. Fix the cladding sheets to the first upright, and then turn the assembly over to fix the
cladding to the second upright.
E. Assemble the baseplates.
F. Check and ensure all connections are secure.
Issue: June 2005 Section C –Assembly Instructions Page C.4
 Loading...