D-Control Guide20
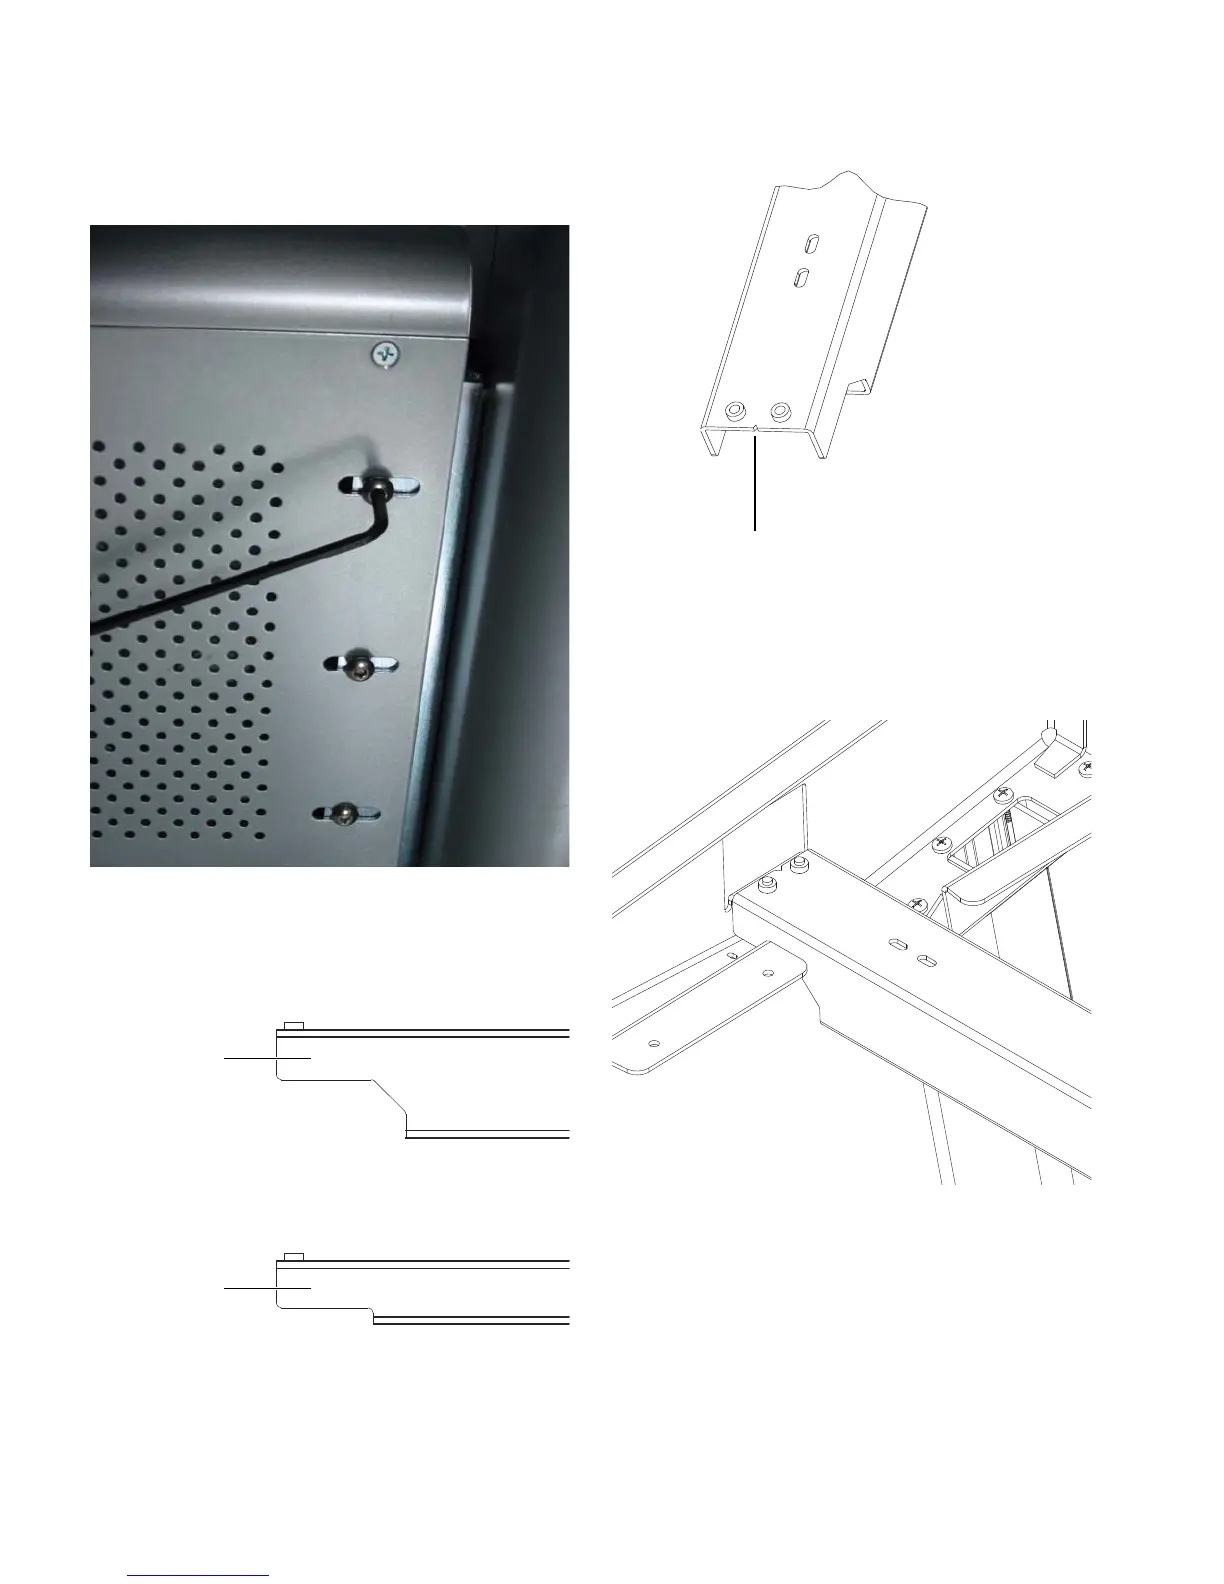
3 Using a 5/32-inch hex wrench, attach the crossbar to the
brackets with 1/4-inch-20 x 1/2-inch button head cap screws
(see Figure 9), using 6 screws on each side (3 in front and 3 in
back). Make sure to leave the screws loose enough so that the
legs can be moved side-to-side relative to the rear crossbar.
4 Locate the rear pan support rail, which is the larger of the
two rails provided with the stand.
5 Position the rear rail so that the edge with the V-shaped
notch points toward the left stand leg.
6 Lift the rear rail into place so that the rail rests on the rear
rail tabs of the stand legs (see Figure 12). The holes on the ends
of the rail should line up with the slots in the rear rail tabs on
each leg.
Figure 9. Attaching the crossbar
Figure 10. Side view of pan support rails
Rear pan
Front pan
support rail
support rail
Figure 11. V-shaped notch in rear pan support rail
Figure 12. Rear support rail in place on left stand leg
Notch indicating left side of rear pan support rail