Chapter 11: Normal Mode Operations and Commands 127
Chapter 11: Normal Mode Operations and
Commands
The power and flexibility of D-Control lies in its different op-
erating modes, which let you customize the behavior of its
channel strip controls to fit your workflow.
The main D-Control operating modes are Normal mode and
the four Custom Fader modes.
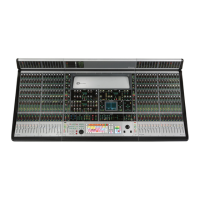
In Normal mode, Pro Tools tracks are displayed on D-Control
in a standard console format. In this mode, each channel strip
corresponds to a track in the session, and most of the channel
strip controls correspond directly to on-screen controls or
views in Pro Tools:
Channel Fader controls channel volume
Channel Display shows track name, and track volume when
fader is touched
Pan switch shows Pan values on encoders (this is the default
view when a new track is created)
Inserts switch shows name of each Insert on encoders
Sends switch shows name of Send and Send level on encod-
ers
Pre switch shows controls for the channel’s Pre on encoders
Dyn switch cycles through dynamics plug-ins on the track
EQ switch cycles through EQ plug-ins on the track
Assigning Elements to Tracks
You can assign Inputs, Outputs, Inserts, and Sends to tracks di-
rectly from D-Control by entering a temporary Assign mode.
To assign an input, output, insert or send:
1 Press an Assign switch (Input, Output, Insert, or Send) to en-
ter the corresponding Assign mode.
2 On the channel where you want to make the assignment,
turn an encoder knob to select from the first level of menu
choices.
3 Press the encoder Select switch to move down and the By-
pass/Mute/Pre switch to move up through menu levels.
4 Press the flashing encoder Select switch or press the flashing
Assign switch to confirm the assignment.
To assign multiple inputs, outputs, inserts, or sends:
1 Press an Assign switch (Input, Output, Insert, or Send) to en-
ter the corresponding Assign mode.
2 Turn the encoder knobs and use the encoder Select and By-
pass/Mute/Pre switches to select each assignment.
3 Press the flashing Assign switch to confirm all the assign-
ments at once.
To remove an input, output, insert or send:
1 Press an Assign switch (Input, Output, Insert, or Send) to en-
ter the corresponding Assign mode.
2 For the assignment you want to remove, press the encoder
Bypass/Mute/Pre switch repeatedly until you reach the top
level menu for the assignment.
3 Turn the encoder knob counter-clockwise until no assign-
ment is visible.
4 Do one of the following:
• Press the flashing encoder Select switch or press the flash-
ing Assign switch to confirm the removal.
– or –
• Press the flashing Escape switch to cancel the removal
and restore the assignment.
To quickly remove an output or send assignment:
1 Press the Output Assign or Send Assign switch.
2 Hold Start (Windows) or Control (Mac) and press the Select
switch for each output or send assignment you want to re-
move.
3 Press the flashing Assign switch to exit Assign mode.
For more information on Custom Fader mode, see
Chapter 13, “Custom Fader Modes.”

 Loading...