page 57
Digital Projection E-Vision Laser 4K Series
Operating Guide
USING THE PROJECTOR
Rev A June 2017
Edge Blend menu continued from previous page
Black Level Uplift
Black in the blended regions appears less dark than in the rest of the image. To
compensate for this, use this menu to raise the black levels of the rest of the image:
• Set All to the required amount of black level correction. This will apply equal
correction to the black levels of all colors.
• If necessary, use the individual color sliders (Red, Green and Blue) for ne
adjustment.
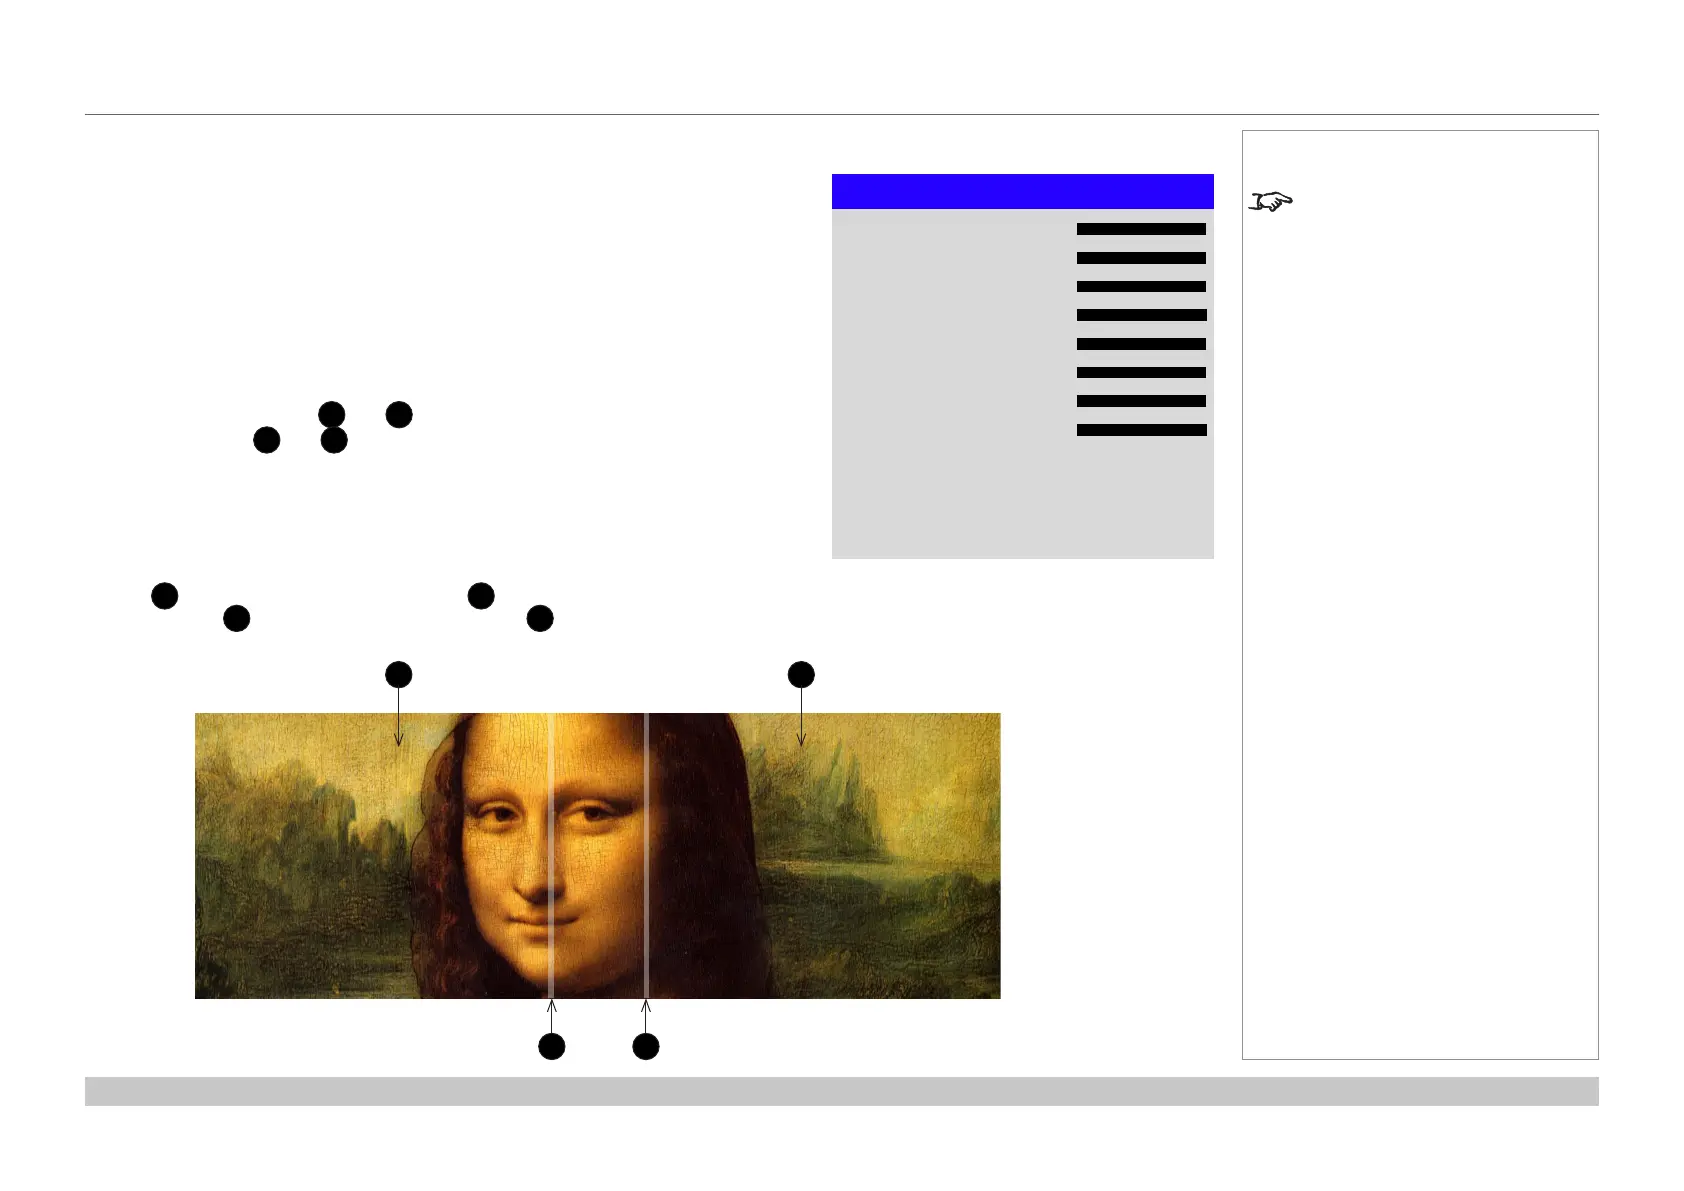
You may experience artifacts at the edges where the blended region of one projector
overlaps the pond of mirrors of its neighbor. In the example below, the blended image
comes from two projectors,
1
and
2
. Both images have black level uplift applied;
as a result, artifacts
3
and
4
have emerged at the edges where the black level uplift
region of one projector overlaps the pond of mirrors of the other.
To remove the artifacts, you need to slightly reduce the size of the black level uplift region
of each projector so it does not overlap the pond of mirrors of the other projector.
• Depending on your array, use Top, Bottom, Left and/or Right to reduce the black
level uplift size. In the example below, use the Right slider of the projector on the
left
1
to remove the artifact on the right
4
, and the Left slider of the projector
on the right
2
to remove the artifact on the left
3
.
Notes
Enable Align Pattern from the
Edge Blend menu to see the black
level uplift area.
Black Level Uplift
Top
Left
Right
Bottom
0
0
0
0
All
Green
Blue
Red
0
0
0
0
1 2
3 4

 Loading...


