54
5.2.2 Calibration
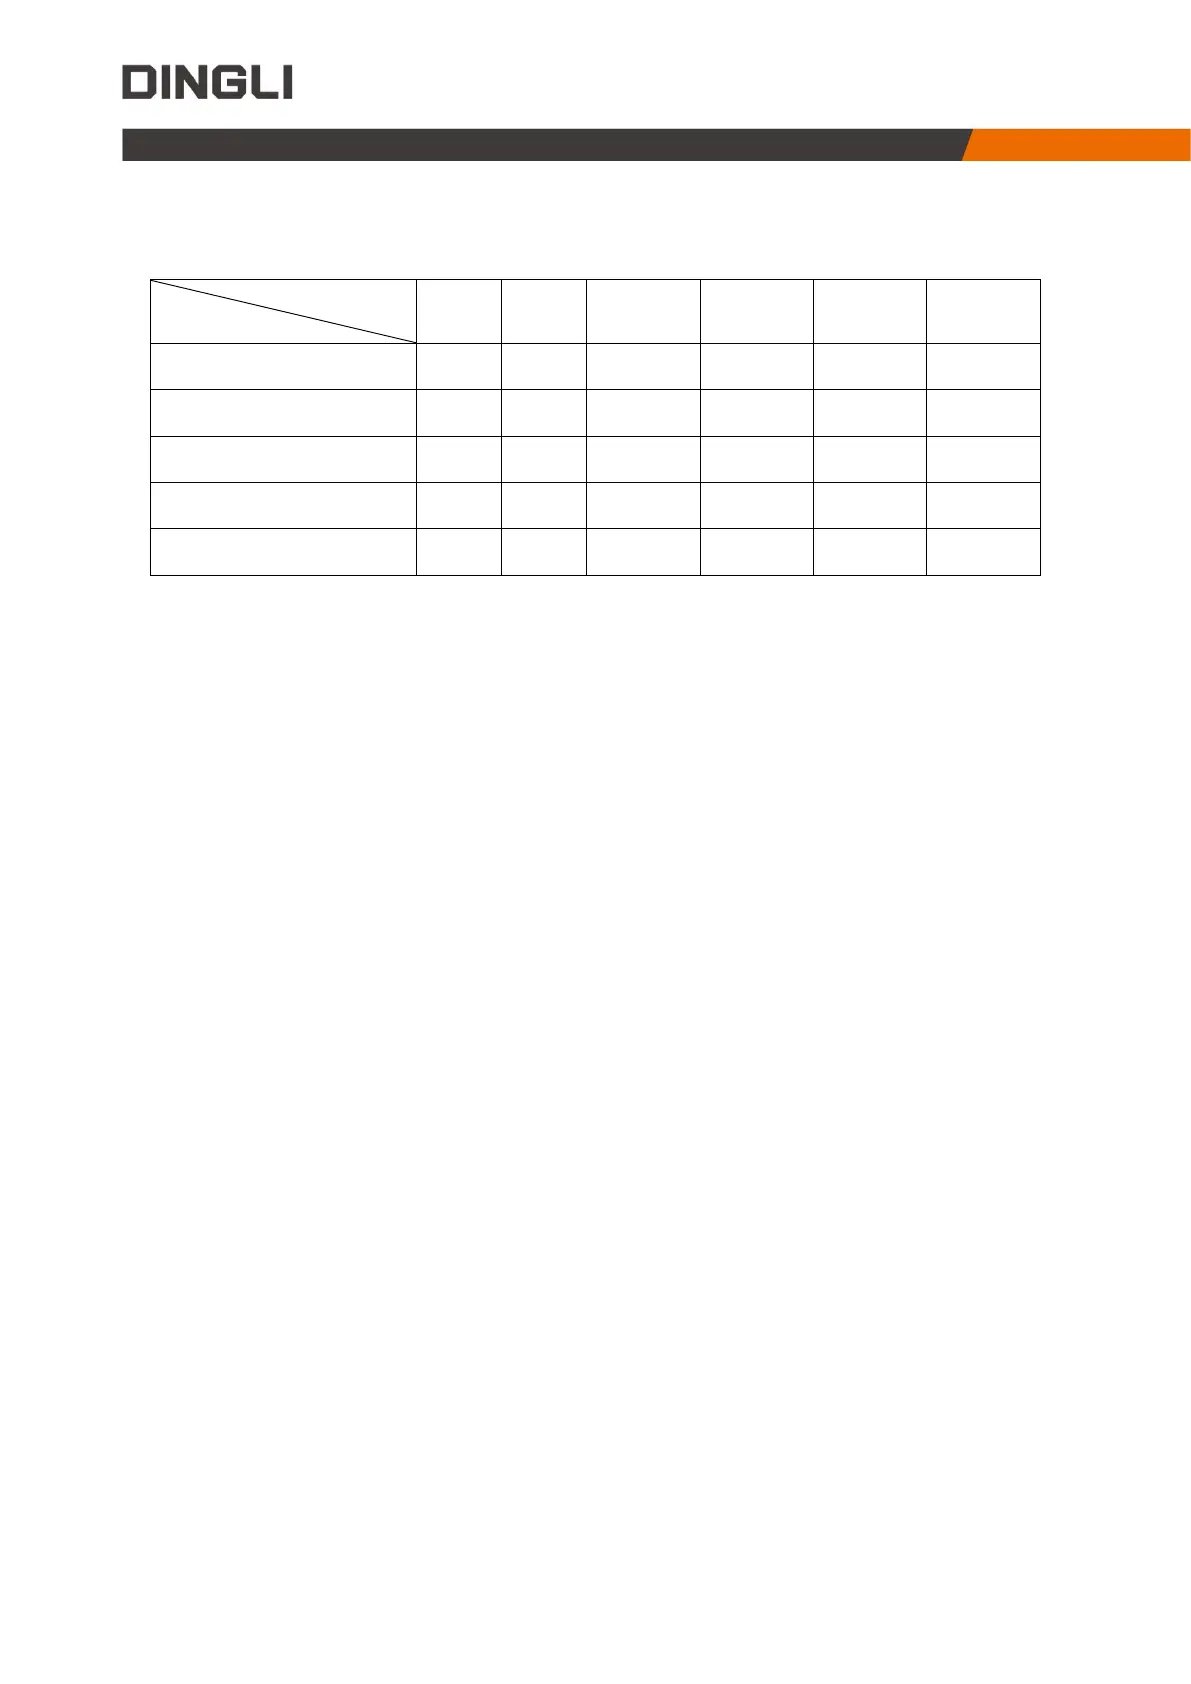
Calibration steps that need to be redone after replacing parts
Replaced Part
Calibration
5.2.2.1 Load Sensing
① No-load calibration
No load is placed on the vehicle platform.
Turn the chassis key switch to the ground control, press and hold the "Enter" button on the ECU
panel for 5 seconds to enter ECU setting menu. Press the "Up" or "Down" button to switch to the
"3.Calibration".
Press the "Enter" button, press the "Up" or "Down" button to switch to the no-load calibration option
("1. No Load Sensing"). Long press the "Enter" button for 5 seconds to start automatic no-load
calibration; press the "Exit" button to return to the up-level menu.
After the no-load calibration is completed, the execution result is displayed ("Calibration complete!",
or "Pressure sensor failure!", or "Angle sensor failure!"). Press the "Exit" button to return to the up-level
menu.
During the calibration process, the overload indicator will light up.
② Full-load calibration
Place the rated load on the vehicle platform.
Turn the chassis key switch to the ground control, press and hold the "Enter" button on the ECU
panel for 5 seconds to enter ECU setting menu. Press the "Up" or "Down" button to switch to the
"3.Calibration".
Press the "Enter" button, press the "Up" or "Down" button to switch to the full-load calibration
option ("2. Full Load Sensing"). Long press the "Enter" button for 5 seconds to start automatic full-load
calibration; press the "Exit" button to return to the up-level menu.
After the full-load calibration is completed, the execution result is displayed ("Calibration
complete!", or "Pressure sensor failure!", or "Angle sensor failure!"). Press the "Exit" button to return to
the up-level menu.
During the calibration process, the overload indicator will light up.