18
IP2368EN
EN
11.1 Main menu
Display Description
WZ - Quick configuration wizard
Quick configuration menu
AT - Automatic Configuration
The menu allows you to manage the automatic configurations of the control panel.
BC - Basic Configuration
The menu allows you to display and modify the main settings of the control panel.
BA - Basic Adjustments
The menu allows you to display and modify the main adjustments of the control panel.
NOTE: some settings require at least three operations before they are set correctly.
RO - Radio Operations
The menu is used to manage the radio functions of the control panel (alarm management, diag-
nostics enabling, FW updating).
SF - Special Functions
The menu allows you to set the password and manage the special functions in the control panel.
CC - Cycle Counter
The menu allows you to display the number of operations carried out by the automation and
manage the maintenance interventions.
EM - Energy Management
This menu may be used to view and modify energy saving settings and adjustments (Green Mode).
AP - Advanced Parameters
The menu allows you to display and modify the advanced settings and adjustments of the control
panel (limit switch mode, selection of devices connected to the terminals, disengagement duration
adjustments, flashing light adjustments, etc.).
NOTE: some settings require at least three operations before they are set correctly.
11. Configuration and settings menu
NOTE: depending on the type of automation and control panel, some menus may not
be available.
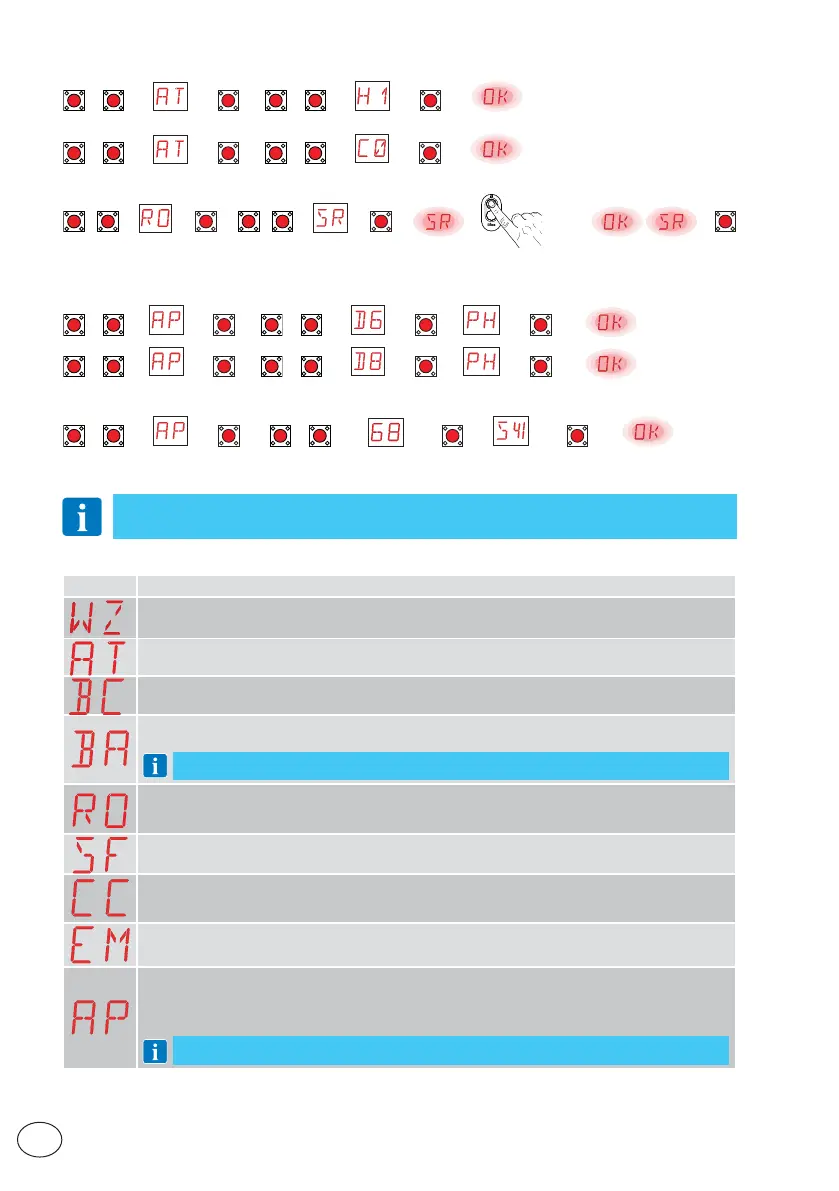
Step-by-step mode with automatic closure 1 min (residential use) [standard settings]
UP
/
DOWN
→ →
ENTER
→
UP
/
DOWN
→ →
ENTER
→
Opening mode with automatic closure 1 min (condominium use)
UP
/
DOWN
→ →
ENTER
→
UP
/
DOWN
→ →
ENTER
→
10.3.2 Adding remote controls
UP
/
DOWN
→ →
ENTER
→
UP
/
DOWN
→ →
ENTER
→ → x1, x2, ... →
ESC
10.3.3 Configuring the NC contact safety devices
Example 1 - Configuring the photocells connected to terminals 1-8 and 1-6 [standard settings]
Set
UP
/
DOWN
→ →
ENTER
→
UP
/
DOWN
→ →
ENTER
→ →
ENTER
→
UP
/
DOWN
→ →
ENTER
→
UP
/
DOWN
→ →
ENTER
→ →
ENTER
→
Example 2 - Configuring the safety edge with safety test simultaneously connected to terminals 1-6 and 1-8
Set
UP
/
DOWN
→ →
ENTER
→
UP
/
DOWN
→ →
ENTER
→ →
ENTER
→