PROGRAMMING P SERIES
Page 14 of 100
* "STS" - SPACE-TO-SALES ROUTINE
This function allows you to change the space-to-sales settings.
Press select button 4 and "OPT#" or "CSTS" will show on the display, this indicates the current space-to-
sales option.
Press select button 2 or 3 to scroll through the options.
Press select button 4, with the desired option showing on the display, to save that option and return to "STS".
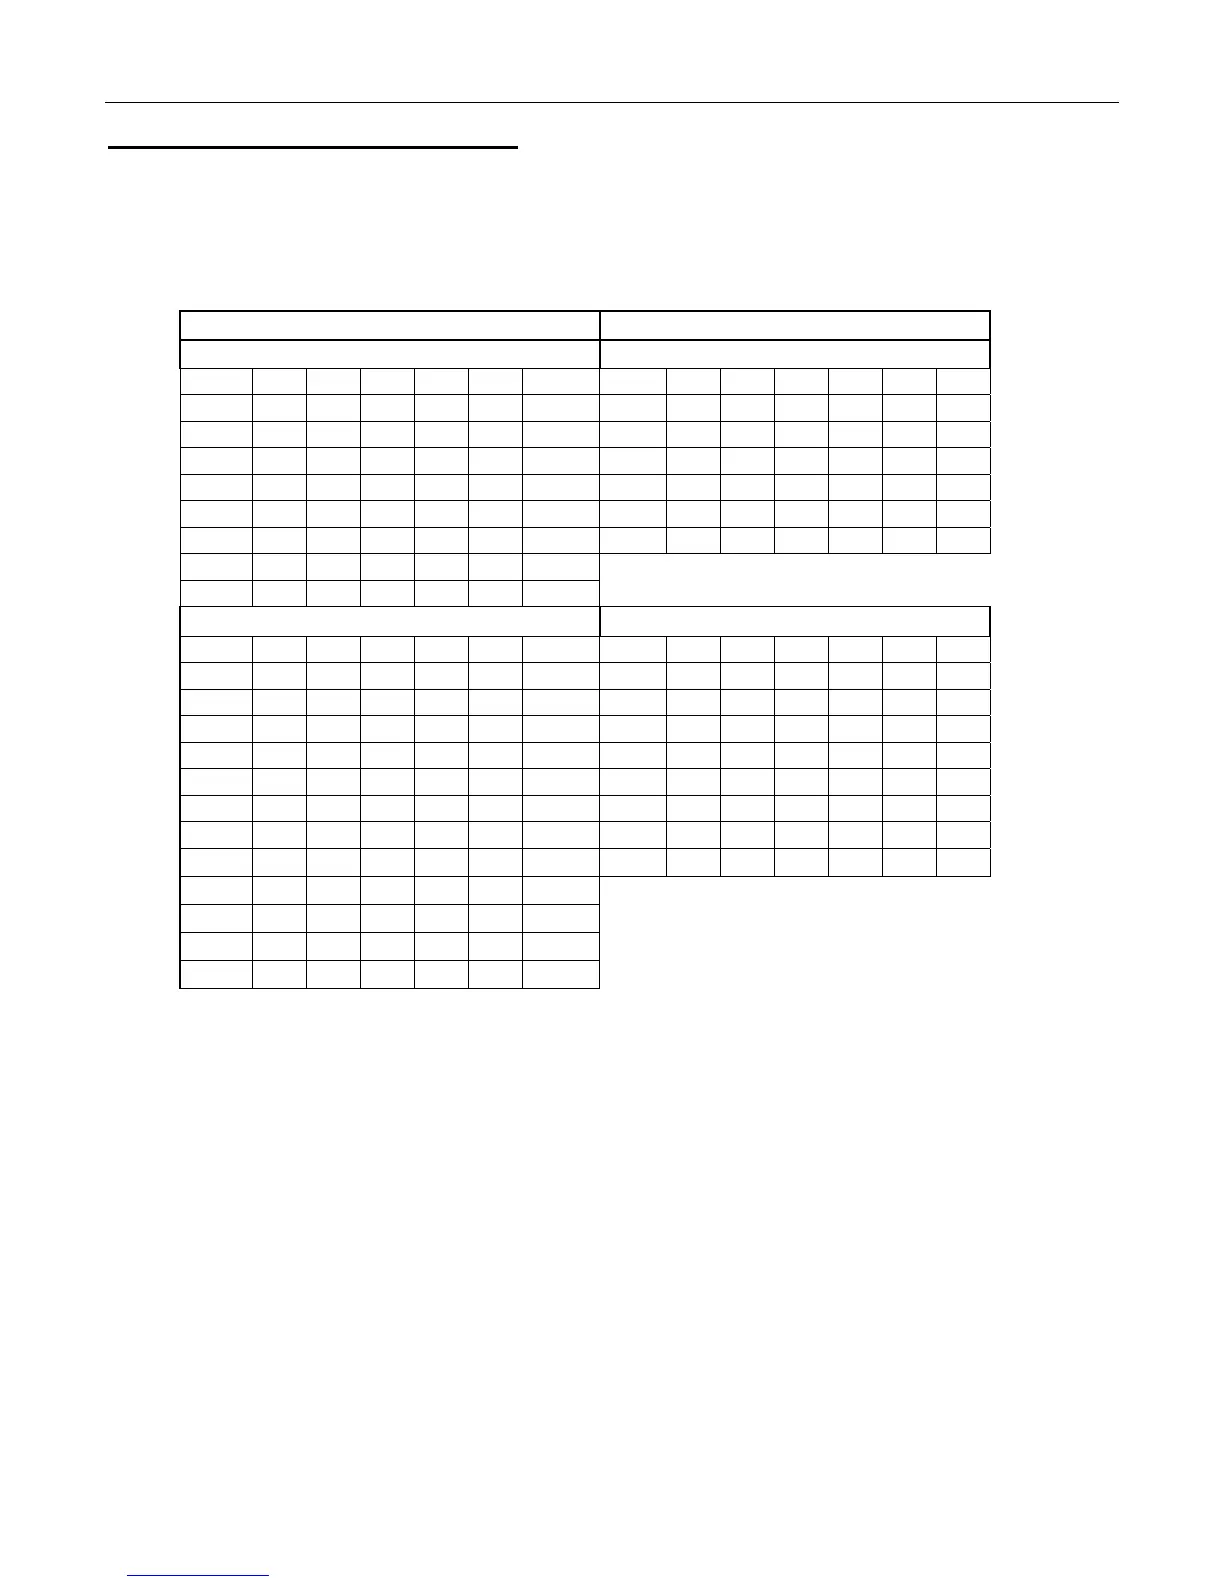
SELECT / COLUMN OPTIONS SELECT / COLUMN OPTIONS
DN504P LMV DN504P CCC
Select # Opt1 Opt2 Opt3 Opt4 Opt5 Opt6 Select # Opt1 Opt2 Opt3 Opt4 Opt5 Opt6
1 1 1 1 1 1 1 1 1,2 1 1 1 1 1
2 1 2 2 2 2 2 2 3 2,3 2 2 2 2
3 2 2 3 3 3 3 3 4 4 3,4 3 3 3
4 3 3 3 4 4 4 4 5 5 5 4,5 4 4
5 4 4 4 4 5 5 5 6 6 6 6 5,6 5
6 5 5 5 5 5 6 6 7 7 7 7 7 6,7
7 6 6 6 6 6 6
8 7 7 7 7 7 7
DN720P LMV
DN720P CCC
Select # Opt1 Opt2 Opt3 Opt4 Opt5 Opt6 Select # Opt1 Opt2 Opt3 Opt4 Opt5 Opt6
1
1 1 1 1 1 1
1 1,2 1 1 1 1 1
2
1 2 2 2 2 2
2 3,4 2,3 2 2 2 2
3
2 2 3 3 3 3
3 5 4,5 3,4 3 3 3
4
2 3 3 4 4 4
4 6 6 5,6 4,5 4 4
5
3 3 4 4 5 5
5 7 7 7 6,7 5,6 5
6
4 4 4 5 5 6
6 8 8 8 8 7,8 6,7
7
5 5 5 5 6 6
7 9 9 9 9 9 8,9
8
6 6 6 6 6 7
8 10 10 10 10 10 10
9
7 7 7 7 7 7
10
8 8 8 8 8 8
11
9 9 9 9 9 9
12
10 10 10 10 10 10
NA = Not Applicable
"CSTS" - Custom space-to-sales allows you to assign columns to select buttons.
Press select button 4 and "SL#/##" will alternate showing on the display. SL# is the select
button number and ## is the column(s) currently assigned or "NONE".
Press select button 4 and "CO#" will show on the display. "CO#" is the column number to be
added or deleted to select button.
Press select button 4 and "CO # #" will show on the display with # blinking on the display; 0 = off
or delete, 1 = on or add.
Press button 2 to scroll between 0 and 1. With the setting you wish to use showing on the
display press select #4 and return to "CO#".
Press select button 1 will return to "SL#/#".
Press select button 1 again will go to "SAVE".
Press select button 4 to save and display will go to "STS".
Repeat steps above to add/delete columns to each selection.
Press select button 2 to scroll to next routine.