16 XR150FC/ XR550FC User’s Guide System Setup
Ch ang i n g User Pr of il es
1. Access the User Menu.
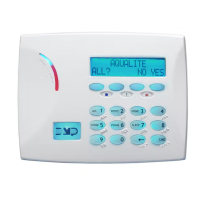
2. Press COMMAND until USERPROFILES?displays.
3. Press any Select key. The keypad displaysADD DEL CHG.
4. Press the far right Select key, under CHG.
5. At the PROFILE NO: - option, enter a proÀle number and
press COMMAND. The display changes to PROFILENAME.
6. Press any Select key to display -. Enter a proÀle name of up
to 16 characters. The default ProÀle Name uses the ProÀle
Number. Enter the name and press COMMAND.
7. At the Arm/ Dis AREAS: option, enter the area numbers
(1-32) for arming and disarming assigned to this proÀle.
8. The keypad displaysACCESSAreas: . Enter the ar ea numbers
(1-32) assignment to allow d oor access for this proÀle. Press
the COMMAND key.
9. The keypad displays OUTPUT GROUP: -. Enter the number
(1 through 20) for the Output Group assigned to this proÀle.
Press the COMMAND key.
10. The keypad displayseach of the menusasshown in the ProÀle
Table. You then enable or disable the menu function for this
proÀle number. Select YES or NO and press the COMMAND
key to advance to the next menu selection.
11. When you complete Selecting all User ProÀle menu
assignments, the keypad displays the PROFILE CHNGD
message for 4 seconds, indicating the proÀle is changed.
TEMP Co DE
When you select YES for this menu option, and this proÀle is
assigned to a user code (see next section), the keypad displays
TEMP EXPIRE DATE:. Enter the ending date for the proÀle to
expire. Default is seven days from today. The system deletes
Temp user s at 12:00 AM on the last date.
An TI PASS n o
Anti-passback requires that you properly exit (egress) an area
previously accessed. When you fail to exit through the proper
location you cannot access it until you properly exit. Default is
No. See page 6 for more information.
ACCESS SCHEDULES
Thisoption allowsyou to assign two Schedulesto a proÀle for door
access. When the keypad displays FIRST ACCESSSCHEDULE:
- press COMMAND to browse available Schedules. Enter the
Schedule number and press COMMAND. When the keypad displays
SECOND ACCESS SCHEDULE: - repeat the same process for the
third through eighth access schedule and press COMMAND to
return to the User Menu.
RE ARM DELAY
REARM DELAY allows the entry of 0 to 720 minutes to be used to
delay automatic rearming when the user disarms an area outside
of schedule. If zero is selected, the rearming occurs based on
permanent programming in the panel.
REARM DELAY is also used to delay a late to close message to the
central station when the panel does not use automatic arming.
If the user has Extend Schedule authority, 2HR 4HR 6HR 8HR
displays at disarming. If the user d oes not make a choice, the RE
ARM DELAY is used to extend the schedule.
Application example: An exit door near the trash is scheduled
to be armed at all times. When the custodian needs to remove
trash, program 10 minutes for the activity. Or, an overhead door
only requires access when a delivery is made. Program up to 250
minutes to allow the loading dock supervisor to load or unload a
semi-truck.
Br ser Feat ur e
Refer to Appendix B in this guide for a diagram showing you how to
use the Output Group browser and the ProÀle browsers.

 Loading...
